Understanding Safe Rooms: Basic Concepts and Benefits
When Maria heard glass breaking downstairs at 2 AM, her first thought wasn't about confronting an intruder—it was about getting her two children to safety. Converting a walk-in closet into a safe room can cost less than $2,500, and Maria spent just one weekend making it happen . Her upstairs walk-in closet now had a reinforced door, communication equipment, and emergency supplies. That investment gave her family a protected space to shelter while she called 911 and waited for help to arrive.
A safe room is a fortified space within your home designed to protect occupants during emergencies—whether that's a home invasion, severe weather event, or other crisis situation. Unlike the elaborate panic rooms you see in movies with biometric scanners and bulletproof glass, a practical safe room can be created by converting an existing closet, bathroom, or interior bedroom into a more secure space. The beauty of this approach is that you're working with what you already have, which dramatically reduces costs while still achieving meaningful protection.
The misconception that safe rooms require massive budgets keeps many families from taking this important preparedness step. You're not building a fortress from scratch—you're strategically upgrading a room you already own to make it significantly more secure than the rest of your home. Many families complete effective modifications by focusing on the essentials: a stronger door, better locks, and basic supplies.
Even basic safe rooms significantly increase family security during emergencies. They provide a designated gathering point, physical barriers between you and threats, and a stocked location with communication tools and supplies . The psychological benefit alone is substantial. Knowing you have a plan and a place to go during a crisis reduces panic and helps you respond more effectively. Your safe room becomes your family's rally point, the one location everyone knows to head toward when seconds count.
Choosing the Right Room
Not all rooms make equally good candidates for conversion into a safe room. Walk through your home with fresh eyes, and you'll start noticing which spaces offer natural advantages. The ideal safe room candidate has several key characteristics that work together to maximize protection while minimizing the upgrades you'll need to make.
Interior rooms without windows offer best protection for multiple reasons . Windows are vulnerable entry points that require expensive reinforcement to secure properly. They also expose you to flying debris during severe weather and provide potential sight lines for intruders to monitor your location. An interior room—one that doesn't share any walls with the outside of your house—puts additional barriers between you and external threats. That guest bedroom with two exterior walls and a large window? Not your best choice. That walk-in closet in the center of your upstairs hallway? Much better.
Location within your home matters more than you might initially think. FEMA recommends minimum 3 square feet per person for short-term shelter, but you also need to consider accessibility . A basement room offers excellent protection from tornadoes but might be difficult to reach quickly if you're upstairs when an intruder breaks in. Conversely, an upstairs closet provides good security against home invasion but won't help during flooding.
Consider your most likely threats based on your geographic location and neighborhood. If you live in tornado alley, prioritize the lowest level of your home. In areas with higher crime rates but minimal severe weather, an upper-floor location might make more sense.
Size requirements deserve careful calculation. That 3-square-foot minimum per person is truly minimal—imagine a space roughly 18 inches by 24 inches per person. That's enough to stand or sit during a brief emergency, but you'll want more space if possible for comfort and supply storage. A family of four should aim for at least 12-15 square feet, though 20-30 square feet is more realistic if you're using a small bedroom or large closet. This gives you room for emergency supplies, communication equipment, and enough space that young children won't feel claustrophobic during what might be a stressful wait.
The room's existing features can save you money or cost you extra. A room with a solid-core door is ahead of the game compared to one with a hollow-core door that needs replacing. Concrete walls in a basement room provide natural strength that drywall simply can't match. Even the direction the door swings matters—an inward-swinging door is harder for you to barricade effectively but easier to reinforce with a door security bar. Take inventory of what you're working with before making your final selection.
Basic Security Upgrades on a Budget
Transforming an ordinary room into a secure space doesn't require a contractor or thousands of dollars in materials. The foundation of any safe room is controlling access through that single entry point—your door. Let's walk through the essential upgrades that deliver maximum security for minimum investment.
Start with the door itself. If you're working with a hollow-core interior door, replacement is your first priority. These doors are essentially cardboard honeycomb wrapped in thin veneer—an adult can kick through one in seconds. A solid-core wood door provides substantially more resistance to forced entry. For even better protection, a steel door offers the kind of strength that will stop most forced entry attempts. When installing any new door, pay special attention to the gap between the door and frame—a tight fit with proper weatherstripping eliminates the space where pry bars can gain leverage.
Minimum door requirements include three heavy-duty hinges and deadbolt locks to ensure proper security . Those standard two-hinge installations on most interior doors won't cut it when you need real protection. The third hinge distributes force more evenly and prevents the door from warping or twisting under pressure.
The frame matters as much as the door. You can install the strongest door available, but if it's mounted in a weak frame, the whole assembly will fail when the frame splinters. Standard door frames attach to wall studs with a few small nails, creating a weak point that gives way under forceful kicks. Steel door frames transform this vulnerability into a strength . If steel frames exceed your budget, reinforcing your existing frame with a door jamb reinforcement kit dramatically improves resistance to kick-ins. These kits use heavy-gauge steel plates that distribute force across a larger area of the frame and wall studs.
Upgrade to a solid deadbolt lock as your next step. The privacy locks that come standard on interior doors offer zero security—they're designed for privacy, not protection. Install a Grade 1 deadbolt, which carries the highest residential rating. The deadbolt should have at least a one-inch throw—that's the part that extends into the frame. Longer throws are harder to force back. Position the deadbolt so it extends into the reinforced frame or jamb reinforcement plate you installed.
Add a secondary barrier system for additional security. A door security bar that braces against the floor provides excellent resistance against forced entry, even if the lock or frame begins to fail. These adjustable bars wedge under the door handle and angle down to the floor, using physics to your advantage. For sliding closet doors or situations where a security bar won't work, consider a simple sliding bolt lock installed at the top of the door. It's basic, but it's another barrier an intruder must defeat.
Safe rooms should have reliable communication methods and backup power to maintain contact with emergency services and loved ones . Your primary communication is likely your cell phone, but cell networks can become overloaded during widespread emergencies. Keep a charging cable and portable battery pack in the safe room. A battery pack with 10,000mAh capacity can recharge your phone multiple times during an extended emergency.
Add a battery-powered or hand-crank emergency radio so you can receive weather alerts and emergency broadcasts even if the power fails. If your home has a landline, consider installing an extension in the safe room. Landlines often work when cell service is down, providing a critical backup communication method.
Essential Supplies and Storage
Your safe room needs to sustain your family for the critical first hours of an emergency. Ready.gov recommends 72 hours of emergency supplies, though your safe room should focus on the essentials for a shorter duration since it's an interior room, not your primary long-term shelter . The goal is having everything you need to stay safe, communicate with authorities, and maintain basic comfort until the immediate crisis passes.
You can assemble a basic supply kit by shopping strategically and focusing on true necessities. Here's what belongs in your safe room:
Water and food supplies form your foundation. Store at least one gallon of water per person for drinking and sanitation needs. Boxed water or canned water has a longer shelf life than plastic bottles and won't take up much space. For food, focus on no-cook, no-refrigeration items: granola bars, peanut butter, crackers, dried fruit, and nuts. These provide calories and energy without requiring preparation. Don't forget any prescription medications family members need, plus a basic first aid kit with bandages, pain relievers, and any specific medical supplies your family requires.
Lighting and tools help you manage in the dark. LED flashlights are inexpensive and last for hours on a set of batteries. Store at least two flashlights plus extra batteries. A headlamp frees your hands for other tasks. Add a multi-tool or basic toolkit with screwdriver, pliers, and wrench—you might need to shut off utilities or make emergency repairs. A whistle costs just a couple dollars but can signal for help if you're trapped and your voice gives out.
Comfort and sanitation items matter more than people realize during stressful situations. Pack a change of clothes for each family member, blankets or emergency mylar blankets, and basic hygiene supplies. A portable toilet or even just a bucket with heavy-duty garbage bags and kitty litter addresses bathroom needs if you're sheltering for extended periods. Baby wipes work for basic cleaning without water. Include activities for children—a deck of cards, small toys, or coloring books—to help manage fear and boredom.
Documents and information should be stored in a waterproof bag or container. Keep copies of identification, insurance policies, medical records, and emergency contact numbers. Include cash in small bills—ATMs and credit card systems may not work during widespread emergencies. A local map helps if you need to direct emergency responders to your location or plan an evacuation route.
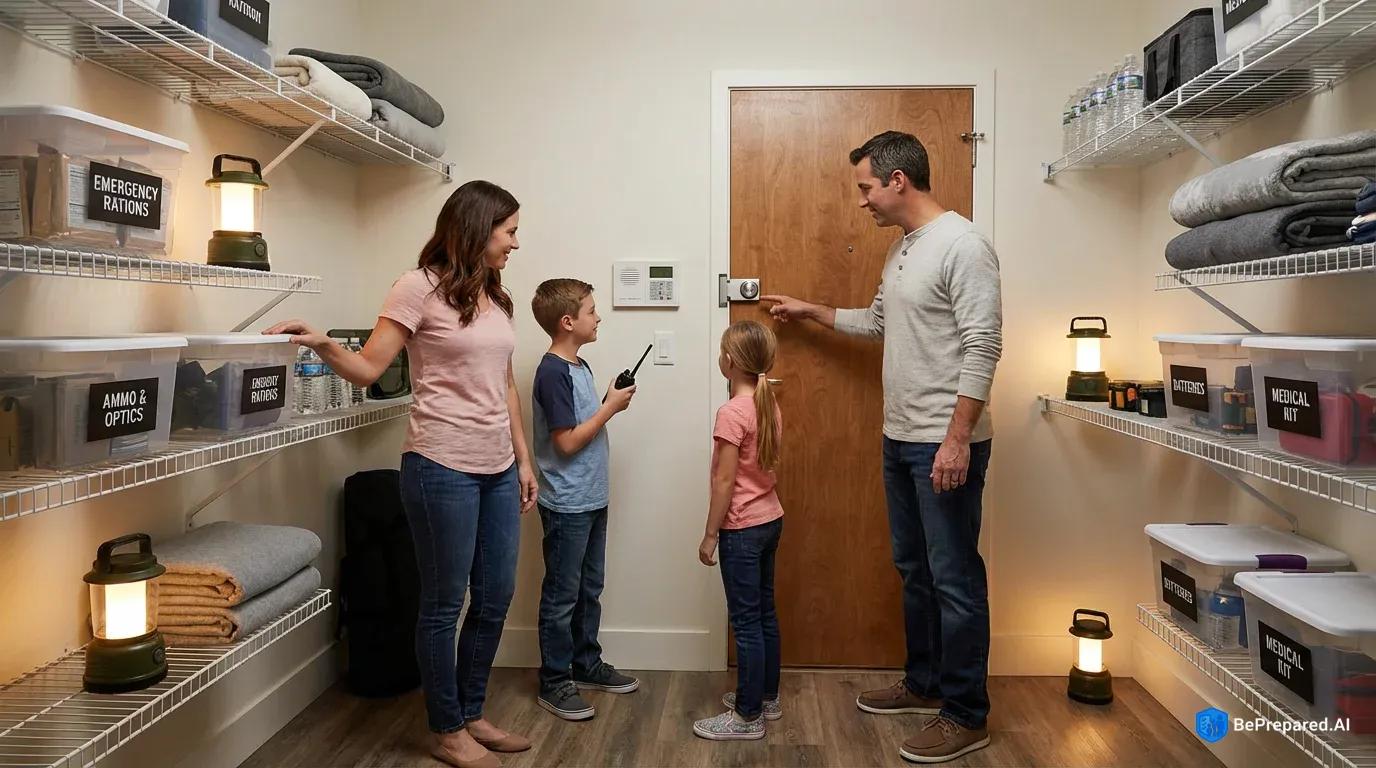
Storage solutions maximize your limited space while keeping supplies organized and accessible. Clear plastic storage bins let you see contents at a glance and stack efficiently. Label everything clearly with contents and expiration dates. Use vertical space with shelving units—a simple wire shelf doubles your storage capacity. Store heavy items low and frequently needed items at eye level. Rotate food and water supplies every six months, using and replacing items to maintain freshness.
Create a simple inventory list and tape it inside your safe room door. This helps you track what you have, what needs replacing, and what you might be missing. Review and update this list twice a year when you rotate supplies.
Taking Your First Steps
The difference between a regular room and a safe room isn't measured in thousands of dollars or weeks of construction. It's measured in the thoughtful upgrades you make, the supplies you gather, and the plan you create. That converted closet or reinforced bedroom becomes your family's insurance policy—a space where you've stacked the odds in your favor, where you've taken control of what you can control.
Start small if the whole project feels overwhelming. Pick one weekend to install a solid-core door and better locks. The next month, gather your basic supplies. The month after that, add communication equipment and backup power. Breaking the project into manageable chunks makes it less daunting and spreads out any costs.
When an emergency strikes, you won't be improvising in panic. You'll be executing a plan, moving to a prepared space, using tools and supplies you've already positioned. That confidence, that readiness, that's the real value of a budget-friendly safe room.
Walk through your home this week and identify potential safe room locations. Look for interior rooms without windows, spaces that are accessible to all family members, and areas with enough room for your family size. Measure the space and sketch a basic floor plan showing where you might place supplies and equipment.
Talk with your family about the safe room concept. Make sure everyone knows which room you're converting and what it's for. Practice moving to the safe room together so the route becomes automatic. Young children especially benefit from this rehearsal—it transforms an abstract concept into a concrete plan they can understand and follow.
Your safe room doesn't need to be perfect to be effective. Every upgrade you make, every supply you add, every practice drill you run increases your family's safety and preparedness. You're not building a fortress—you're creating a fighting chance, one manageable step at a time.