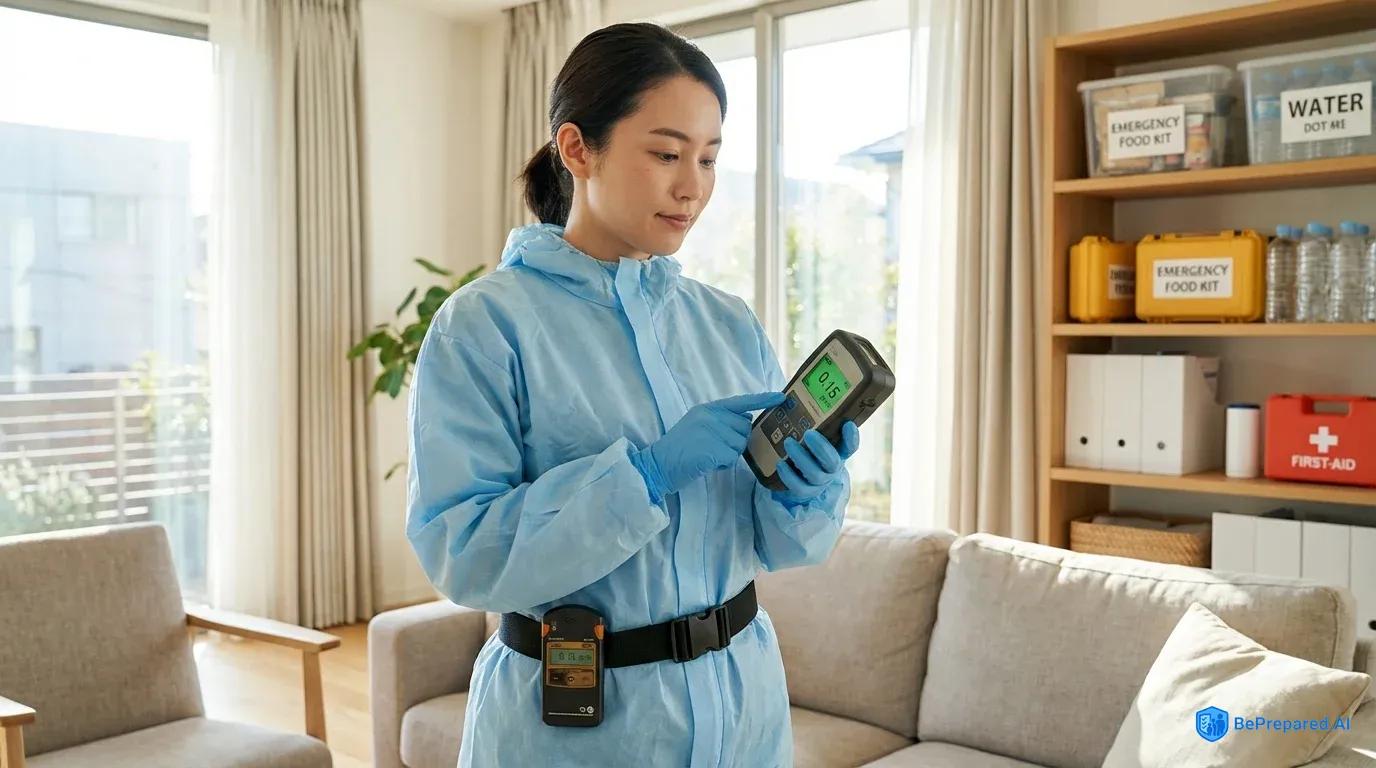
Understanding Radiation Detection Fundamentals
When the Fukushima Daiichi nuclear disaster unfolded in 2011, thousands of residents faced an invisible threat they couldn't see, smell, or feel. Those equipped with radiation detection devices had critical information that shaped life-or-death decisions about evacuation routes and shelter locations. The difference between guessing and knowing radiation levels separated informed action from panic-driven mistakes. Understanding radiation detection fundamentals transforms you from a passive observer hoping for government guidance into an active participant capable of protecting your family with real-time data.
Radiation exists in multiple forms, each with distinct characteristics that affect both detection methods and protective responses. Alpha radiation consists of helium nuclei ejected from decaying radioactive materials—heavy particles that travel only a few centimeters in air and cannot penetrate human skin. A single sheet of paper stops alpha particles completely. Despite their limited range, alpha emitters become extraordinarily dangerous when ingested or inhaled, as they deliver concentrated energy directly to internal tissues. Polonium-210, the substance used to assassinate Russian dissident Alexander Litvinenko, exemplifies alpha radiation's lethal potential when introduced inside the body.
Beta radiation comprises high-energy electrons or positrons that penetrate further than alpha particles, traveling several meters through air and requiring denser materials like aluminum or plastic for shielding. Beta particles can penetrate the outer dead layer of skin, potentially causing radiation burns with sufficient exposure. Radioactive iodine-131, released during nuclear accidents, emits beta radiation and concentrates in the thyroid gland when absorbed through contaminated food or water. This characteristic makes beta detection particularly crucial for assessing contamination risks in food, water, and environmental surfaces.
Gamma radiation represents the most penetrating form commonly encountered, consisting of high-energy electromagnetic waves similar to X-rays but more energetic. Gamma rays travel vast distances through air and require dense shielding materials like lead, concrete, or thick steel to attenuate their intensity. Following a nuclear detonation or reactor accident, gamma radiation poses the primary external exposure threat, capable of delivering whole-body doses from contaminated areas or fallout particles. The ability to detect gamma radiation at distance makes it the most critical measurement for assessing environmental hazards and determining safe movement corridors.
Neutron radiation, though less commonly encountered outside nuclear facilities or weapon detonations, presents unique detection challenges and extreme biological hazards. Neutrons carry no electrical charge, allowing them to penetrate deeply into materials and human tissue. During the initial flash of a nuclear explosion, neutron radiation comprises a significant portion of the prompt radiation dose. Specialized detection equipment is required for neutron measurement, as standard Geiger-Mueller tubes remain largely insensitive to neutrons without specific modifications or additives.
Understanding measurement units proves as essential as recognizing radiation types. The Sievert (Sv) quantifies biological dose—the amount of radiation energy absorbed by tissue weighted for the type of radiation and its biological effects. One Sievert represents a substantial dose; most measurements appear in millisieverts (mSv, one-thousandth of a Sievert) or microsieverts (μSv, one-millionth of a Sievert). The Gray (Gy) measures absorbed dose without biological weighting, representing one joule of radiation energy absorbed per kilogram of matter. For gamma and beta radiation, one Gray approximately equals one Sievert, but for alpha radiation and neutrons, the biological effectiveness multiplier significantly increases the Sievert value relative to Gray measurements.
American radiation professionals frequently reference older units: rem (roentgen equivalent man) and rad (radiation absorbed dose). The conversion between these systems follows established relationships, with rem and rad relating to their SI equivalents through standard multiplication factors. Many existing detection devices, particularly those manufactured before international standardization, display readings in these traditional units. Conversion fluency between measurement systems becomes necessary when consulting historical data, older equipment, or American regulatory guidance that hasn't fully transitioned to SI units.
Background radiation establishes the baseline against which threat assessments occur. Natural sources—cosmic rays, radon gas, terrestrial minerals—produce continuous low-level exposure that varies considerably based on geographic location and local geology . Denver residents experience higher cosmic ray exposure than coastal populations due to thinner atmospheric shielding at elevation. Granite-rich regions like parts of New England show elevated terrestrial radiation. Air travel at cruising altitude increases cosmic ray exposure compared to ground level. This natural variability means your detector will register different "normal" readings based on location—understanding your local baseline prevents false alarms while enabling recognition of genuine anomalies.
Dangerous radiation levels depend on dose rate and exposure duration. Acute exposure exceeding 1,000 mSv (1 Sv) delivered rapidly produces radiation sickness with increasing severity at higher doses. Studies indicate that whole-body exposure in the range of 4,000-5,000 mSv represents a critical threshold for survival without medical intervention . However, chronic low-level exposure follows different risk calculations. Accumulated doses above 100 mSv correlate with measurable increases in lifetime cancer risk, though debate continues regarding effects below this threshold. Regulatory bodies generally recommend keeping accumulated exposure "as low as reasonably achievable" (ALARA) beyond unavoidable background levels.
The distinction between immediate exposure and accumulated dose shapes appropriate protective responses. A brief transit through an area reading 50 μSv/hr adds minimal total dose if movement remains swift—ten minutes yields only about 8 μSv, a trivial addition to annual background. However, remaining in that environment for extended periods accumulates significant dose: 24 hours delivers 1,200 μSv (1.2 mSv), and a month approaches 40 mSv—potentially twenty times typical annual background. This relationship between dose rate and duration explains why evacuation timing, shelter duration, and decontamination urgency depend on measured intensity levels combined with exposure time calculations.
- Gamma-Scout Professional Counter
- High-end Geiger counter with alpha/beta/gamma detection, data logging capability, USB interface, 10-year battery life
- RAD-60 Personal Dosimeter
- Professional-grade electronic dosimeter, real-time dose rate monitoring, audible/visual alarms, water-resistant
- Ludlum Model 3 Survey Meter
- Industry-standard analog survey meter, interchangeable probes, rugged construction, 2000-hour battery life
Essential Radiation Detection Equipment
Selecting radiation detection equipment demands understanding the fundamental distinction between survey meters and personal dosimeters—instruments serving complementary but different purposes in comprehensive radiation monitoring. Survey meters function as your radiation "eyes," actively measuring current radiation levels in the environment, on surfaces, or emanating from objects. Personal radiation detectors can detect radiation and measure dose rates , answering the immediate question: "What is the radiation level right here, right now?" Personal dosimeters, conversely, track cumulative exposure over time, answering: "How much total radiation dose have I received?" Serious preparedness requires both instrument types, as survey meters guide navigation and decontamination while dosimeters ensure you don't exceed safe accumulated exposure limits.
Survey meters dominate the consumer radiation detection market, with Geiger-Mueller (GM) counters representing the most widely recognized technology. Geiger-Mueller counters can detect alpha, beta, and gamma radiation , making them versatile tools for general monitoring. GM tubes contain low-pressure inert gas that ionizes when radiation passes through, creating detectable electrical pulses. Each pulse corresponds to a detected radiation event, with pulse frequency determining the count rate displayed as counts per minute (CPM) or dose rate in μSv/hr or mR/hr. The characteristic clicking of a Geiger counter—each click representing a detected particle or photon—provides intuitive audio feedback that accelerates during exposure to elevated radiation fields.
Quality GM-based survey meters span enormous price ranges, from $200 consumer units to $2,000+ professional instruments. The GQ GMC-500Plus ($200-250) exemplifies capable entry-level equipment, featuring a large GM tube sensitive to beta and gamma radiation, data logging capabilities, and USB connectivity for computer analysis. Its sensitivity proves adequate for detecting elevated radiation and general environmental monitoring, though calibration accuracy and low-dose precision lag behind professional equipment. The Radex RD1212 ($350-400) offers similar capabilities in a more compact form factor with improved build quality and better calibration stability.
Professional-grade GM survey meters like the Ludlum Model 3 ($1,200-1,500) or Thermo Scientific RadEye ($1,800-2,200) deliver superior performance across critical parameters. These instruments feature calibrated accuracy traceable to national standards, wider detection ranges spanning from background levels to emergency-level fields, temperature compensation preventing reading drift, and ruggedized construction surviving harsh field conditions. The difference becomes apparent when measuring low-level contamination or documenting exposure for official purposes—professional instruments provide legally defensible data while consumer units offer general awareness .
Detection range capabilities separate adequate from inadequate equipment. Consumer meters typically measure from background (0.1 μSv/hr) to moderate levels (100-1,000 μSv/hr), with accuracy degrading or readings maxing out at higher intensities. This limitation proves acceptable for most preparedness scenarios, as exposure levels exceeding these ranges demand immediate evacuation rather than careful measurement. Professional survey meters extend to 10,000+ μSv/hr, enabling assessment of extreme contamination and accurate measurement near concentrated sources. The Mazur PRM-9000 ($1,000-1,200) bridges consumer and professional categories, offering extended range, multiple detector options, and smartphone integration at intermediate pricing.
Scintillation detectors represent an alternative technology offering superior sensitivity and energy discrimination compared to GM tubes. Scintillation detectors are more sensitive than Geiger counters , making them particularly valuable for detecting low-level sources. These devices use crystals (typically sodium iodide or cesium iodide) that emit light flashes when struck by gamma radiation. Photomultiplier tubes or photodiodes convert these flashes to electrical signals, enabling both counting and energy analysis. The Polimaster PM1704 ($800-1,000) employs cesium iodide scintillation detection in a pocket-sized personal radiation detector format, providing exceptional sensitivity for detecting low-level gamma sources and distinguishing between natural background variations and artificial radionuclides. Scintillation instruments excel at detecting shielded sources or low-activity materials that might escape GM counter notice, though they typically cost more and consume more power than equivalent GM devices.
Ion chambers provide another detection technology worth understanding. Ion chambers provide the most accurate measurements of radiation dose rates in air , making them the gold standard for precise dosimetry in professional applications. These devices measure the ionization current produced when radiation interacts with gas-filled chambers. While ion chambers offer superior accuracy and energy independence compared to GM counters, they typically cost significantly more and require larger physical sizes to achieve adequate sensitivity. Professional health physics applications rely heavily on ion chamber technology, though most preparedness applications find GM counters or scintillation detectors more practical.
Personal dosimeters track accumulated dose, with Electronic Personal Dosimeters (EPDs) providing real-time readout of cumulative exposure. Unlike older film badges or thermoluminescent dosimeters requiring laboratory processing, EPDs display current dose totals instantly while providing alarm functions when preset thresholds are exceeded. The Polimaster PM1621 ($400-500) represents a capable EPD option, measuring gamma exposure from 10 μSv to 10 Sv with 0.1 μSv resolution, featuring programmable dose and dose-rate alarms, and storing 1,000 hours of exposure history. During extended shelter-in-place scenarios or when operating in contaminated environments, EPDs answer the critical question of whether accumulated exposure approaches concerning levels.
Professional EPDs like the Thermo Scientific DMC 3000 ($600-800) add features including neutron detection, wireless data transmission, and integration with radiation safety management systems. For serious preparedness applications, mid-range EPDs provide optimal value—the enhanced capabilities of premium models primarily serve institutional radiation safety programs rather than individual preparedness needs. However, the distinction between a $100 consumer radiation "badge" and a $400 calibrated EPD matters enormously. Consumer badges often lack calibration traceability, display questionable accuracy, and provide no verification of proper function. Investing in properly calibrated, professionally-manufactured dosimeters ensures the exposure data you collect actually reflects reality.
Digital versus analog devices presents less of a performance question than a usability consideration. Modern digital instruments offer data logging, computer connectivity, customizable alarms, and precise numerical readouts. Analog meters with traditional needle displays provide at-a-glance readings without powering on, function during electronic failures, and offer certain advantages in rapidly changing radiation fields where needle movement conveys rate-of-change information digital numbers obscure. The Ludlum Model 3 with analog meter remains popular among professionals who value the intuitive feedback of needle deflection, though digital variants of the same instrument outsell analog versions.
The question of consumer-grade versus professional equipment ultimately depends on your preparedness objectives and budget constraints. Consumer devices adequately detect the presence of elevated radiation, identify contaminated objects or areas, and provide general situational awareness. They answer the fundamental question: "Is there a radiation problem here?" Professional equipment enables quantitative assessment, documentation for medical treatment decisions, precise contamination surveys, and measurements that emergency responders or medical personnel will accept as credible data. If your preparedness philosophy emphasizes self-reliance during extended grid-down scenarios when professional help remains unavailable, investing in professional-grade equipment provides capabilities matching your expanded responsibilities.
Multi-function instruments combining survey meter and dosimeter capabilities offer efficiency advantages for individuals assembling comprehensive detection capabilities. The Polimaster PM1703MO-1 ($1,200-1,500) integrates a sensitive scintillation detector for gamma detection with dosimetry functions, data logging, and sophisticated analysis capabilities in a smartphone-sized package. Similarly, the RadTarge Colibri ($800-1,000) combines survey and dosimetry functions with spectroscopic capabilities enabling radionuclide identification—distinguishing between natural potassium-40 in granite versus cesium-137 from fallout or medical sources.
Specialized detection needs may require additional equipment beyond general-purpose survey meters and dosimeters. Alpha radiation detection demands instruments with thin entrance windows allowing alpha particles to reach the detector—most GM tubes feature windows too thick for alpha penetration. The Ludlum Model 43-93 alpha/beta/gamma detector ($800-1,000) incorporates a delicate mica window enabling alpha detection for contamination surveys where alpha-emitting materials like plutonium or polonium pose concerns. Neutron detection requires specialized instruments like the Thermo Scientific RadEye NL ($3,000-4,000) incorporating lithium-loaded detectors sensitive to neutron radiation—capabilities most preparedness applications don't require unless proximity to nuclear facilities or weapons effects creates specific neutron exposure scenarios.
Building comprehensive detection capabilities typically follows a phased approach. Initial investment might prioritize a quality GM-based survey meter ($300-500) providing reliable beta/gamma detection for environmental monitoring and contamination surveys. Adding a personal dosimeter ($400-600) enables exposure tracking during any radiation event. Advanced capabilities might include a scintillation-based instrument ($800-1,200) offering enhanced sensitivity and energy discrimination, or specialized detectors addressing specific scenarios relevant to your location and threat assessment. The total investment for professional-grade comprehensive coverage typically ranges from $1,500-3,000—substantial but proportionate to the critical nature of radiation detection during nuclear emergencies.
Given the technical complexity and safety implications of radiation detection, only specially trained personnel should use radiation detection devices . However, preparedness-minded individuals can acquire the necessary training through radiation safety courses, health physics programs, or manufacturer-provided instruction. This training ensures proper equipment operation, accurate interpretation of readings, and appropriate protective responses based on measured radiation levels.
Calibration and Maintenance Procedures
The most sophisticated radiation detection equipment becomes worthless if calibration drift or maintenance neglect compromises measurement accuracy. Unlike many preparedness tools where degraded performance remains obvious—a dull knife cuts poorly, a weak flashlight dims noticeably—radiation detectors fail silently, displaying confident numerical readings that bear no relationship to actual radiation levels. This insidious failure mode makes rigorous calibration and maintenance protocols absolutely essential. Your detector's reading might indicate safe levels while actual exposure delivers dangerous doses, or conversely, trigger false alarms that undermine confidence in the instrument. Establishing and following systematic maintenance procedures ensures your detection equipment provides accurate, reliable data when radiation threats materialize.
Radiation detection equipment should be calibrated regularly to maintain measurement accuracy. Professional radiation safety programs typically calibrate survey meters and dosimeters annually, with more frequent calibration for heavily-used instruments or those exposed to harsh conditions. For preparedness applications where instruments remain in storage most of the year, annual calibration before returning to storage ensures readiness when needed. However, any instrument dropped, exposed to extreme temperatures, or showing unusual behavior requires immediate calibration verification regardless of the scheduled interval.
Professional calibration involves exposing the detector to precisely known radiation sources traceable to national standards, then adjusting the instrument's response to match actual exposure levels. This process requires specialized equipment and expertise beyond most individual capabilities—attempting to calibrate radiation instruments without proper reference sources and training produces false confidence in questionable readings. Instead, identify qualified calibration services through manufacturers, health physics consulting firms, or university radiation safety departments. The National Voluntary Laboratory Accreditation Program (NVLAP) accredits calibration laboratories meeting strict quality standards; choosing NVLAP-accredited services ensures calibration traceability and quality.
Calibration costs typically range from $75-150 for basic survey meters to $200-300 for sophisticated multi-function instruments, with shipping adding $20-40 each direction. The total annual cost of $120-400 per instrument represents essential maintenance rather than optional enhancement. When purchasing used radiation detection equipment—a cost-effective approach to acquiring professional-grade instruments—always factor immediate calibration costs into the total investment. A $500 "bargain" professional survey meter requires $150 calibration before you can trust its readings, making the true acquisition cost $650. Reputable sellers provide recent calibration certificates; instruments lacking documentation should be assumed uncalibrated regardless of seller claims.
Between professional calibrations, verification checks using long-lived check sources confirm continued proper function. Check sources—small sealed radioactive sources producing consistent radiation levels—enable regular verification that your detector still responds appropriately. Cesium-137 or cobalt-60 check sources with activities around 1 microcurie produce easily detectable gamma radiation while remaining safe for storage and handling. Position the check source at a fixed distance from your detector and record the reading. Subsequent checks should yield consistent readings within the instrument's specified uncertainty (typically ±10-20% for GM counters). Significant deviations indicate problems requiring investigation—battery weakness, detector degradation, or electronic failure.
Establishing a verification routine ensures early detection of problems. Monthly checks provide reasonable frequency for stored preparedness equipment, while weekly or daily verification suits instruments in regular use. Maintain a logbook recording check source measurements, battery condition, physical inspection findings, and any anomalies. This documentation creates a performance history revealing gradual drift or sudden failures. When professional calibration time arrives, providing this history helps calibration technicians identify and address developing issues.
Battery maintenance represents the most common source of radiation detector failures. Survey meters and dosimeters typically employ standard alkaline batteries (AA, AAA, or 9V), rechargeable NiMH cells, or specialized lithium batteries. Alkaline batteries stored in instruments eventually leak, destroying electronic components with corrosive electrolyte. Remove batteries from instruments during long-term storage, storing them separately in a cool, dry location. Check battery expiration dates semi-annually, replacing expired cells before they fail. Many radiation detectors draw minimal standby current even when "off," slowly draining installed batteries—another reason for removal during storage.
Rechargeable batteries require different maintenance protocols. NiMH cells self-discharge relatively rapidly, losing 20-30% capacity monthly even without use. Recharge NiMH batteries quarterly during storage, and fully charge them before deployment or calibration. Lithium-ion batteries, used in some advanced instruments, maintain charge better but degrade with age regardless of use. Replace lithium batteries every 3-5 years even if they still function, as capacity loss and increased internal resistance compromise reliability. Always maintain spare batteries in your radiation detection kit—discovering dead batteries during an emergency wastes precious time and potentially leaves you operating blind during critical initial hours.
Sensor cleaning requires delicate attention to avoid damaging sensitive detector components. GM tubes feature thin windows—sometimes mica only a few micrometers thick—that rupture easily under physical pressure or chemical attack. Never apply solvents, abrasive cleaners, or rough cloths to detector windows. Dust accumulation on windows reduces sensitivity, particularly for alpha detection where particles must penetrate the window. Remove dust using gentle air flow from a compressed air canister, holding the canister upright to prevent propellant spray. For stubborn contamination, barely dampen a lint-free optical cloth with distilled water and gently wipe the window, allowing it to air dry completely before storage or operation.
Scintillation detectors employ hygroscopic crystals that absorb moisture from air, degrading performance. These instruments feature sealed detector assemblies that should never be opened outside controlled environments. External cleaning involves only the case and display, using slightly damp cloths and avoiding moisture intrusion into any openings. Electronic components accumulate dust over years, potentially causing connection problems or shorts. Periodic cleaning using compressed air removes dust from circuit boards and connectors, but only attempt this if you possess electronics experience and the instrument design permits safe access—many modern instruments feature sealed cases that shouldn't be opened.
Storage conditions profoundly affect long-term reliability. Radiation detectors should be stored in climate-controlled environments with stable temperatures between 50-80°F and relative humidity below 60%. Extreme temperatures damage electronic components and batteries while causing calibration drift. High humidity promotes corrosion of electrical contacts and, in scintillation detectors, degrades hygroscopic crystals. Avoid storage locations experiencing temperature swings—unheated garages, attics, or outdoor sheds—that cycle between freezing and hot conditions. Instead, store radiation detection equipment in interior closets or climate-controlled storage areas.
Protect instruments from physical damage using padded cases. Many professional survey meters include fitted cases providing excellent protection; retain and use these cases for storage and transport. For instruments lacking dedicated cases, foam-lined hard cases designed for cameras or test equipment provide suitable protection. Label cases clearly identifying contents and including calibration due dates, check source information, and battery requirements. This labeling enables quick deployment without searching for documentation or specifications.
Implement a maintenance schedule documenting all required actions and their frequencies. Create a checklist including monthly check source verification, quarterly battery charging or replacement, semi-annual physical inspection and cleaning, and annual professional calibration. Set calendar reminders ensuring these tasks occur on schedule rather than when you happen to remember. This systematic approach prevents the gradual neglect that leaves preparedness equipment non-functional when emergencies arise.
Document all maintenance activities in an instrument logbook. Record dates, actions performed, check source readings, battery changes, calibration results, and any anomalies observed. This documentation serves multiple purposes: tracking performance trends, demonstrating proper maintenance if readings are questioned during emergencies, and providing history for troubleshooting when problems develop. Digital documentation using spreadsheets or specialized software offers searchability and backup advantages, though paper logbooks survive electronic failures and remain accessible without power.
Download our Radiation Detection Equipment Maintenance Checklist for a comprehensive schedule of all required calibration and maintenance tasks, complete with tracking sheets and decision trees for addressing common problems. This resource ensures your detection equipment remains accurate and reliable through years of storage and ready for immediate deployment when radiation threats emerge.
Deployment and Usage Protocols
Possessing calibrated, well-maintained radiation detection equipment provides only potential value—effective deployment following systematic protocols converts that potential into actionable intelligence during radiation emergencies. The difference between haphazard measurements and methodical surveys separates useful data from misleading numbers. Random spot checks might miss contamination hot spots, fail to detect gradual exposure accumulation, or waste time measuring irrelevant locations while critical areas remain unassessed. Professional radiation safety personnel follow rigorous survey protocols developed through decades of operational experience and radiation physics understanding. Adapting these professional techniques to preparedness applications maximizes detection effectiveness while ensuring your safety during measurement operations.
Survey patterns and techniques begin with understanding your measurement objectives. Are you assessing environmental radiation levels to determine safe movement corridors? Checking people and equipment for contamination after potential exposure? Monitoring shelter integrity during fallout conditions? Each objective demands different survey approaches. Environmental surveys typically employ systematic patterns ensuring complete area coverage without gaps where contamination might hide undetected. The grid pattern divides the area into squares, with measurements taken at grid intersections and any elevated readings triggering detailed investigation of that square. For a residential property, a 10-meter grid provides reasonable coverage—measure at each intersection point, documenting readings and locations.
The perimeter-to-center pattern works well for assessing buildings or enclosed areas. Begin at the perimeter, taking measurements at regular intervals around the boundary to establish baseline levels and identify external contamination. Then work inward using concentric paths or radial lines from the perimeter toward the center, comparing readings to detect gradual changes or sudden hot spots. This pattern quickly identifies whether contamination remains primarily external or has penetrated into the structure, informing decisions about shelter viability and decontamination priorities.
Contamination surveys of people, equipment, or surfaces require different techniques emphasizing close proximity and methodical coverage. Hold the detector probe 1-2 centimeters from the surface being surveyed, moving slowly enough for the instrument to respond—typically 2-3 seconds per probe area for GM counters, slightly faster for scintillation detectors with better sensitivity. Survey the entire body systematically: head and hair, face and neck, shoulders and arms, torso front and back, legs and feet. Don't rush—contamination concentrated in small areas like hair or clothing folds produces localized readings easily missed by rapid sweeps. Pay particular attention to areas likely to accumulate fallout: hair, shoulders, shoe treads, and any crevices or folds in clothing.
Background subtraction proves essential for accurate contamination assessment. Measure background radiation in a clean area before beginning contamination surveys, recording this baseline reading. During surveys, readings exceeding background by 2-3 times indicate likely contamination requiring decontamination procedures. The exact threshold depends on your detector's sensitivity and normal reading variability, but doubling of readings reliably indicates contamination for most instruments. Scintillation detectors with superior sensitivity might detect contamination at smaller increases above background, while less sensitive GM counters require more obvious elevation for confident detection.
Documentation methods transform measurements into usable intelligence for decision-making and long-term exposure assessment. Verbal memory of radiation readings fades quickly under stress; systematic documentation preserves critical information. Create survey maps showing measurement locations and readings, using graph paper or printed property maps. Mark each measurement point with coordinates or landmarks, recording the reading, time, and any relevant observations. Digital photography provides excellent documentation—photograph the detector display showing the reading, then photograph the measurement location, creating linked visual records. Modern smartphones enable GPS-tagged photos automatically recording location data.
Maintain a radiation survey log documenting all measurements chronologically. Include date, time, location description, detector used, reading obtained, background level, and surveyor name. This log serves multiple purposes: tracking exposure accumulation, identifying trends over time, providing data for medical treatment if significant exposure occurs, and creating records for insurance or legal purposes after the emergency. During shelter-in-place scenarios, regular environmental measurements every 2-4 hours document fallout decay rates and inform decisions about when external conditions permit safe movement.
Personal dosimeters require different documentation approaches focused on cumulative exposure rather than instantaneous readings. Record dosimeter readings at regular intervals—every 4-6 hours during active radiation events, daily during extended shelter situations. Note the accumulated dose, time period covered, and activities performed during that interval. This data enables calculation of dose rates for different activities (shelter time versus external movement) and ensures total exposure remains within safe limits. If multiple family members each wear dosimeters, maintain separate logs tracking each person's accumulated exposure.
Alert level responses establish predetermined actions triggered by specific radiation measurements, preventing decision paralysis during high-stress emergencies. Define alert levels before emergencies occur, establishing clear criteria and corresponding responses. A basic three-tier system provides workable structure:
Green (Normal) status applies when readings remain within 2-3 times typical background levels for your location. Background radiation varies by geography and altitude, so establish your specific baseline through pre-emergency measurements. Green status permits normal activities with routine monitoring. Continue periodic measurements to detect changing conditions, but no special precautions are required.
Yellow (Elevated) status activates when readings exceed 3-10 times your established background baseline. Elevated readings indicate potential contamination or distant fallout effects requiring increased monitoring and precautionary measures. Minimize time outdoors, close windows and ventilation systems, and increase monitoring frequency to hourly intervals. Begin contamination surveys of people and equipment entering from outside. Yellow status doesn't require shelter-in-place but demands heightened awareness and readiness to escalate to Red status if readings continue rising.
Red (Dangerous) status triggers when readings exceed 10 times background. Dangerous levels demand immediate shelter-in-place, sealing of the structure against outside air infiltration, and cessation of non-essential outdoor activities. Prolonged exposure at these levels can accumulate significant doses over hours or days. Red status continues until readings decline below Yellow thresholds, typically requiring days to weeks following fallout events .
These alert levels provide general guidance requiring adjustment based on your specific situation, detector capabilities, and risk tolerance. Conservative thresholds provide additional safety margins; more aggressive thresholds accept higher exposure in exchange for greater operational flexibility. The critical element is establishing thresholds in advance rather than making decisions under emergency stress.
Integration with shelter-in-place procedures ensures radiation monitoring informs broader protective actions. During fallout events, radiation levels peak hours after detonation, then decay following predictable patterns. Continuous monitoring documents this decay, enabling calculation of when external conditions permit brief outside activities for essential tasks. The "seven-ten rule" provides rough estimates: radiation intensity may decrease by a factor of ten for every seven-fold increase in time since detonation. One hour post-detonation might show 1,000 μSv/hr; seven hours later, 100 μSv/hr; 49 hours (7×7) later, 10 μSv/hr. Your measurements verify whether actual decay matches theoretical predictions or whether ongoing fallout deposition maintains elevated levels.
Interior measurements assess shelter effectiveness. Measure radiation levels in different rooms and locations, identifying areas with maximum shielding. Basements typically provide best protection; interior rooms without exterior walls offer intermediate protection; rooms with exterior walls or windows provide minimal shielding. Documenting these variations enables concentration of shelter activities in best-protected areas, minimizing exposure during extended shelter periods. Measurements near windows, doors, and ventilation systems identify potential infiltration routes requiring additional shielding or sealing.
Survey protocols for decontamination verification ensure cleaning efforts actually remove contamination rather than merely redistributing it. Measure contamination levels before decontamination, establishing baseline readings. After decontamination procedures—removing clothing, showering, cleaning equipment—resurvey the same areas using identical techniques. Successful decontamination should reduce readings to near-background levels. Persistent elevated readings indicate incomplete decontamination requiring additional cleaning or identification of contamination sources not yet addressed. Survey wash water disposal areas and decontamination stations themselves to prevent creating new contaminated zones through improper waste handling.
Field measurement techniques require attention to detector positioning and environmental factors. Hold survey meters at waist height (approximately 1 meter above ground) for general area surveys, as this position represents average whole-body exposure. For ground contamination assessment, position the detector closer to the surface (10-15 cm) to maximize sensitivity to deposited materials. Wind affects readings by moving contaminated dust; take measurements from multiple positions and average results to account for localized variations. Rain or snow can temporarily elevate readings as atmospheric radon progeny wash out, creating false indications of contamination—understanding these natural phenomena prevents misinterpretation.
Temperature extremes affect detector performance. Cold temperatures reduce battery capacity and may slow detector response; warm instruments to operational temperature before critical measurements. High temperatures can damage sensitive components or cause calibration drift; avoid leaving instruments in direct sunlight or hot vehicles. Most professional instruments specify operational temperature ranges (typically -20°C to +50°C); operating outside these ranges produces unreliable results.
Quality assurance checks during field operations verify continued proper function. Perform check source measurements before beginning surveys, after completing surveys, and every 2-4 hours during extended operations. Consistent check source readings confirm the detector hasn't drifted or malfunctioned. Battery voltage checks prevent mid-survey failures; replace batteries when voltage drops below manufacturer specifications rather than waiting for complete failure. Physical inspection before each use identifies damage, loose connections, or contamination on the detector itself that might compromise measurements.
Cross-contamination prevention protects both you and your equipment during surveys. Avoid touching potentially contaminated surfaces with bare hands; use disposable gloves changed frequently. Don't allow the detector probe to contact contaminated surfaces directly—maintain the 1-2 cm standoff distance. If the detector itself becomes contaminated, readings become unreliable as the instrument measures its own contamination rather than environmental levels. Survey the detector regularly; if contamination is detected, decontaminate the instrument before continuing measurements.
Systematic deployment protocols transform radiation detection equipment from interesting gadgets into genuine safety tools. The discipline of methodical surveys, careful documentation, and predetermined response criteria ensures reliable data collection and appropriate protective actions. These protocols require practice before emergencies—conduct survey drills using your equipment, document measurements around your property to establish baseline readings, and rehearse alert level responses until they become automatic. When radiation threats materialize, practiced protocols enable calm, effective responses while chaos surrounds you.
Understanding radiation detection fundamentals, selecting appropriate equipment, maintaining calibration and readiness, and deploying systematic measurement protocols creates comprehensive detection capabilities. This knowledge transforms abstract radiation threats into quantifiable hazards you can measure, track, and respond to appropriately. The investment in quality equipment and the discipline of proper procedures provides your family with critical advantages during nuclear emergencies—the ability to make informed decisions based on real data rather than fear and speculation.