Why Proper Food Storage Matters
Sarah pulled the plastic bin from her garage shelf, excited to finally organize her emergency supplies. She'd spent nearly $200 on canned goods, rice, and other staples two years ago, feeling proud and prepared. But as she opened the container, her heart sank. Rust bloomed across the can lids, the rice bags had tiny holes with suspicious trails of powder, and everything smelled musty. She'd done something right by buying supplies, but nearly everything would need to be replaced.
This scenario plays out in homes across America more often than you'd think. According to disaster preparedness experts, improper storage can reduce shelf life by as much as 50%, turning your investment into waste . When you combine low preparedness levels with poor storage practices, you've got a recipe for both wasted money and potential crisis during emergencies.
The good news? Most storage mistakes are completely preventable with simple changes. You don't need expensive equipment or a dedicated pantry room. Understanding just a few basic principles can transform your food storage from a money pit into a reliable safety net that actually works when you need it.
Temperature and Environment Mistakes
Think of your stored food like Goldilocks searching for the perfect porridge—it needs conditions that are just right. Too hot, too cold, too humid, or too sunny, and your carefully stocked supplies deteriorate faster than milk left on the counter.
Heat exposure ranks as the number one enemy of long-term food storage. Many people make the critical mistake of storing emergency supplies in garages, attics, or sheds where temperatures can soar during summer months. Here's the problem: high temperatures can dramatically reduce how long your food stays good. That five-year supply of canned vegetables? In a hot garage, you're looking at maybe two to three years before quality seriously degrades. The chemical reactions that cause food to spoil accelerate dramatically with heat, breaking down nutrients, changing flavors, and eventually making food unsafe to eat.
Humidity presents the second major environmental challenge. When moisture levels climb too high, you're essentially inviting mold, bacteria, and rust to the party. Basements might seem like ideal storage locations because they stay cool, but many have moisture problems that make them terrible choices. Condensation forms on metal cans, creating the perfect conditions for rust. Cardboard packaging absorbs moisture and weakens. Even foods inside sealed containers can develop problems when moisture penetrates packaging seams.
Temperature fluctuations cause almost as much damage as consistently high temperatures. When your storage area swings from cold to warm repeatedly, it creates a pumping effect—packages expand and contract, seals weaken, and air gets pulled in and pushed out. This happens frequently in spaces like garages that cool down overnight and heat up during the day. The constant cycling stresses packaging materials and accelerates oxidation inside containers.
Direct sunlight might not seem like a major concern if you're storing food in boxes or bins, but UV radiation penetrates many containers and packaging materials. Light breaks down vitamins, causes fats to go rancid, and degrades plastic containers over time. Even indirect bright light in a sunny room causes problems over months and years.
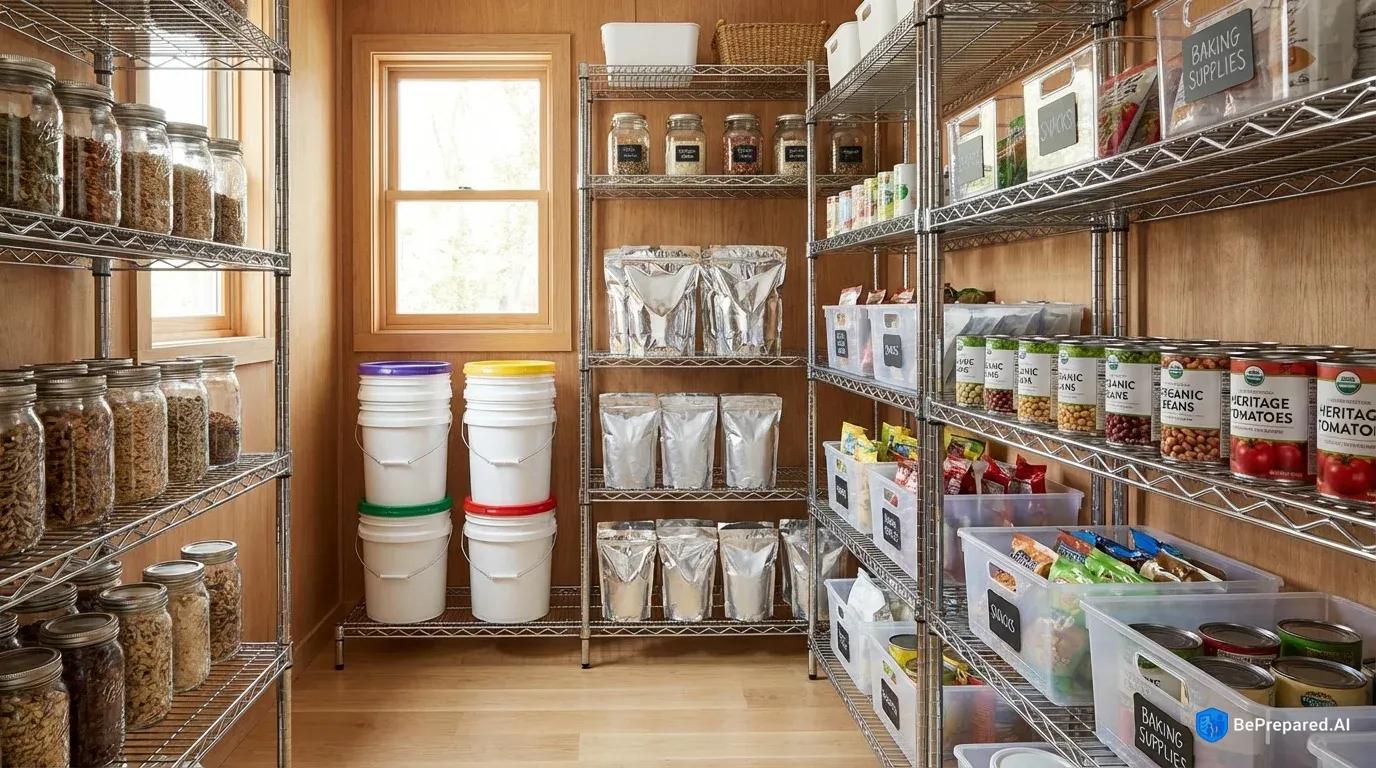
The ideal approach is to store food in a dry, cool, dark area . A climate-controlled interior closet beats a garage or basement every time, even if it means using less convenient space in your living areas. Look for spots in your home that stay consistently comfortable year-round—if you're comfortable there, your food probably will be too.
Container and Packaging Errors
Choosing the right containers makes the difference between food that lasts and food that fails. Here's what you need to know about common packaging mistakes:
Original packaging often isn't enough. Those paper bags of flour, sugar, and rice from the grocery store? They're designed for short-term pantry storage, not emergency preparedness. Paper and thin plastic allow air, moisture, and pests to penetrate. Within months, you'll likely find bugs, staleness, or clumping from absorbed humidity.
Wrong container materials create new problems. Not all plastic containers are created equal. Some plastics can leach chemicals into food over time, especially when exposed to temperature changes . Low-quality plastic bins might seem economical, but they often crack, warp, or develop gaps that compromise your storage. Metal cans can develop rust in humid conditions, which is why you'll see experienced preppers storing cans in plastic bins with desiccant packets.
Pest vulnerability destroys more stored food than most people realize. Rodents chew through cardboard, thin plastic, and even aluminum cans if motivated enough. Insects lay eggs in grain products that hatch months later, creating infestations that spread throughout your storage. Weevils, meal moths, and other pantry pests can penetrate surprisingly robust-seeming packaging. That's why experts recommend you store food in airtight containers to prevent pest infestation .
Air exposure causes oxidation, moisture absorption, and staleness. Every time air reaches your stored food, the countdown to spoilage accelerates. Foods high in fats and oils go rancid. Dried goods absorb moisture and lose texture. Even canned goods benefit from secondary containment that protects against air exposure if seals fail.
Solutions that work:
- Food-grade buckets with gamma seal lids for bulk dry goods like rice, beans, flour, and oats
- Mylar bags with oxygen absorbers inside buckets for maximum shelf life
- Clear plastic storage bins with tight-sealing lids for organizing canned goods and protecting against rust
- Glass jars with metal lids for smaller quantities of frequently rotated items
- Vacuum-sealed bags for items you'll use within 1-2 years
The investment in proper containers pays for itself by preventing waste. A $15 food-grade bucket protects $50 worth of rice for many years instead of just one or two in the original bag. You're not spending extra money—you're protecting the money you've already invested in food.
Organization and Rotation Failures
Let's walk through building a system that actually works, step by step. You don't need perfection—you need consistency and simplicity.
Step 1: Establish your FIFO (First In, First Out) system. This principle borrowed from grocery stores means using older items before newer ones. Start by arranging your storage so the oldest items sit at the front or top where you'll grab them first. When you buy new supplies, they go in the back or bottom. This sounds obvious, but without a physical system that makes it automatic, you'll inevitably grab whatever's convenient and leave older items to expire. Consider using shelf dividers or tilted can racks that naturally roll older cans forward as you remove items.
Step 2: Create a labeling protocol and stick to it religiously. Every single item needs two pieces of information: what it is and when you acquired it. For items you've repackaged into buckets or containers, add the original expiration date if available. Use a permanent marker to write directly on containers, or invest in a label maker if you want a cleaner look. Without clear labeling, food gets pushed aside and forgotten. When you can't quickly identify what something is or how old it is, it becomes invisible in your storage area.
Step 3: Develop an inventory tracking method that matches your style. Some people love detailed spreadsheets with quantities, purchase dates, and expiration dates. Others do better with a simple written list on a clipboard hung near the storage area. The best system is the one you'll actually use. At minimum, track categories and approximate quantities—"12 cans vegetables, 8 cans soup, 25 lbs rice" gives you enough information to know what needs replenishing. Update your inventory every time you add or remove significant quantities.
Step 4: Schedule regular expiration monitoring. Put a recurring reminder in your phone or calendar for quarterly storage checks. During these 15-minute sessions, scan for bulging cans, rust spots, pest evidence, and items approaching expiration. Good labeling makes these checks quick and effective. Pull anything within six months of expiration to use in your regular cooking, and note what needs replacing.
Step 5: Integrate storage into your daily life. The biggest rotation failure happens when emergency supplies exist completely separate from everyday eating. Instead, store foods you actually eat and create a rotation schedule that moves items from storage to kitchen regularly. Cook with your stored rice, beans, and canned goods weekly. This approach not only prevents waste but also familiarizes you with preparing these foods before an emergency forces you to figure it out under stress.
Regular rotation checks prevent most storage waste. That's a remarkable return on investment for less than an hour per month. The key is making rotation so simple and systematic that it becomes automatic rather than a dreaded chore you avoid. Think of it like brushing your teeth—just another quick habit that protects something valuable.
Taking Action: Your Storage Improvement Plan
You don't need to overhaul everything today. Start with one simple improvement that addresses your biggest vulnerability.
Begin with a storage audit this weekend. Spend thirty minutes examining what you currently have and where it's stored. Check temperatures with a simple thermometer, look for moisture signs, inspect packaging condition, and note organizational problems. This assessment shows you exactly where to focus your efforts.
Make one significant improvement within the next week. Maybe that means moving supplies from the hot garage to a bedroom closet. Perhaps it's investing in a few food-grade buckets to repackage bulk items. Or it could be as simple as labeling everything with purchase dates. Pick the change that will have the biggest impact on your specific situation.
Build your system progressively over the next month. You can spread the work across several sessions so it never feels overwhelming. Week one: relocate to better environment. Week two: repackage vulnerable items. Week three: set up FIFO arrangement. Week four: create inventory system and schedule first rotation check. Breaking it into small chunks makes the whole process manageable.
Create a simple tracking system that works for you. Whether it's a notebook, a spreadsheet, or even photos on your phone, find a method to track your supplies and rotation schedule. This simple tool helps you maintain the system you're building without creating extra work.
The difference between food storage that protects your family and food storage that wastes your money comes down to these basics: stable cool environment, proper containers, and regular rotation. You've already taken the hardest step by deciding to prepare. Now make those preparations count by storing food correctly. Your future self—whether facing a storm, job loss, or any other emergency—will thank you for the time you invested today.