Why Start an Emergency Food Storage (Even on a Budget)
Sarah stared at the empty grocery shelves where pasta and canned goods usually sat in neat rows. It was March 2020, and like millions of others, she'd waited until everyone else had the same idea. That moment changed how she thought about food security forever.
You don't need a global pandemic to experience food shortages. Severe weather can knock out power for days. A job loss can make every grocery trip stressful. An unexpected illness might leave you unable to shop for weeks. These everyday disruptions happen more often than we'd like to admit.
FEMA recommends maintaining at least a three-day emergency food supply for every household . That might sound daunting when you're already stretching your grocery budget. Here's what most people don't realize: building emergency food storage doesn't require a basement full of freeze-dried meals or a second mortgage. Recent supply chain disruptions have shown us that even in developed countries, food availability can become unpredictable quickly .
The families who weathered those disruptions most comfortably weren't necessarily the wealthiest. They were simply the ones who had started preparing, even in small ways. They'd picked up an extra bag of rice here, a few cans of soup there. Nothing dramatic or expensive—just consistent, small additions over time.
The real benefit of food storage goes beyond physical supplies. When you know you have backup food at home, the stress of unexpected events decreases dramatically. You're not making panicked grocery runs at midnight. You're not paying inflated prices during shortages. You're not wondering how you'll feed your family if the store runs out. Instead, you're calmly drawing from resources you've built gradually over time.
Budget-friendly preparation is absolutely possible. It starts with shifting your mindset from "I can't afford to prepare" to "I can't afford not to prepare." Even setting aside five dollars a week puts you ahead of most households. That's one less takeout coffee or one skipped convenience store snack. Small sacrifices create big security.
Building Your Starter Food Supply
Think of your emergency food storage like a financial savings account. You wouldn't try to save a year's expenses overnight. You shouldn't approach food storage that way either. The secret is focusing on shelf-stable basics that your family already eats and enjoys.
This isn't about buying strange survival foods you'd never normally touch. It's about strategically increasing the quantity of foods already rotating through your kitchen. You're not learning to eat freeze-dried astronaut meals. You're just buying more of what you already love.
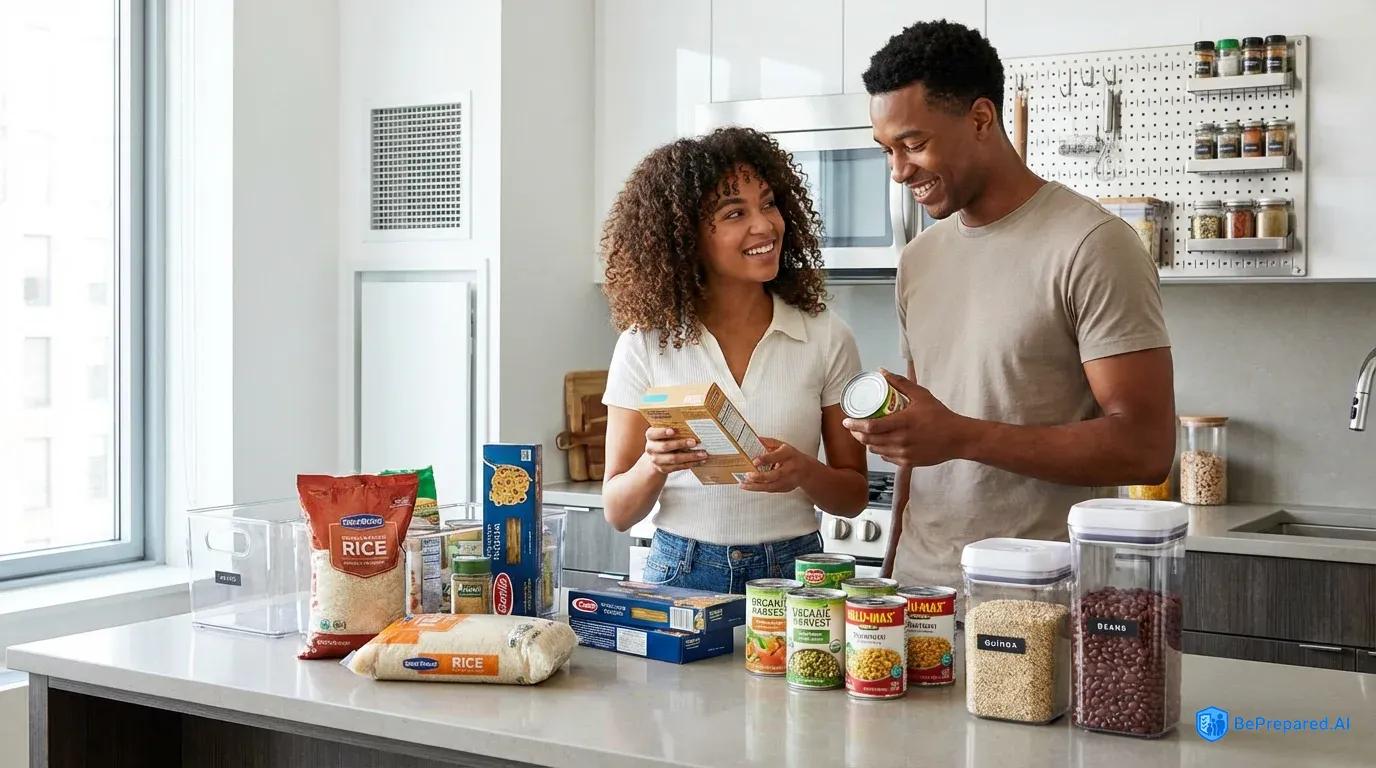
Start by taking inventory of what you actually consume in a typical week. Do you eat rice with dinner three times weekly? Pasta twice? Oatmeal for breakfast? Write it down. These everyday staples become the foundation of your emergency supply.
The beauty of foods like rice, beans, pasta, flour, and oats is their incredible shelf life when stored properly. Dry goods can remain safe and nutritious for many years in their original packaging when kept in cool, dry locations. Some sources suggest properly stored rice and beans may last decades, though exact timeframes vary based on storage conditions. Even without fancy storage containers, these items give you tremendous value for your investment.
Canned goods form the second pillar of your starter supply. Vegetables, fruits, soups, meats, and fish in cans offer convenience and nutrition. Most canned items remain safe well beyond their "best by" dates when stored properly, often lasting several years. Walk through your pantry and note which canned items you use regularly.
Maybe you make tuna sandwiches for lunch. Perhaps you use canned tomatoes for pasta sauce. You might keep chicken noodle soup on hand for sick days. Whatever you're already buying, simply buy extra. If you normally purchase two cans of black beans, buy four. This doubles your supply without changing your eating habits or requiring you to learn new recipes under stress.
Begin with a modest goal: one week's worth of food. For many families, this might mean an extra ten pounds of rice, five pounds of dried beans, a dozen cans of vegetables, six cans of protein like tuna or chicken, pasta, pasta sauce, peanut butter, and some comfort foods like crackers or cereal.
This starter supply might cost between forty and sixty dollars total. You don't need to buy it all at once. Add three or four items to your regular shopping trip each week. Within a month, you'll have built a meaningful buffer without straining your budget.
Once you've achieved one week, extend to two weeks. Then a month. Then three months. The progression happens naturally as you develop the habit of buying slightly more than you immediately need. Each milestone feels like an accomplishment because it is one.
Smart Storage Solutions for Small Spaces
Living in a small apartment or home doesn't disqualify you from building food storage. It just requires creativity. The space you need is probably already available. You're just not using it strategically yet.
Under-bed storage represents one of the most overlooked opportunities in small homes. Shallow plastic bins designed for under-bed use can hold dozens of canned goods or bags of rice and beans. If you have two beds in your home, that's significant storage capacity hiding in plain sight. Just ensure these bins are sealed to protect from dust and potential pests.
Vertical storage techniques multiply your capacity dramatically. The CDC recommends storing food in cool, dry places away from direct sunlight . That means your walls, closets, and even the backs of doors become viable storage locations. Install narrow shelving units in closets, laundry rooms, or pantries.
These shelves don't need to be deep. Six to eight inches accommodates most canned goods perfectly. Consider the often-wasted space above existing furniture. Sturdy shelving mounted above your washer and dryer, above closet hanging rods, or along the upper walls of a garage can hold substantial supplies while keeping floor space clear.
Temperature and humidity control extend your food's shelf life significantly. This makes your investment last longer. Basements often work well if they're dry, but avoid areas prone to flooding or excessive moisture. Heat is the enemy of food storage. Avoid placing supplies near furnaces, water heaters, or in hot attics. Room temperature or cooler is ideal.
If you live in a humid climate, consider adding desiccant packets to your storage containers. A small dehumidifier for your storage area can also help. These small investments protect your larger investment in food.
Kitchen cabinets can be reorganized to accommodate more. Use can organizers that angle cans forward, making it easy to see what you have while fitting more in the same space. Stack cans of the same size. Use shelf risers to create two levels where you previously had one.
The back of your pantry door can hold a hanging organizer for lighter items. Seasoning packets, instant meals, or snack bars fit perfectly. Every vertical inch counts when space is limited. Look up, not just out.
Rotation and Maintenance on a Budget
Building your food storage is only half the equation. Maintaining it prevents waste and ensures you actually have safe, edible food when you need it. Nobody wants to open their emergency supplies during a crisis only to find everything expired.
The first-in, first-out system (FIFO) is the gold standard for food rotation. It's simpler than it sounds. When you buy new items, place them behind or under older items of the same type. When you need that item for cooking, take from the front or top.
This natural rotation ensures you're always consuming the oldest food first. Nothing sits forgotten until it expires. You're constantly refreshing your supply without even thinking about it.
The University of Minnesota Extension recommends checking and rotating your food storage every six months . Mark your calendar for two annual "storage days." Perhaps choose the weekends when you change your clocks for daylight saving time. During these checks, pull everything out, verify expiration dates, reorganize, and make a shopping list for items running low.
This might sound tedious, but it typically takes less than an hour. It saves money by preventing waste. Think of it as a maintenance routine, like changing your car's oil. A small investment of time protects a larger investment.
Technology makes rotation even easier. Several free smartphone apps help track expiration dates and inventory. Apps like "NoWaste," "Pantry Check," or simple spreadsheet apps let you log what you have and when it expires. Set reminders for items approaching their dates.
Some people prefer low-tech solutions. A simple notebook listing items, quantities, and expiration dates works perfectly. It doesn't require batteries or updates. Choose whichever system you'll actually use consistently.
The most effective rotation strategy is incorporating your storage foods into regular meals. Don't think of your emergency food as completely separate from your daily eating. Use that stored rice for dinner tonight and replace it with fresh rice on your next shopping trip. Make soup with those canned vegetables and buy new ones.
This active rotation means your food storage is constantly refreshing itself. It always contains the newest possible items while nothing goes to waste. Your emergency food becomes an extension of your working pantry rather than a separate, static stockpile. You're eating from your storage and storing what you eat.
Download our free food storage rotation tracker to simplify this process and ensure nothing in your carefully built supply goes to waste.
- Week 3: Comfort Foods
- Add pasta, sauce, and comfort snacks - focus on items your family regularly eats
- Week 4: Pantry Basics
- Stock salt, sugar, cooking oil, and basic spices - essential for making stored food palatable
- Progress Tracker
- Simple checkbox system to mark weekly goals complete and track total servings stored
- Storage Tips
- Basic guidelines for proper storage locations and rotation dates for each food type
Building Your Supply: Monthly Budget Plan
The five-to-ten-dollar weekly investment strategy transforms emergency preparedness from overwhelming to achievable. That's the cost of two fancy coffee drinks or one fast-food meal. Redirect that small amount toward food storage, and within a year, you'll have a substantial supply.
The key is consistency rather than large, sporadic purchases. You don't need to drop hundreds of dollars at once. Small, regular additions add up faster than you'd expect.
Create a simple system. Each week, designate five to ten dollars of your grocery budget specifically for storage items. Don't just grab random sale items. Shop strategically with a list.
Week one might focus on grains like rice, pasta, and oats. Week two could target proteins like canned tuna, beans, and peanut butter. Week three might emphasize canned vegetables and fruits. Week four could cover comfort foods and cooking essentials like oil, salt, and sugar.
This rotation ensures you're building a balanced supply. You won't end up with twenty cans of corn and nothing else. You'll have variety, nutrition, and options.
Sale shopping accelerates your progress dramatically. Store brands often cost significantly less than name brands with identical nutritional content and shelf life. Sign up for your grocery store's loyalty program and check weekly ads before shopping.
When staples go on sale, that's the time to stock up. If pasta normally costs one dollar per box but drops to fifty cents, buy ten boxes instead of two. That five-dollar investment just bought you ten pounds of pasta that will last for years.
Warehouse stores like Costco or Sam's Club can offer substantial savings on large quantities. Even regular grocery stores have bulk bins where you can purchase exactly the amount you need of rice, beans, oats, and flour at lower per-pound prices. Buying larger quantities typically reduces your cost per serving.
Combine strategies for maximum impact. Use store sales, coupons, and bulk purchasing together. Buy generic brands of sale items in bulk. One savvy shopper reported building a three-month supply for her family of four by spending just an affordable amount monthly over several months.
She focused exclusively on sales and never paid full price. She prioritized store brands. Her total investment was modest for food that would have cost significantly more at regular prices. She proved that preparation doesn't require wealth—just patience and strategy.
Track your spending and progress. Keep a running list of what you've added to storage and how much you've spent. Watching your supply grow provides motivation to continue.
Some people find it helpful to calculate how many days of food they have stored. Knowing you've progressed from three days to one week to two weeks creates tangible evidence of your preparation efforts. This visible progress encourages you to maintain the habit even when budgets get tight.
Celebrate your milestones. When you hit one week of food storage, acknowledge that achievement. When you reach one month, treat yourself to something small. These celebrations reinforce the positive behavior and remind you why you're doing this.
Taking Your First Step Today
Emergency food storage isn't a luxury reserved for people with extra money and space. It's a practical safety net that anyone can build gradually. The barrier to entry is lower than most people think.
By starting with foods you already eat, you eliminate the learning curve. You're not forcing your family to adapt to strange new meals during a crisis. You're providing comfort and familiarity when they need it most.
Using creative storage solutions means your living situation doesn't limit your preparedness. Whether you live in a studio apartment or a house, you have more storage capacity than you realize. Look around with fresh eyes and you'll spot opportunities everywhere.
Maintaining proper rotation keeps your investment from going to waste. Your food stays fresh, safe, and ready. You're not throwing money away on expired items. You're building a living, breathing system that serves you daily.
Investing just a few dollars weekly creates security and peace of mind. The families who weather unexpected disruptions most successfully aren't the ones who panic-bought everything at once. They're the ones who started small, stayed consistent, and built their supplies one affordable step at a time.
Your journey toward food security can start today with a single extra can of beans or bag of rice. That small beginning matters more than you might think. It represents a shift in mindset from reactive to proactive. From anxious to prepared. From vulnerable to secure.
You don't need to have everything figured out right now. You don't need a perfect plan or a big budget. You just need to take one small action. Buy one extra item this week. Find one new storage spot in your home. Write down what you already have in your pantry.
Each small step builds momentum. Each small success proves you can do this. Before you know it, you'll look at your growing supply and realize you've created something meaningful. You've given yourself and your family a gift: the peace of mind that comes from being prepared.
The best time to start building your emergency food storage was last year. The second best time is right now. Don't wait for the next crisis to wish you'd started sooner. Don't let another month pass while you think about it. Take action today, even if that action feels small.
Because when the unexpected happens—and it will—you'll be ready. You'll be calm. You'll be secure. And you'll be grateful you started when you did.