Why You Need an Emergency Water Supply
Picture this: You wake up on a Tuesday morning, stumble to the kitchen for your coffee, and turn on the tap. Nothing. You try again—still nothing. You check your phone and see an emergency alert: the water treatment plant has been compromised by flooding, and the entire city's water supply is shut down indefinitely. Your mind races. How much water do you have in the house? Maybe a few bottles in the fridge? Suddenly, the simple act of making breakfast feels impossible.
This scenario isn't far-fetched. Every year, thousands of Americans face water emergencies due to natural disasters, infrastructure failures, contamination events, or power outages that disable pumping stations. According to FEMA, municipal water systems can be disrupted for days or even weeks following major disasters . When Hurricane Katrina struck, some areas went without running water for over a month. Winter storms in Texas left millions without water when treatment facilities froze. Chemical spills have forced entire communities to rely on bottled water for extended periods.
Here's the sobering truth: water is essential for survival, and going without it for even a few days can be life-threatening. Your body depends on water for every vital function—regulating temperature, transporting nutrients, removing waste, and maintaining blood pressure. A normally active person needs about three quarters of a gallon of fluid daily . Without adequate water, dehydration sets in quickly, especially during stressful emergency situations where you might be exerting yourself more than usual.
Water isn't just for drinking. You need it for cooking, basic hygiene, and sanitation. Try washing your hands, brushing your teeth, or flushing a toilet without running water, and you'll quickly realize how much we take this resource for granted. Having a well-planned emergency water supply means the difference between managing a crisis calmly and scrambling in panic when stores are mobbed and shelves are empty.
The good news? Building a water supply is one of the easiest preparedness steps you can take. You don't need special skills or expensive equipment. You can start small and build your supply gradually. Let's walk through exactly how to do it.
Calculate Your Water Storage Needs
Now that you understand why water storage matters, let's figure out exactly how much you need. The calculation is simpler than you might think, but getting it right makes all the difference.
Start with the baseline: FEMA recommends storing at least one gallon of water per person per day . This gallon covers drinking, food preparation, and basic hygiene. If you live in a hot climate or have family members who are pregnant, nursing, or have medical conditions, you'll want to increase this amount. An extra half gallon per person daily gives you a comfortable buffer.
Next, consider your household composition. A family of four needs four gallons per day at minimum. Multiply that by fourteen days—the recommended minimum storage duration—and you're looking at 56 gallons . That might sound like a lot, but remember that two weeks is actually a conservative estimate. Some disasters have left communities without clean water for much longer.
Don't forget your pets. Dogs and cats need water too. While exact requirements vary by size and activity level, planning for your pets ensures they stay healthy during an emergency. Add extra water to your total based on your pet's size—larger animals naturally need more than smaller ones.
Here's a practical example: The Martinez family consists of two adults, two children (ages 8 and 12), and a Labrador retriever. Their calculation looks like this: four people times one gallon equals four gallons daily, plus extra for the dog equals roughly five gallons per day. Multiply by fourteen days, and they need 70 gallons total. They round up to 75 gallons to build in a safety margin.
Write down your household calculation right now. Count every person and pet. Then multiply your daily total by fourteen. This number is your target. It might seem daunting, but you don't need to acquire it all at once—you can build your supply gradually over several weeks or months.
Start with a simple first step: pick up an extra case of bottled water next time you're at the store. That's it. Then add another case the following week. Before you know it, you'll have a solid foundation. Breaking this project into small, manageable pieces makes it feel less overwhelming and more achievable.
Ready to make this even easier? Download our free water storage calculation worksheet to determine your exact needs and track your progress as you build your supply.
Choosing Safe Storage Containers
Not all containers are created equal when it comes to storing drinking water. The wrong choice can lead to contaminated water that makes you sick during an emergency—exactly when you can't afford health problems. Understanding your options helps you make safe, cost-effective decisions.
Commercial bottled water offers the simplest solution, especially when you're just starting out. Unopened commercial water bottles have a shelf life of about two years , and they require zero preparation. The bottles are made from food-grade plastic designed specifically for water storage. You can simply buy cases at the grocery store, stack them in your designated storage area, and you're done. The downside? Cost and space. For a family needing 60 gallons, you're looking at nearly 500 individual bottles, which creates significant storage challenges and expense.
Food-grade water storage containers provide a more economical long-term solution. These containers, clearly marked as BPA-free and food-grade, come in sizes ranging from five-gallon jugs to 55-gallon drums . The five and seven-gallon containers strike the best balance for most families—they're portable enough to move when needed but large enough to store significant quantities. A family needing 60 gallons could manage with twelve five-gallon containers, which stack efficiently and cost considerably less than equivalent bottled water.
Here's what you absolutely must avoid: used milk jugs, juice containers, or any container that previously held non-water beverages. Milk proteins create an environment where bacteria thrive, and you cannot adequately sanitize these containers for water storage . Similarly, containers that held juice, soda, or other sugary drinks retain residues that promote bacterial growth. Even thorough washing doesn't eliminate these risks.
Glass containers work well for smaller quantities, but they're heavy, breakable, and impractical for large-scale storage. Stainless steel containers are excellent but expensive. For most families, purpose-made food-grade plastic water containers offer the best combination of safety, cost, and practicality.
When shopping, look for containers specifically labeled "food-grade" and "BPA-free." Check that they have tight-sealing lids—preferably with gaskets. Avoid containers with spigots unless you plan to use the water within a few months, as spigots can harbor bacteria. Clear or translucent containers let you inspect water quality, but they must be stored away from light to prevent algae growth.
If you're feeling overwhelmed by the choices, start with what's easiest: commercial bottled water. You can always add larger containers later as you get more comfortable with the process. There's no wrong way to begin—the important thing is taking that first step.
Where and How to Store Water
You've calculated your needs and chosen your containers—now comes the critical question of where to put everything. Proper storage location directly impacts water quality and longevity, so this decision deserves careful thought.
Temperature control is your first consideration. Stored water maintains its quality best when kept in cool, stable conditions. Extreme heat can affect plastic containers and water taste over time. Freezing won't harm water quality, but it can crack containers and make water inaccessible when you need it. Basements typically provide ideal conditions, staying naturally cool year-round in most climates. Interior closets, under-bed storage, and climate-controlled garages also work well.
Light exposure is your second concern. Direct sunlight promotes algae growth, even in sealed containers . That green slime you've seen in neglected water bottles? That's algae, and while not necessarily dangerous, it makes water unpalatable and indicates potential contamination. Store containers in dark locations—inside closets, under opaque tarps, or in cabinets. If you must store water in a garage with windows, cover your containers with dark plastic sheeting or blankets.
Chemical contamination presents a less obvious but serious risk. Keep water storage far away from gasoline, paint, pesticides, cleaning supplies, or any other chemicals. Plastic containers can absorb vapors over time, and you definitely don't want your emergency water tasting like gasoline. Some preppers recommend placing containers on wooden pallets or plastic shelving rather than directly on concrete, though the science on this varies.
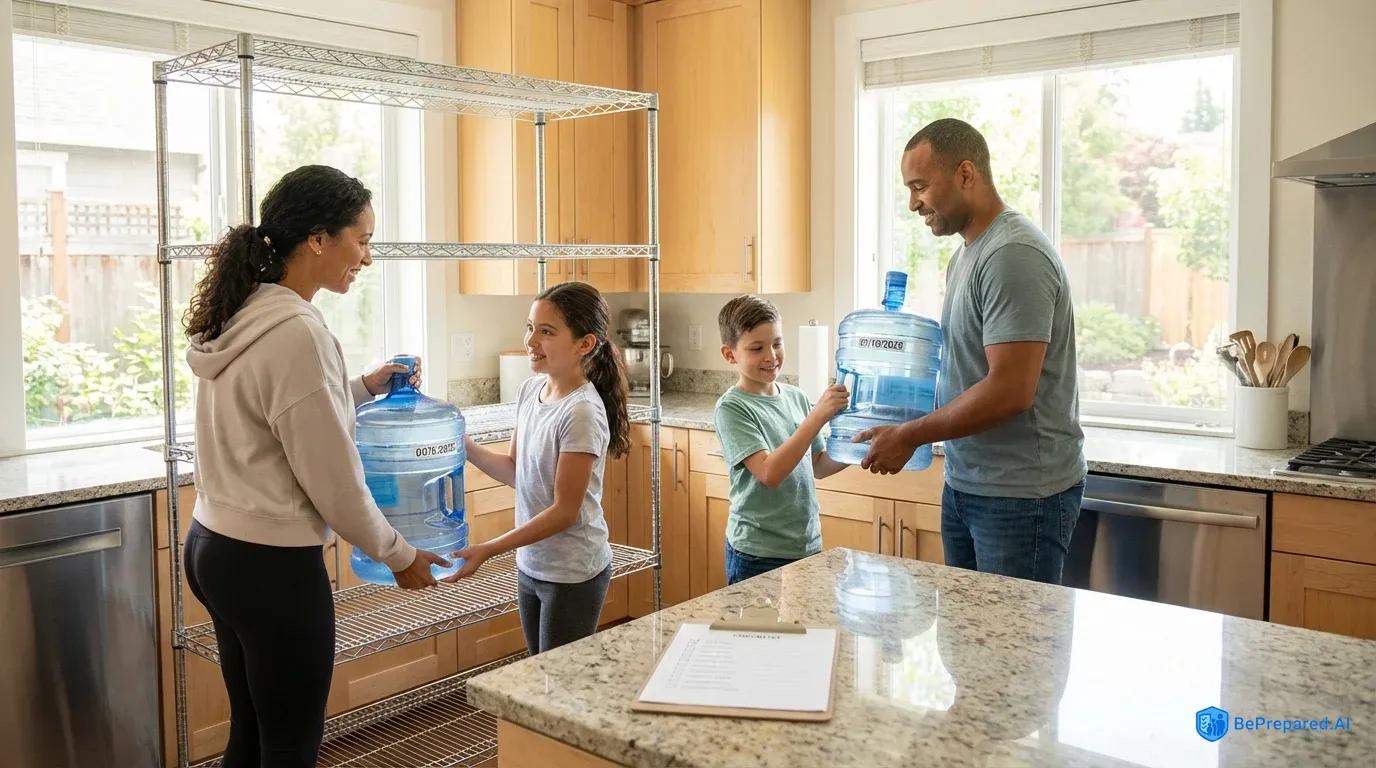
Consider accessibility during your storage planning. In an emergency, you need to reach your water supply quickly, possibly in the dark or while stressed. Don't bury containers behind mountains of other stored items. Create a dedicated water storage zone where everything is visible and accessible. Label each container with the storage date using permanent marker.
Distribution matters too. Don't put all your water in one location. If you have 60 gallons, consider keeping 40 gallons in the basement, 15 gallons in an upstairs closet, and 5 gallons in easily portable containers near your emergency kit. This strategy ensures you'll have access to water even if part of your home becomes inaccessible due to structural damage or flooding.
Think about your specific living situation. Apartment dweller? Under-bed storage and closet space work great. Have a basement? You've got plenty of options. Live in a small space? Vertical stacking of smaller containers maximizes your storage efficiency. Work with what you have—every household can find room for emergency water with a little creativity.
Maintaining Your Water Supply
Storing water is only half the battle—maintaining it properly ensures your supply remains safe and drinkable when disaster strikes. A neglected water supply can become contaminated or degraded, leaving you with 50 gallons of useless liquid when you need it most.
Start with a regular inspection schedule. Every three months, visually examine your stored water. Look for cloudiness, floating particles, or discoloration. Smell the water—it should be odorless. Check containers for cracks, bulging, or leaks. This quarterly inspection takes maybe 15 minutes but prevents nasty surprises during emergencies. Create a recurring calendar reminder so you don't forget.
The CDC recommends replacing personally stored tap water every six months . This might seem excessive, but it's the safest approach for water stored in home containers. Commercial bottled water lasts longer due to the sterilization process during bottling, but water you've stored yourself should follow this six-month rotation. Here's the practical approach: mark each container with the fill date, then rotate your supply twice yearly—perhaps when you change your smoke detector batteries in spring and fall.
Rotation doesn't mean dumping perfectly good water down the drain. Use your stored water for normal household purposes—watering plants, washing the car, filling the dog's bowl—then refill with fresh water. This rotation system keeps your supply fresh while eliminating waste. Some families keep a spreadsheet tracking which containers need rotation each month, making the process manageable rather than overwhelming.
Sanitization becomes necessary when you're filling containers for the first time or after they've been empty. Wash containers thoroughly with dish soap and hot water, then sanitize them using a bleach solution. The EPA recommends one teaspoon of unscented household chlorine bleach (5-6% concentration) per quart of water . Swirl this solution around the inside of the container, let it sit for two minutes, then rinse thoroughly with clean water. Allow containers to air dry completely before filling.
When filling containers with tap water, you can add a small amount of bleach for extra protection. Use 1/8 teaspoon of unscented bleach per gallon of water . This tiny amount prevents bacterial growth during storage without making water taste like a swimming pool. If your municipal water is already chlorinated—which most is—you can skip this step, though adding bleach provides an extra safety margin.
Keep detailed records of your water storage system. A simple notebook works fine. Record when you filled each container, when you last inspected it, and when rotation is due. Note any issues you discover during inspections. This documentation helps you spot patterns and ensures nothing gets forgotten.
After a few rotation cycles, the system becomes second nature. You'll spend maybe 30 minutes twice a year maintaining your entire water supply. That's a small time investment for the peace of mind knowing you're prepared for whatever comes your way.
Taking Your First Step Today
Building an emergency water supply might have seemed complicated before you started reading, but now you can see it's actually straightforward. You don't need to do everything at once. You don't need to spend a fortune. You just need to start.
Here's your simple action plan: Calculate how much water your household needs using the formula we covered. Write that number down. Then pick up one case of bottled water this week. That's your first step. Next week, grab another case or invest in a five-gallon container. Keep going until you hit your target number.
Store your water somewhere cool and dark. Check it every few months. Rotate it twice a year. That's the entire system. You've got this.
The families who weathered those Texas winter storms with water supplies already in place didn't have special knowledge or unlimited budgets. They just took the time to prepare before the crisis hit. Now it's your turn to join them. Your future self—the one who stays calm and hydrated during the next water emergency—will thank you for starting today.