Why You Need Food Preservation Skills When the Power Goes Out
Picture this: You're three days into an unexpected power outage after a severe storm. The ice in your cooler has melted, and you're staring at a refrigerator full of food that's becoming more questionable by the hour. That package of chicken you bought on sale? Gone. The fresh vegetables from your weekend farmer's market trip? Wilting into mush. By the time the lights flicker back on, you've thrown away over $150 worth of groceries, joining the millions of households that face this same frustrating scenario every year.
Here's the truth that most people discover too late: much of this waste is completely preventable. When you understand even basic preservation methods, you transform from someone who watches helplessly as food spoils into someone who can confidently maintain a safe, nutritious food supply regardless of whether the power is on or off. You don't need to become an expert overnight or invest in expensive equipment. Just a few simple techniques can make all the difference.
The beauty of traditional food preservation is that it doesn't depend on modern conveniences. Long before refrigeration existed, people kept food safe through techniques that worked with nature rather than against it. These same methods remain just as effective today, and they don't require specialized training. Whether you're facing a brief outage or an extended emergency, having these skills in your back pocket means you'll never again experience that sinking feeling of watching perfectly good food go to waste while your family needs it most.
Understanding Food Safety Without Refrigeration
Food safety during power outages hinges on understanding one critical concept: the temperature danger zone. This zone exists between 40°F and 140°F (4°C-60°C), where bacteria multiply at alarming rates . When your refrigerator stops working, food enters this danger zone within hours, not days. Perishable items like meat, dairy, and cooked foods become breeding grounds for pathogens that can cause serious illness.
The speed of spoilage varies dramatically depending on the food type and storage conditions. Highly perishable items like ground meat or opened milk containers become unsafe within two hours at room temperature. Hard cheeses and butter show more resilience, potentially remaining safe for several days if kept cool. Eggs in their shells can survive surprisingly long without refrigeration, though their quality degrades. Understanding these differences helps you prioritize which foods to consume first and which can wait.
Recognizing spoilage signs becomes your most important safety tool when refrigeration fails. Trust your senses, but understand their limitations. Visible mold, off-putting odors, and unusual textures are obvious red flags. However, dangerous bacteria don't always announce themselves with clear warning signs. Some contaminated foods look and smell perfectly normal. This is why time and temperature guidelines matter more than appearance alone.
Dry goods offer your most reliable emergency food source because they exist outside the danger zone entirely. Dry goods like rice, beans, pasta, flour, and sugar can last anywhere from four to twelve months . These shelf-stable foods become the foundation of your no-power food security system. Canned goods join this category, remaining safe for extended periods even without climate control, though extreme heat can affect quality over time.
The key to food safety without refrigeration lies in creating conditions that slow or prevent bacterial growth. This means keeping foods as cool as possible, minimizing exposure to air and moisture, and using preservation methods that create hostile environments for microorganisms. When you understand what bacteria need to thrive—warmth, moisture, and time—you can systematically remove these conditions and keep food safe even when modern conveniences fail.
Some foods are remarkably forgiving when it comes to storage. Salt, sugar, and honey can be stored indefinitely if kept free from moisture . These staples become valuable not just as ingredients but as preservation tools themselves. Foods stored at room temperature are safe indefinitely if properly sealed and dry . This means your sealed packages of pasta, rice, and dried beans don't require any special conditions beyond keeping them away from moisture and pests.
Simple Preservation Methods Anyone Can Use
Drying and dehydrating stand as perhaps the oldest and most accessible preservation methods available. The principle is elegantly simple: remove moisture, and bacteria cannot multiply. You don't need fancy equipment to start drying foods. Sun-drying works in climates where temperatures reach 85°F or higher . Slice fruits or vegetables thinly, arrange them on clean screens or racks, and place them in direct sunlight with good air circulation. Cover with cheesecloth to protect from insects while allowing moisture to escape.
For those without consistent hot weather, air-drying herbs and certain vegetables works indoors. Bundle herbs like oregano, thyme, or rosemary and hang them upside down in a warm, dry space with good airflow. Thinly sliced peppers, mushrooms, and green beans can be strung on thread and hung near (but not too close to) a heat source. The process takes longer than sun-drying, but patience rewards you with shelf-stable foods that rehydrate beautifully when you need them.
The best part about drying? You can start with just one or two herbs from your garden or a single batch of apple slices. There's no need to preserve everything at once. Small successes build your confidence and skills naturally.
Salt preservation has sustained civilizations for thousands of years, and it remains remarkably effective today. Salt works through osmosis, drawing moisture out of food while creating an environment where harmful bacteria cannot survive. For basic salt preservation, you'll use either dry salting or brine methods. Dry salting works well for fish and some meats—layer the protein with generous amounts of salt, ensuring complete coverage, and store in a cool location. The salt pulls moisture out over several days, creating a preserved product that can last for extended periods when stored properly.
Brining involves submerging foods in a salt-water solution. A common starting point is to use enough salt to make the water taste distinctly salty—roughly the salinity of seawater. This method works particularly well for vegetables and some meats. The brine must completely cover the food, and you'll need to weigh items down to keep them submerged. Check the brine regularly and replace it if it becomes cloudy or develops off odors. Properly brined foods develop complex flavors while remaining safe for storage.
Don't worry about getting everything perfect on your first try. Salt preservation is forgiving, and you'll develop a feel for the right ratios as you practice. Start with small batches of vegetables you enjoy, and experiment until you find what works for your taste.
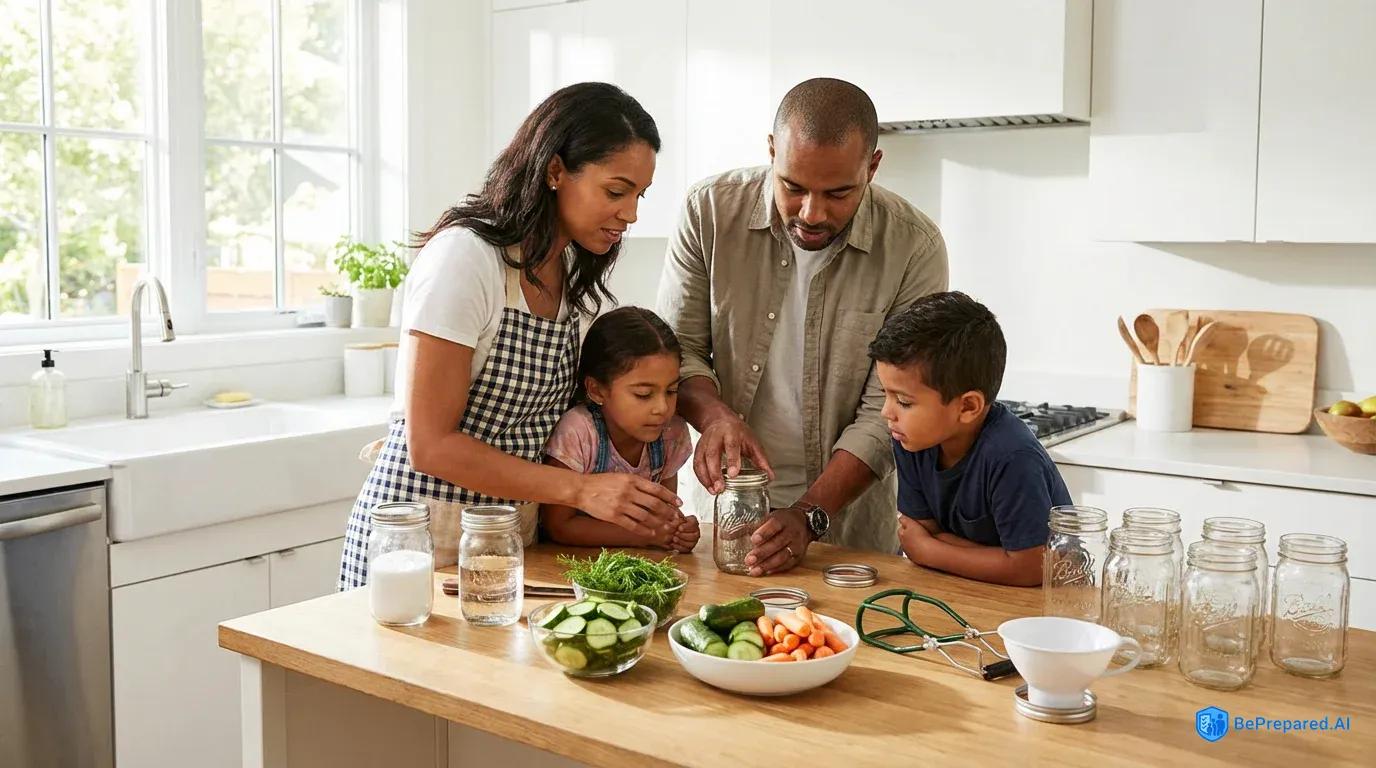
Vinegar pickling provides another straightforward preservation option that requires minimal equipment. Vinegar's high acidity creates an environment hostile to most bacteria. Basic pickling involves heating vinegar with salt and optional spices, then pouring this hot liquid over prepared vegetables packed in clean jars. The acid penetrates the food, lowering its pH to safe levels. Cucumbers, onions, peppers, and green beans all respond beautifully to this treatment.
You don't need to process pickles in a water bath if you plan to store them in a cool location and consume them within a few weeks. However, for longer storage without refrigeration, proper canning techniques become important. The combination of acid and proper sealing creates shelf-stable foods that can last for months. Start with simple recipes using proven ratios of vinegar to water—typically one-to-one—and experiment with different spices to develop flavors your family enjoys.
Pickling is one of the most rewarding preservation methods because you see results quickly. Within days, you'll have tangy, flavorful vegetables that taste nothing like store-bought versions. Your first successful jar of pickles will give you the confidence to try more ambitious projects.
Root cellaring represents the most low-tech preservation method of all, requiring nothing more than a cool, dark, humid space. Traditional root cellars were underground rooms that maintained naturally cool temperatures year-round. Most modern homes don't have dedicated root cellars, but you can approximate these conditions in unheated basements, crawl spaces, or even buried containers. Root vegetables like potatoes, carrots, beets, and turnips thrive in these environments, lasting months longer than they would at room temperature.
The secret to successful root cellaring lies in managing three factors: temperature, humidity, and air circulation. Different vegetables have different preferences. Potatoes and root vegetables prefer high humidity and temperatures just above freezing. Winter squash and pumpkins want it slightly warmer and drier. Never wash root vegetables before storage—the soil clinging to them provides protection. Check stored items weekly, removing any that show signs of spoilage before they affect their neighbors.
You might already have a suitable space in your home without realizing it. An unheated garage corner, a basement stairwell, or even a consistently cool closet can work. The goal is finding the coolest spot in your home that doesn't freeze.
Creating Your No-Power Food Storage System
Building an effective no-power food storage system starts with understanding rotation principles. The concept is straightforward but often overlooked: use the oldest items first while continuously adding fresh supplies to the back. This "first in, first out" approach prevents food from aging past its prime. Consistent rotation helps ensure nothing sits forgotten until it's too late to use.
Set up your storage area to make rotation natural rather than a chore. Arrange shelves so you can easily access items from the front while adding new purchases from behind. Label everything with purchase or preservation dates using a permanent marker. Create a simple inventory system—even just a notebook listing what you have and when you acquired it—that you update monthly. This small investment of time prevents the common scenario of discovering expired food you forgot you owned.
Think of your storage system as a living pantry rather than a static stockpile. You're not hoarding food—you're creating a flowing system where items move through regularly. This approach keeps everything fresh and usable.
Container selection makes an enormous difference in how long your preserved foods remain viable. Glass jars with tight-fitting lids excel for most preservation methods, offering the advantage of seeing contents at a glance while protecting from pests and moisture. Food-grade plastic buckets with gamma seal lids work wonderfully for bulk dry goods like rice and beans. Avoid containers that previously held non-food items, as residual chemicals can contaminate your supplies. Metal containers work well for some applications but can react with acidic foods.
You don't need to buy all new containers at once. Start by saving glass jars from store-bought items like pasta sauce or pickles. Wash them thoroughly, and you have free, effective storage containers. As your preservation activities expand, you can gradually invest in additional containers that suit your specific needs.
Temperature and humidity control separate successful long-term storage from disappointing failures. Your storage location ideally stays consistently cool and maintains moderate humidity levels. Many experts suggest keeping storage areas between 50°F and 70°F when possible, though cooler is generally better for extending shelf life. Extreme temperature swings accelerate food degradation, while excessive moisture invites mold growth. Basements often provide better conditions than kitchen pantries, which experience daily temperature fluctuations from cooking.
Dark storage areas maintain food quality longer than those exposed to light, which degrades nutrients and can affect flavor. If your storage space has windows, consider covering them or storing food in opaque containers. Even indirect light exposure over months can impact food quality.
Pay attention to what you're storing near your food supplies. Keep them away from chemicals, cleaning supplies, and anything with strong odors that foods might absorb. Elevate containers slightly off concrete floors, which can transfer moisture and cold. Use pallets, wooden boards, or metal shelving to create air circulation underneath. Check your storage area seasonally, adjusting for changes in temperature and humidity that come with different weather patterns.
This ongoing attention ensures your carefully preserved foods remain safe and nutritious when you need them most. A quick monthly check takes just minutes but can save you from unpleasant surprises down the road.
Your First Steps Forward
The journey to food security doesn't require dramatic lifestyle changes or overwhelming commitments. Start with one simple preservation method that appeals to you. Maybe it's drying herbs from your windowsill or making a single jar of pickled vegetables. Each small success builds your confidence and skills.
Choose a preservation method that matches your current living situation and available time. Apartment dwellers might start with small-batch vinegar pickling or drying herbs. Those with basements can experiment with root cellaring. The key is beginning with something manageable rather than attempting everything at once.
As you gain experience, you'll naturally expand your repertoire. You'll discover which methods you enjoy and which foods your family actually eats. This personalized approach creates a sustainable practice rather than a temporary project. Your preserved foods become part of your regular meal planning, not just emergency supplies gathering dust.
Track your successes and learn from your experiments. Keep notes about what worked well and what you'd do differently next time. This simple practice accelerates your learning and helps you refine your techniques. Before long, you'll have developed instincts about preservation that serve you reliably.
Start your food preservation journey with our printable storage guide that helps you track what you've preserved, when you preserved it, and optimal storage conditions for each method. Taking control of your food security doesn't require perfection—just consistent application of these time-tested techniques that have sustained families through countless emergencies throughout history. Your future self will thank you for the skills you're building today.