Understanding Nuclear Emergency Food Storage Requirements
Picture this: the emergency alert sounds on your phone, and you have fifteen minutes to shelter in place. The last thing you want to be thinking about is whether you have enough food to sustain your family through the critical days ahead. This scenario, however unsettling, highlights why understanding nuclear emergency food storage isn't just recommended—it's essential for survival.
When radiation is a threat, the rules of emergency preparedness shift dramatically. Unlike preparing for a hurricane or winter storm where you might run to the store beforehand, a nuclear emergency demands that everything you need is already in your home, properly stored, and ready to sustain you without leaving your shelter. FEMA establishes a minimum 14-day food supply requirement for nuclear emergencies . This timeline isn't arbitrary. During the initial two weeks following a nuclear event, radiation levels decrease significantly through natural decay, but they remain dangerous enough that sheltering in place becomes your primary protection strategy.
The 14-day threshold accounts for the time needed for initial radiation to decrease to safer levels, for emergency services to establish distribution networks, and for authorities to assess contamination zones. During this period, you cannot rely on grocery stores, restaurants, or even community aid stations. Your home becomes your complete life-support system, and the food you've stored becomes your lifeline.
What sets nuclear emergency food storage apart from general emergency preparedness is the critical consideration of radiation-safe packaging. Radioactive particles, often called fallout, settle on surfaces and can contaminate exposed food and water. However, food in sealed containers and factory-sealed packages provides protection against radioactive contamination . The packaging itself acts as shielding, preventing radioactive particles from reaching the food inside. This is why commercially packaged foods are strongly preferred over bulk items stored in permeable containers. A can of soup that's been sitting in your pantry for months becomes infinitely more valuable than fresh produce or bulk grains that could be exposed to fallout.
The third pillar of nuclear emergency food storage revolves around no-power cooking and preparation capabilities. Nuclear events often trigger cascading infrastructure failures. The electrical grid may go down. Natural gas lines might be shut off for safety. Your microwave, electric stove, and even your refrigerator become useless appliances. This reality fundamentally shapes what foods you should store and how you should prepare to use them. Food stocks should include items requiring no refrigeration, preparation, or cooking . While you might have alternative heating methods available—and we'll explore those later—your core food supply should function even if every power source fails.
Understanding these three requirements—the 14-day minimum supply, radiation-safe packaging, and no-power preparation needs—creates the foundation for building an effective nuclear emergency food storage system. These aren't suggestions or nice-to-haves; they're the non-negotiable elements that separate a functional survival plan from a dangerous illusion of preparedness. The food you select, how you store it, and how you organize your supply all flow from these fundamental principles.
- Shelf-Stable Proteins
- 7 lbs total: Canned meats, dried beans, nuts (1/2 lb per day)
- Grains & Starches
- 14 lbs total: Rice, pasta, cereal, crackers (1 lb per day)
- Canned Vegetables
- 14 cans: Mixed varieties, 1 can per day for essential nutrients
- Comfort Foods
- 2 lbs total: Coffee, tea, chocolate, hard candy (minimal daily ration)
Essential Food Items Checklist
Building your 14-day nuclear emergency food supply requires strategic selection. You're not just filling a pantry—you're creating a complete nutrition system that functions under the worst possible conditions while maintaining morale during an extraordinarily stressful period.
Ready-to-Eat Protein Sources
The cornerstone of any nuclear emergency food supply is protein that requires absolutely no preparation. Canned meats lead this category for good reason. Canned chicken, turkey, ham, and tuna provide complete proteins with extended shelf lives. Canned foods remain safe and nutritious for 2-5 years beyond their best-by dates when seals are intact . The can itself provides radiation protection, and these proteins can be eaten directly from the container if necessary, though they're more palatable when incorporated into simple meals.
Vienna sausages, while not gourmet fare, pack significant protein and calories into small, easily stored cans. Spam and other canned luncheon meats offer similar benefits with the added advantage of being pre-seasoned and genuinely edible at room temperature. Don't overlook canned fish beyond tuna—salmon, sardines, and mackerel provide omega-3 fatty acids and come in pop-top cans that require no can opener, a critical consideration if tools are misplaced during a chaotic evacuation to your shelter area.
Shelf-stable protein alternatives expand your options beyond traditional canned meats. Peanut butter, with its combination of protein, healthy fats, and calories, serves as both a standalone food and a versatile ingredient. Check the label for specific shelf life information, as this varies by brand and formulation. Canned beans—black beans, kidney beans, chickpeas, and refried beans—provide plant-based protein that can be eaten cold, though they're admittedly more appealing when warmed. Dried beans also work but require extended cooking time and precious water, making them less ideal for the initial emergency period.
Carbohydrate and Energy Foods
Canned soups and stews represent the perfect intersection of nutrition, ease of preparation, and psychological comfort. A can of beef stew or chicken noodle soup eaten cold isn't ideal, but it's substantially more satisfying than many alternatives. These items typically contain a balance of protein, carbohydrates, and vegetables, making them nearly complete meals. Stock varieties that can be eaten as-is; cream-based soups generally taste better than broth-based when consumed at room temperature.
Crackers and shelf-stable bread products provide essential carbohydrates and create the foundation for simple meals. Saltine crackers, while basic, remain edible for months when stored properly and pair with canned meats, peanut butter, or cheese spreads. Hardtack or survival crackers, specifically designed for long-term storage, last years and provide reliable calories even if they lack excitement. Canned bread, a lesser-known option, stays fresh for extended periods and offers genuine bread texture without requiring any preparation.
Pasta and rice, when paired with appropriate sauces, create filling meals. However, these require cooking water and heat, making them secondary choices for nuclear emergency storage. If you include them, ensure you also have canned pasta meals like ravioli or spaghetti that are ready-to-eat. These canned pasta options might not match homemade quality, but they deliver carbohydrates and calories without any preparation requirements.
Fruits and Vegetables
Canned fruits provide essential vitamins, natural sugars for energy, and a welcome change from savory foods. Peaches, pears, fruit cocktail, and pineapple all store well and taste good cold. Choose fruits packed in juice rather than heavy syrup when possible—they're less cloying when you're eating them frequently, and the juice provides additional hydration. Applesauce in individual containers or larger jars offers similar benefits with the added advantage of being easy to consume even if you're feeling unwell from stress or radiation sickness.
Canned vegetables complete the nutritional picture. Corn, green beans, carrots, peas, and mixed vegetables maintain their nutritional value for years when properly canned. While cold canned vegetables aren't particularly appealing, they're edible and provide necessary vitamins and minerals. Canned tomatoes and tomato products—sauce, paste, and diced tomatoes—add flavor to other foods and can be consumed as-is if needed.
Comfort Foods and Morale Boosters
Never underestimate the psychological importance of comfort foods during extended emergencies. Stress, fear, and confinement take enormous mental tolls, and familiar, enjoyable foods provide crucial psychological relief. Include items your family actually likes, not just foods that check nutritional boxes.
Cookies, crackers, candy bars, and other treats might seem frivolous, but they serve genuine purposes. A chocolate bar on day ten of sheltering in place might provide the emotional boost needed to maintain morale and rational thinking. Instant coffee, tea bags, hot chocolate mix, and drink flavoring packets transform plain water into something more bearable and provide small daily rituals that maintain normalcy.
Canned puddings, fruit cups, and individual dessert items designed for lunch boxes offer portion-controlled treats that don't require refrigeration. Granola bars, protein bars, and energy bars provide quick calories and the convenience of grab-and-go eating if you need to move to different areas of your shelter.
Beverages and Hydration Support
While water is your primary hydration concern, shelf-stable beverages add variety and nutrition. The American Red Cross recommends at least 3 days of non-perishable food , but for nuclear emergencies, you need to extend this significantly. Store 1 gallon of water per person per day for at least 3 days , though many experts recommend extending this to match your 14-day food supply when possible.
Canned or boxed juices provide vitamins and calories. Powdered drink mixes, electrolyte replacement powders, and sports drink mixes help maintain hydration when stress and fear might suppress thirst signals. Shelf-stable milk boxes or canned evaporated milk enable cereal consumption and provide calcium and vitamin D.
Special Dietary Considerations
Account for specific dietary needs within your household. If someone requires gluten-free foods, ensure those options are included. Baby food, formula, and infant supplies need special attention—these items have specific expiration dates that require stricter monitoring. Pet food also qualifies as essential; your animals depend on you completely during emergencies.
The key to building this checklist is balance: nutritional completeness, preparation flexibility, genuine palatability, and psychological sustainability across 14 days of high-stress confinement. A proper rotation system, which we'll address later, ensures these foods remain fresh and ready when needed.
Storage Requirements and Organization
Having the right foods means nothing if they're improperly stored, inaccessible during an emergency, or degraded by poor storage conditions. Your nuclear emergency food supply requires thoughtful organization that balances preservation, accessibility, and space efficiency.
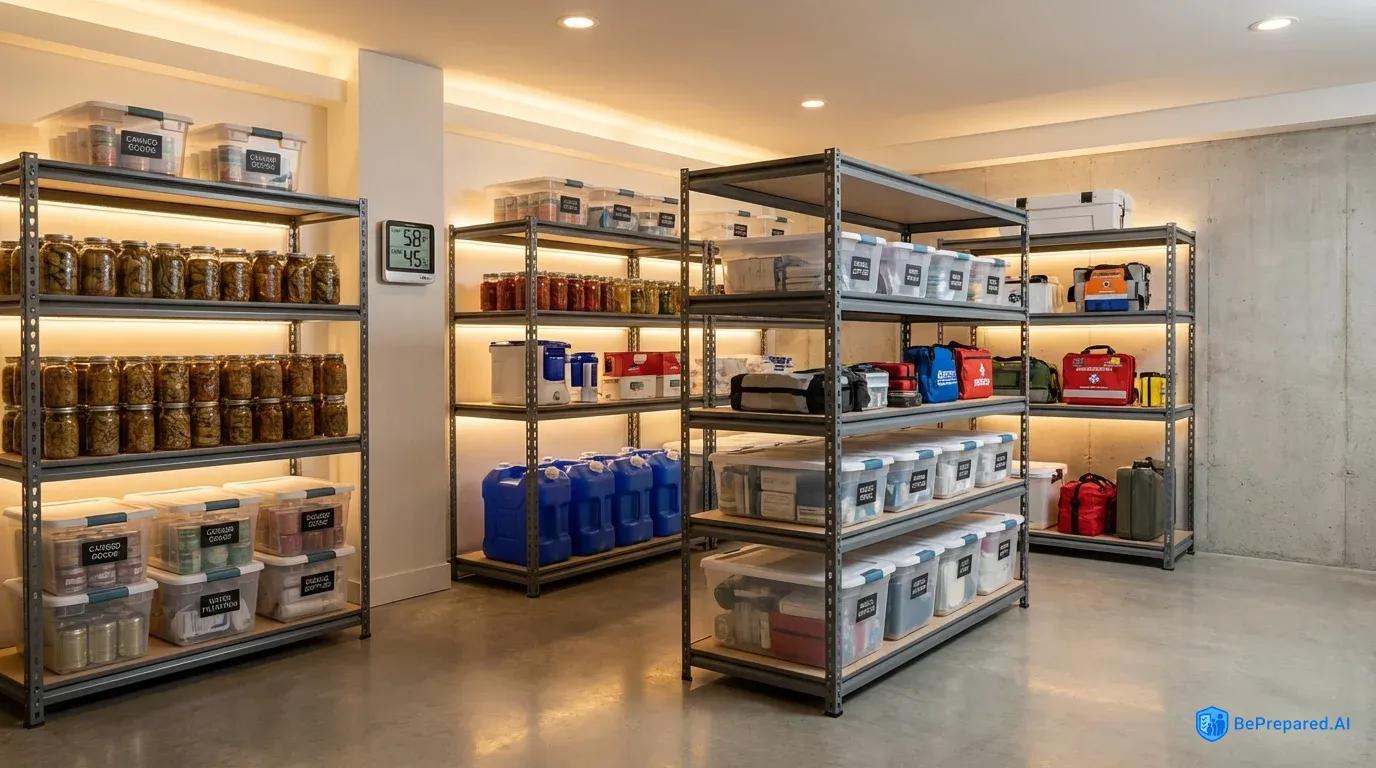
Temperature control stands as one of the most important factors in extending shelf life and maintaining food safety. Cool, stable temperatures help preserve food quality and nutritional value. A basement storage area typically provides cooler, more stable temperatures than a kitchen pantry, making it preferable for long-term emergency supplies. However, avoid areas that freeze—repeated freeze-thaw cycles damage canned goods by potentially compromising seals and degrading food texture.
Heat sources present particular challenges. Storing emergency food near furnaces, water heaters, or in attics where summer temperatures soar dramatically shortens shelf life and can render foods unsafe. That convenient space above your garage might seem perfect for emergency supplies, but if temperatures regularly exceed 85°F, you're essentially degrading your emergency food supply. Higher temperatures accelerate chemical reactions that reduce nutritional value and can compromise can integrity.
Moisture prevention ranks among your top priorities. Humidity causes can corrosion, compromises packaging integrity, and creates conditions for bacterial growth in any foods that become exposed. Store your emergency food supply in the driest area available, away from plumbing lines, water heaters, and exterior walls that might develop condensation. If your storage area has humidity concerns, use desiccant packets or moisture absorbers designed for food storage areas. These simple additions can prevent the heartbreaking discovery that your carefully accumulated emergency supply has corroded cans and compromised seals.
Elevate stored food off concrete floors, which can transfer moisture and cold into containers. Simple wire shelving units or wooden pallets create airflow underneath while keeping supplies organized and visible. This elevation also provides protection against minor flooding from water heater failures or plumbing issues—disasters that can destroy your nuclear emergency supplies before you ever need them for their intended purpose.
Organizational systems transform a pile of cans into an accessible, manageable emergency resource. The most effective approach uses clearly defined zones: proteins in one area, fruits and vegetables in another, ready-to-eat meals in a third section. Within each zone, arrange items with the oldest dates in front and newest in back—the classic first-in, first-out (FIFO) rotation system that grocery stores use.
Label everything clearly. While most commercial packaging includes dates, adding your own labels with purchase dates and rotation schedules helps maintain the system. Use a permanent marker to write purchase dates on can tops, making them visible without moving items. Some preparedness experts color-code supplies by expiration year—blue dot for items expiring in 2025, red for 2026, and so forth. This visual system allows quick assessment of what needs rotation without checking individual dates.
Create an inventory list that lives in two places: with your stored food and in your household documents. This redundancy ensures you can check supplies without accessing storage and provides backup if one copy is lost. The inventory should include item names, quantities, purchase dates, and expiration dates. Update this list whenever you add or remove items—a discipline that seems tedious until you're actually facing an emergency and need to know exactly what resources you have available.
Accessibility during an actual emergency deserves special consideration. Your nuclear emergency food supply should be reachable without moving heavy objects, navigating complex storage systems, or requiring tools you might not have available. If your shelter-in-place location is your basement, your emergency food should be there too, not in a garage that might be inaccessible or contaminated. If you're sheltering in an interior room on your main floor, consider keeping a portion of your supply there or ensuring you can safely transport supplies before radiation levels become dangerous.
No-Power Food Preparation Methods
When the power fails and you're sheltering in place, your ability to prepare food safely becomes a critical survival skill. Understanding multiple preparation methods provides flexibility and ensures you can maintain nutrition even under varying circumstances.
Step 1: Assess your cold-consumption options first. Before considering any heating method, identify which foods in your supply require absolutely no preparation. Open your inventory mentally or physically and categorize items: completely ready-to-eat (canned fruits, vegetables, meats, soups), requires mixing only (drink powders, instant foods with cold water options), and requires heating for safety or palatability. Your completely ready-to-eat category becomes your fallback position if all other methods fail. Practice eating these foods cold during a test run—you'll discover which items are genuinely acceptable cold and which are merely theoretically edible. This knowledge shapes future purchasing decisions and helps you understand your true capabilities.
Step 2: Implement safe can-opening procedures. When you're stressed, possibly in dim lighting, and dealing with multiple meals daily, can opener failures become genuine emergencies. Maintain multiple can openers in different styles: a traditional manual opener, a military-style P-38 or P-51 opener, and at least one multi-tool with can-opening capability. Store these with your food supply, not in a kitchen drawer you might not be able to access. Practice using each type—the P-38 opener, while compact and reliable, requires technique that's not intuitive. Learning during an emergency wastes time and risks injury.
Step 3: Establish alternative heating methods safely. If you have the capability and safety conditions allow, heating food dramatically improves both nutrition absorption and morale. However, every heating method in a nuclear emergency scenario carries risks that must be carefully managed. Portable camping stoves using butane or propane canisters provide controllable heat for cooking. These work well but require ventilation—carbon monoxide poisoning is a real danger when using any combustion-based heating indoors. If you're sheltering in a sealed room for radiation protection, you cannot safely use combustion heating inside that space. Instead, you might heat food in a different area with ventilation, then bring it to your shelter area, accepting that it will cool during transport.
Step 4: Use flameless heating alternatives when appropriate. Flameless ration heaters (FRHs), the technology used in military MREs, provide heating without flames, smoke, or significant ventilation requirements. These chemical heaters activate when water is added, generating enough heat to warm a meal pouch in 10-15 minutes. They're single-use and require water, but they offer genuine hot meals without combustion risks. Stock sufficient quantities if you plan to rely on this method—you'll need one per heated meal, which adds up quickly over 14 days for multiple people.
Step 5: Master room-temperature food assembly techniques. Create satisfying meals from unheated ingredients by thinking of food assembly rather than cooking. Canned chicken, drained and mixed with mayonnaise packets (stock shelf-stable condiment packets), served on crackers creates a recognizable chicken salad without any heating. Canned beans combined with canned corn and salsa packets make cold bean salad. Peanut butter spread on shelf-stable bread or crackers provides familiar sandwiches. These assembly techniques transform individual ingredients into meals that feel more normal and satisfying than eating components separately.
Step 6: Maintain strict food safety protocols. Without refrigeration and potentially without running water, food safety requires extra vigilance. Once you open any canned item, plan to consume it promptly if unrefrigerated, as bacteria can multiply at room temperature. Use hand sanitizer before handling food if you cannot wash hands with soap and water. Designate one clean area for food preparation, keeping it separate from waste disposal and other potentially contaminated activities. Wipe down surfaces with disinfecting wipes before food preparation. These practices prevent foodborne illness that could be catastrophic when medical care is unavailable.
Step 7: Conserve water while maintaining cleanliness. Every food preparation method should minimize water usage since your water supply is also limited. Use disposable plates, cups, and utensils if you have them—this eliminates dishwashing water requirements. If you must reuse items, wipe them thoroughly with paper towels before washing, reducing the water needed for actual cleaning. Consider the water content of your foods too; soup and fruits in juice provide both nutrition and hydration, making them valuable when water is precious.
Pros and Cons of Different Food Storage Approaches
Understanding the trade-offs between various storage strategies helps you make informed decisions about your nuclear emergency food supply.
Commercial Emergency Food Kits
Pros: Pre-packaged emergency food kits offer convenience and simplicity. They come with calculated portions for specific timeframes, require minimal planning, and typically include foods specifically designed for long-term storage. The packaging is compact and often includes preparation instructions.
Cons: These kits cost significantly more per serving than building your own supply from grocery store items. Many contain freeze-dried foods that require water for preparation, which may be problematic if your water supply is limited. Your family might not find the flavors appealing, and you won't know this until you're actually using them in an emergency.
DIY Grocery Store Approach
Pros: Building your supply from regular grocery items costs less and allows you to select foods your family already enjoys. You can rotate items into regular meals easily, ensuring nothing goes to waste. This approach offers flexibility to accommodate dietary restrictions and preferences.
Cons: This method requires more planning, organization, and ongoing maintenance. You need to track expiration dates across many different products. Storage space requirements may be larger since commercial packaging isn't optimized for long-term storage density.
Hybrid Strategy
Pros: Combining commercial emergency foods with grocery store staples provides both convenience and customization. You can use commercial kits as your backup layer while maintaining familiar foods as your primary supply. This approach offers redundancy if one supply type becomes compromised.
Cons: Managing two different systems requires more organizational effort. The cost sits between the two approaches but can still be significant. You need adequate storage space for both types of supplies.
Maintenance and Rotation Schedule
A nuclear emergency food supply isn't a one-time project you complete and forget—it's a living system requiring regular attention to remain effective when you need it most.
Step 1: Conduct monthly visual inspections of your entire supply. Set a recurring calendar reminder for the same day each month—first of the month, your payday, whatever you'll remember. During this inspection, look for obvious problems: bulging cans indicating bacterial contamination, rust spots suggesting moisture issues, pest evidence like droppings or chewed packaging, and any environmental changes like new water stains or temperature fluctuations. This monthly rhythm catches problems early, before they compromise significant portions of your supply. Bring a flashlight and actually look at everything; don't just glance at the front row.
Step 2: Check and record expiration dates quarterly. Every three months, go beyond visual inspection to systematically check dates on all items. Update your inventory spreadsheet or written list with this information. Identify items expiring within the next six months and mark them for priority rotation into regular household use. This quarterly deep check prevents the common problem of discovering expired food only when you're trying to use it. Many people find that scheduling this quarterly review with seasonal changes helps maintain the habit—first day of spring, summer, fall, and winter become automatic check dates.
Step 3: Rotate foods into regular use before expiration. The rotation system only works if you actually complete the cycle by consuming older items and replacing them with fresh supplies. When you identify foods approaching expiration, move them to your kitchen pantry and use them in regular meal planning. Simultaneously purchase replacements and add them to your emergency supply with current dates. This rotation accomplishes multiple goals: prevents waste, ensures your emergency supply stays fresh, familiarizes your household with emergency foods under non-stressful conditions, and validates that you actually find these foods acceptable.
Step 4: Maintain digital backup records of your inventory. While paper lists stored with your supplies remain essential, digital records provide searchability, easy updating, and backup security. Create a simple spreadsheet with columns for item name, quantity, purchase date, expiration date, and location. Many preparedness-focused individuals use smartphone apps designed for inventory management, allowing photos of supplies and barcode scanning for quick updates. Cloud storage ensures these records survive even if your home is damaged. Update digital records immediately when you add or remove items—discipline here pays dividends in accuracy.
Step 5: Test your supplies annually with a practice emergency. Once per year, conduct a realistic drill where you rely solely on your emergency food supply for 24-48 hours. Don't use your refrigerator, stove, or microwave. Prepare meals using only the methods you'd have available during an actual nuclear emergency. This annual test reveals gaps in your planning, identifies foods your family won't actually eat under stress, and builds confidence in your system. You'll discover whether you have enough variety, whether your heating methods actually work as planned, and whether your quantities are realistic for your household's needs.
Step 6: Schedule replacement purchases strategically. Rather than buying everything at once annually, spread purchases throughout the year to manage costs and maintain fresher average ages across your supply. Some experienced preparedness practitioners replace one-twelfth of their supply each month, ensuring continuous rotation and avoiding the sticker shock of replacing everything simultaneously. This approach also keeps you engaged with your supply system monthly rather than treating it as an annual chore.
Step 7: Document lessons learned and adjust accordingly. After each inspection, rotation, or practice drill, note what worked well and what needs improvement. Maybe you discovered that your family refuses to eat certain canned vegetables, or that your can opener is harder to use than expected, or that you need more variety in breakfast options. These observations drive continuous improvement in your system. Preparedness isn't about achieving perfection once—it's about building a system that adapts and improves over time based on real experience.
Critical Action Steps for Implementation
Building an effective nuclear emergency food storage system requires methodical execution. Here's your implementation roadmap:
Week 1: Assessment and Planning. Calculate your household's actual needs based on the number of people, any dietary restrictions, and realistic consumption patterns. Audit your current pantry to identify what you already have that meets nuclear emergency criteria. Create your master shopping list organized by food category and prioritized by importance.
Week 2-4: Initial Acquisition. Begin purchasing your core supplies, focusing first on ready-to-eat proteins and complete meals. Don't try to buy everything at once—spread purchases across several shopping trips to manage costs and avoid overwhelming your storage space before it's properly organized. Look for sales and bulk pricing on items with long shelf lives.
Week 5: Storage Setup. Prepare your storage area with proper shelving, organization systems, and environmental controls. Install thermometers to monitor temperature. Set up your inventory tracking system, whether digital, paper, or both. Create clear zones for different food categories and establish your rotation system.
Week 6-8: Completion and Testing. Finish acquiring remaining items to reach your 14-day supply goal. Conduct your first complete inventory. Run a 24-hour test where you prepare meals using only your emergency supplies and no-power methods. Adjust your supply based on what you learn.
Ongoing: Maintenance Rhythm. Establish your monthly inspection routine, quarterly date checks, and annual comprehensive testing. Set calendar reminders so these tasks become automatic rather than something you need to remember.
Common Mistakes to Avoid
Learning from others' mistakes saves time, money, and potentially your safety. Here are the most common pitfalls in nuclear emergency food storage:
Mistake 1: Storing foods your family won't eat. Just because something has a long shelf life doesn't mean it belongs in your supply. If your children refuse to eat canned spinach during normal times, they definitely won't eat it during a high-stress emergency. Stock foods your household actually consumes.
Mistake 2: Neglecting water storage. Food storage often gets more attention than water, but you need both. Without adequate water, many foods become difficult or impossible to consume, and dehydration becomes a critical threat faster than starvation.
Mistake 3: Forgetting can openers and utensils. You can have the best food supply in the world, but it's useless if you can't access it. Store multiple can openers, utensils, and serving implements with your food supply, not in your kitchen where they might be inaccessible.
Mistake 4: Ignoring expiration dates. Assuming canned food lasts forever leads to discovering spoiled supplies during an emergency. While many canned goods remain safe well beyond their dates, you need to monitor and rotate to ensure quality and safety.
Mistake 5: Centralizing everything in one location. If your entire supply is in your basement and that area becomes inaccessible or contaminated, you've lost everything. Consider distributing portions of your supply to multiple locations within your home.
Mistake 6: Overlooking special needs. Medications, infant formula, pet food, and dietary restriction items require special attention. These items often have shorter shelf lives and fewer alternatives during emergencies.
Mistake 7: Failing to practice. The middle of an actual emergency is the worst time to discover your camping stove doesn't work, your family hates the food you've stored, or you don't have enough variety to maintain morale.
Ready to streamline your nuclear emergency food storage management? Download our Nuclear Emergency Food Storage Inventory Template—a comprehensive spreadsheet designed to track quantities, expiration dates, and rotation schedules, ensuring your supplies remain fresh and ready when you need them most.
The difference between having emergency food and having an effective emergency food supply lies entirely in these maintenance practices. Expired, spoiled, or inaccessible food provides no survival value regardless of how much money you spent acquiring it. The monthly inspections, quarterly date checks, systematic rotation, and annual testing transform a static stockpile into a dynamic resource that genuinely protects your household.
This ongoing commitment might seem tedious during normal times, but when an actual emergency strikes, you'll face that crisis with confidence rather than uncertainty. You'll know your carefully maintained supply stands ready to sustain you through the critical first two weeks when survival depends on the preparations you made during calmer days. Your family won't be wondering if there's enough food or whether it's still safe to eat. You'll have answers because you've done the work, maintained the system, and built genuine preparedness rather than just the illusion of it.
The question isn't whether you can afford to invest time in proper nuclear emergency food storage—it's whether you can afford not to. When the alert sounds and you have fifteen minutes to shelter in place, your preparation work is already done. You're ready. That's the peace of mind that proper planning provides.