Understanding Your Emergency Heat Requirements
Picture yourself on a January morning when the power grid fails during a polar vortex. The temperature outside hovers at five degrees, and inside your home, the thermostat has become nothing more than a decorative wall fixture. Within hours, your breath becomes visible indoors. This scenario plays out thousands of times each winter across North America, and the people who fare best aren't necessarily those with the most expensive backup systems—they're the ones who understood their actual heating requirements before crisis struck.
The human body maintains a core temperature of 98.6 degrees Fahrenheit, but we don't need our living spaces nearly that warm to survive comfortably. Alternative heat sources should maintain at least 65°F in living areas . This temperature prevents pipe freezing, stops condensation that leads to mold, and keeps your body from burning excessive calories just to maintain warmth. Vulnerable populations including infants, elderly individuals, and those with certain medical conditions need temperatures closer to 68-70 degrees to remain safe.
When calculating your emergency heating needs, the industry standard measurement is British Thermal Units, or BTUs. One BTU represents the energy required to raise one pound of water by one degree Fahrenheit—a technical definition that matters less than understanding the practical application. In cold climate zones, heating professionals use a baseline of 30-35 BTUs per square foot for adequate heating . This figure accounts for typical construction standards, average ceiling heights of eight to nine feet, and normal winter conditions in northern regions.
The critical insight that separates prepared households from struggling ones is understanding that you don't need to heat your entire home during an emergency. Core living spaces take priority—typically a main gathering room and sleeping areas. This zone heating approach dramatically reduces your BTU requirements and fuel consumption. A family that might need 80,000 BTUs to heat their entire 2,400 square foot home can often maintain safety and reasonable comfort by heating 600-800 square feet of core space, requiring only 20,000-28,000 BTUs.
Your specific heat requirements fluctuate based on several interconnected factors. Geographic location creates the foundation—Minneapolis demands different preparation than Nashville. The age and construction quality of your home significantly impacts heat retention. A well-insulated home built in 2015 requires substantially fewer BTUs than a drafty 1920s farmhouse with single-pane windows, even if both structures measure the same square footage. The number of exterior walls in your chosen heat zone matters because each exterior wall bleeds warmth to the outside environment. A centrally located living room with one exterior wall retains heat far better than a corner room with three exterior walls and multiple windows.
Understanding these fundamentals transforms emergency heating from guesswork into calculated preparation. The difference between shivering through a power outage and maintaining reasonable comfort often comes down to whether you sized your backup heating solution to your actual, calculated needs rather than making emotional purchases based on fear or convenience.
Calculate Your Space's Heat Requirements
Armed with basic BTU knowledge, you're ready to perform calculations that will guide every subsequent heating decision. This process requires measuring, observing, and honest assessment of your home's characteristics. The math itself is straightforward—the challenge lies in accounting for the variables that make your situation unique.
Start by identifying your emergency heat zone. Walk through your home during cold weather and notice which rooms stay warmest, which have the fewest exterior walls, and which spaces your household naturally gravitates toward. Many families select their main living room or a large kitchen as the primary heat zone, with one or two bedrooms as secondary spaces. Measure the square footage of these areas by multiplying length times width. A living room measuring 20 feet by 24 feet yields 480 square feet. If you're adding a bedroom measuring 12 feet by 14 feet, that's another 168 square feet, bringing your total heat zone to 648 square feet.
Apply your climate zone multiplier to this square footage. Northern tier states experiencing extended periods below zero require the full 35 BTUs per square foot . Mid-Atlantic and lower Midwest regions typically use 30 BTUs per square foot. Our example 648 square foot zone in a cold climate calculates to 22,680 BTUs (648 × 35). This baseline assumes average conditions, but your home's specific characteristics require adjustments.
Windows represent the single largest source of heat loss in most homes. Standard building science shows that windows lose heat substantially faster than insulated wall sections. Count the windows in your heat zone and measure their dimensions. A typical double-hung window measures roughly 15 square feet. If your heat zone contains four such windows, that's 60 square feet of window area. Heat loss through windows can increase your total requirements by 10-20% depending on whether you have single-pane, double-pane, or storm windows. For our example with standard double-pane windows, we'll add 15%, bringing the requirement to 26,082 BTUs.
Insulation quality creates another critical variable that many people overlook until they're cold and wondering why their heater isn't keeping up. Check your attic insulation depth—building codes in cold climates often specify substantial insulation levels, typically 12-15 inches of fiberglass or equivalent. If you can see the tops of your ceiling joists, you're underinsulated. Crawl into your attic on a cold, sunny day and look for light penetrating from outside; those light leaks are also heat leaks. Homes with poor attic insulation should add another 10-15% to their calculated BTU requirements. Wall insulation is harder to verify without removing outlet covers or using thermal imaging, but homes built before 1950 often have minimal wall insulation. Our example home, built in 1985 with adequate but not exceptional insulation, adds 10%, pushing requirements to 28,690 BTUs.
Ceiling height affects heat requirements because you're heating volume, not just floor area. The standard calculations assume eight-foot ceilings. If your heat zone has ten-foot ceilings, multiply your floor area by 1.25 before applying the BTU-per-square-foot multiplier. Cathedral ceilings or two-story spaces require professional calculation methods beyond basic emergency planning, though the practical answer often involves hanging thermal blankets to create an artificial ceiling at eight or nine feet.
Air leakage undermines even the best heating equipment. On a windy day, light a stick of incense and walk your heat zone's perimeter, holding it near windows, doors, electrical outlets, and baseboards. Smoke that moves horizontally indicates air infiltration. Weatherstripping and caulking represent the highest-return investments in emergency heating efficiency. A drafty room might require 20-30% more BTUs than the same room properly sealed . After accounting for all factors, our example space requires approximately 29,000-31,000 BTUs to maintain safe temperatures during winter emergencies.
Download our Emergency Heat Calculator Worksheet to walk through these calculations for your specific home, with spaces to record measurements and adjustment factors that create your personalized heating plan.
Document these calculations and keep them with your emergency supplies. When shopping for backup heating equipment, you'll know exactly what capacity you need rather than relying on sales staff or guessing. This preparation prevents both under-buying equipment that won't keep you warm and over-buying unnecessarily expensive or oversized units.
- Indoor Kerosene Heater
- Requires 3ft clearance, CO detector, ventilation. Shows proper fuel storage, refueling outdoors, and wick maintenance.
- Wood-Burning Stove
- Details proper chimney installation, clearance requirements, ash disposal protocol, and recommended firewood storage practices.
Safe Heating Options Comparison
With your BTU requirements calculated, you face a marketplace crowded with heating options making various claims about efficiency, safety, and effectiveness. Understanding the realistic capabilities and genuine risks of each option prevents both inadequate preparation and dangerous mistakes. The sobering reality is that heating equipment causes thousands of home fires each winter, with space heaters representing a significant portion of these incidents . This doesn't mean backup heating is inherently dangerous—it means that people routinely use equipment incorrectly or choose inappropriate devices for their situations.
Electric Resistance Heaters
Electric resistance heaters represent the safest option when power is available, but they're useless during grid failures unless you have generator or solar capacity. Modern electric heaters typically include tip-over switches and overheat protection. They range from small 750-watt personal heaters producing about 2,500 BTUs to larger 1,500-watt models generating 5,000 BTUs.
The math is straightforward: watts multiplied by 3.412 equals BTUs. Electric heaters convert nearly 100% of electricity into heat, making them perfectly efficient at the point of use, though the power plant generating that electricity operates at much lower efficiency.
Pros:
- Safest option with proper use
- No combustion byproducts or ventilation needs
- Easy to operate with minimal maintenance
- Precise temperature control
Cons:
- Useless during power outages without backup power
- Limited by circuit capacity (1,500 watts maximum per standard circuit)
- Expensive to operate during extended use
- Insufficient for whole-home heating
The practical limitation is that a standard 15-amp household circuit supports a maximum of 1,500 watts. Plug in a 1,500-watt heater and a few other devices, and you'll trip the breaker. For our example 30,000 BTU requirement, you'd need six 1,500-watt heaters on six separate circuits—impractical for most homes and impossible during power outages.
Propane Heaters
Propane heaters designed for indoor use provide substantial heat without electricity. Models range from small 4,000-9,000 BTU units burning one-pound bottles to large 30,000 BTU heaters connected to 20-pound tanks. The critical distinction is between heaters rated for indoor use versus those designed for outdoor or garage use.
Indoor-rated propane heaters include oxygen depletion sensors (ODS) that shut off the gas flow if oxygen levels drop to dangerous levels. These sensors are mandatory safety features, not optional upgrades . Propane heaters create combustion byproducts including carbon monoxide, carbon dioxide, and water vapor. Even with an ODS, you must provide ventilation—crack a window an inch in the room where the heater operates.
Pros:
- Works without electricity
- High heat output relative to size
- Fuel widely available and stores indefinitely
- Portable between locations
Cons:
- Produces combustion byproducts requiring ventilation
- Creates water vapor that increases indoor humidity
- Requires carbon monoxide monitoring
- Fuel storage requires outdoor space
The water vapor produced by propane combustion can be substantial; a heater running for several hours will noticeably increase indoor humidity, which can lead to condensation on cold windows.
Kerosene Heaters
Kerosene heaters deliver impressive heat output, with models ranging from 10,000 to 23,000 BTUs. They've heated homes for generations and remain popular in parts of the Northeast. However, they require more management than propane alternatives.
Kerosene heaters need daily refueling, weekly wick trimming, and annual wick replacement for optimal performance. The fuel itself has a limited shelf life when stored; degraded kerosene produces excessive smoke and odor. Only use water-clear 1-K grade kerosene, never diesel or jet fuel, despite what internet forums suggest.
Pros:
- High heat output
- Works without electricity
- Fuel relatively inexpensive
- Proven technology with decades of use
Cons:
- Requires daily maintenance and refueling
- Produces distinctive odor during operation
- Fuel has limited storage life
- Needs ventilation and CO monitoring
Kerosene combustion produces a distinctive odor that some people find objectionable and others don't notice. Like propane, kerosene heaters create combustion byproducts requiring ventilation and carbon monoxide monitoring .
Wood Stoves
Wood stoves represent the gold standard for extended emergency heating if you have proper installation and adequate fuel storage. A modern EPA-certified wood stove can heat 1,000-2,000 square feet while operating for 8-12 hours on a single load of wood.
The upfront investment is substantial—$2,000-$5,000 for the stove plus $1,500-$3,000 for professional installation including proper chimney systems. However, wood stoves operate completely independently of grid power and fuel supply chains.
Pros:
- Complete independence from utilities and supply chains
- Fuel can be harvested locally in many areas
- Long burn times with proper loading
- Adds resale value to home
Cons:
- High upfront cost for equipment and installation
- Requires dry, seasoned firewood (6-12 months drying time)
- Needs substantial storage space for fuel
- Difficult to modulate temperature precisely
The limitations include the need for dry, seasoned firewood, storage space for 2-3 cords of wood, and physical ability to handle heavy logs. Wood heat is also difficult to modulate; you'll experience temperature swings as fires build and fade.
Catalytic Heaters
Catalytic heaters using propane or kerosene operate without flames, instead using a catalytic reaction to produce heat. These flameless heaters are generally safer around children and pets, produce less odor than flame-based heaters, and operate more quietly.
Pros:
- Flameless operation increases safety
- Quieter than flame-based heaters
- Reduced odor compared to standard kerosene heaters
- Works without electricity
Cons:
- Still consumes oxygen and produces combustion byproducts
- Requires same ventilation as flame-based models
- Catalyst elements wear out and need replacement
- Generally more expensive than standard models
However, they still consume oxygen and produce combustion byproducts, requiring the same ventilation and monitoring as their flame-based cousins.
Critical Safety Warning
Never use a generator, grill, camp stove or other gasoline, propane, natural gas or charcoal-burning devices inside . These devices produce lethal levels of carbon monoxide in enclosed spaces, and people die every winter ignoring this warning. Similarly, your kitchen oven and stovetop are not heating solutions. Gas ovens create dangerous carbon monoxide levels when operated with the door open, and electric ovens trip breakers and create fire risks when used for space heating.
The comparison reveals that no single solution suits every household. Your choice depends on your calculated BTU requirements, budget, storage capacity, physical abilities, and risk tolerance. Many experienced preparedness practitioners maintain multiple heating options—perhaps a propane heater for the main living space, a smaller electric heater for a bedroom if generator power is available, and a quality sleeping bag system as a final backup. This redundancy ensures that if one system fails or fuel becomes unavailable, you're not left without options.
Implementing Your Heat Plan
Calculating requirements and selecting equipment accomplishes nothing if you haven't implemented a practical, tested heat plan before emergencies arrive. The implementation phase transforms theoretical preparation into operational readiness, and this is where many otherwise well-prepared households discover gaps in their planning.
Prepare Your Heat Zone
Zone heating strategy begins with physical preparation of your chosen heat space. Identify the smallest area that meets your household's minimum needs—typically 400-800 square feet encompassing living and sleeping space. This room becomes your survival space during extended outages.
Prepare it now by addressing air leaks, adding weatherstripping, and installing heavy curtains or insulated window treatments. Consider installing a door if your chosen space opens directly to other areas; a simple hollow-core door provides surprising insulation value compared to an open doorway. Some families invest in heavy canvas or insulated vinyl curtains that hang from ceiling-mounted tracks, creating temporary room divisions without permanent construction.
Arrange your furniture and supplies to support sustained occupation of this space. You'll need sleeping arrangements, food preparation capability, water storage, sanitation solutions, and entertainment for children if applicable. Practice spending a weekend in this zone with your backup heating running. You'll discover whether your calculated BTU requirements match reality, identify comfort issues before they become crises, and build confidence in your systems.
During this test run, monitor the temperature at floor level, not just at thermostat height—cold air settles, and you'll sleep on the floor if you're conserving heat. Take notes on what works and what doesn't. Adjust your plan based on actual experience rather than assumptions.
Fuel Storage Strategy
Fuel storage requires careful planning based on your chosen heating system and your household's risk tolerance. FEMA recommends maintaining a minimum three-day supply of necessary resources , though many preparedness advisors suggest one to two weeks as a more realistic target for winter emergencies. Calculate your fuel needs by determining your heater's burn rate and multiplying by your expected runtime.
A propane heater consuming 0.5 pounds per hour running 16 hours daily requires 8 pounds per day, or 56 pounds for a week. That translates to three 20-pound tanks, allowing for the fact that you shouldn't run tanks completely empty.
Propane Storage: Store propane cylinders outdoors in a shaded, well-ventilated area, never in living spaces, basements, or attached garages. Propane is heavier than air and accumulates in low areas if leaks occur, creating explosion risks. Keep cylinders upright and secured against tipping. Rotate your fuel annually even if you haven't used it; connect the oldest cylinder first to ensure nothing sits unused for multiple years.
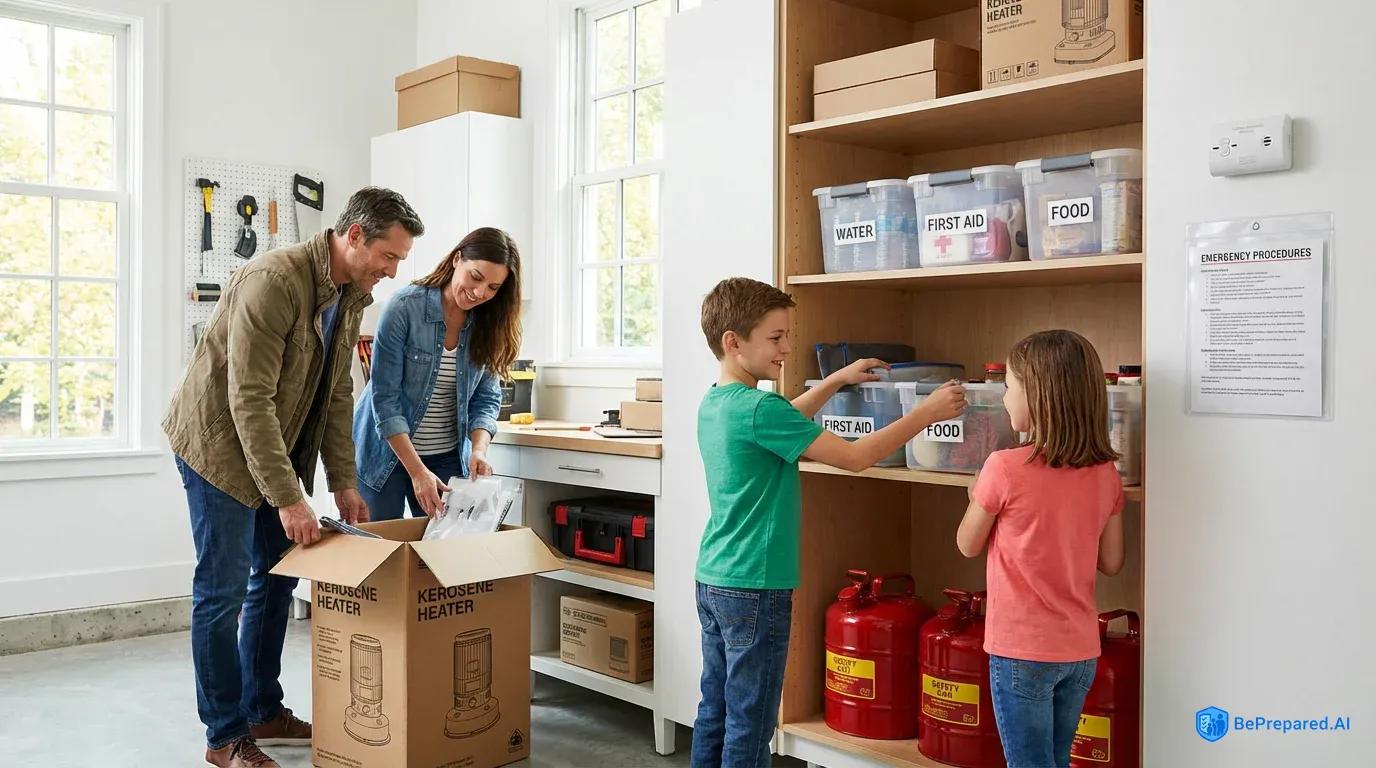
Kerosene Storage: Kerosene stores in approved containers in cool, dark locations. Metal containers prevent the light degradation that affects plastic containers. Add fuel stabilizer if you're storing kerosene for extended periods, and mark containers with fill dates. Store kerosene away from living spaces due to odor, but not in locations where freezing temperatures might occur—kerosene can become cloudy and gel in extreme cold, though it returns to normal when warmed.
Wood Storage: Wood storage demands the most space but provides the longest shelf life. Stack wood off the ground on pallets or lumber, with the top covered but sides open for air circulation. A standard cord of wood—the traditional measurement used in firewood sales—measures 4 feet high, 8 feet long, and 4 feet deep, totaling 128 cubic feet of stacked wood including air spaces.
Most households burning wood as emergency backup rather than primary heat need 2-3 cords per winter. Split wood to 6-inch diameter or smaller for optimal burning. The "seasoned" wood you buy in fall should have been cut the previous winter; test moisture content with an inexpensive moisture meter, targeting 15-20% moisture for efficient burning.
Safety Protocols
Safety protocols begin with carbon monoxide detectors. Install battery-backup or battery-powered CO detectors in every room where you'll operate fuel-burning heaters and in adjacent sleeping areas . Test them monthly and replace batteries twice yearly when you change clocks for daylight saving time.
Carbon monoxide is odorless and colorless; without detectors, you won't know you're being poisoned until symptoms appear. Early symptoms mimic flu—headache, nausea, dizziness—and people often attribute them to illness rather than recognizing the danger.
Create and practice a shutdown procedure for your heating equipment. Everyone in your household should know how to turn off each heating device and where fuel shutoffs are located. Post written instructions near equipment for guests or responders who might need to act in your absence.
Keep anything that can burn at least 3 feet from heating equipment . This clearance zone protects against accidental ignition of furniture, curtains, and stored items. Never dry wet clothing directly on heaters; use drying racks positioned safely away from heat sources.
Maintain fire extinguishers rated for multiple fire types (ABC extinguishers) in your heat zone and near exits. An extinguisher in a distant closet is useless during emergencies. Train household members on the PASS technique: Pull the pin, Aim at the base of the fire, Squeeze the handle, and Sweep side to side. Remember that extinguishers provide 10-15 seconds of suppressant—enough to extinguish a small fire or clear an escape path, not enough to fight a fully developed room fire.
Annual Practice Drill
Schedule a practice emergency heating weekend annually before winter arrives. Set up your equipment, run through your procedures, and identify what you've forgotten since last year. Check fuel supplies, test safety equipment, and verify that everyone remembers their responsibilities.
This annual drill transforms emergency heating from a theoretical plan gathering dust into a practiced capability that you'll execute confidently when temperatures drop and power fails. During your practice weekend, simulate realistic conditions. Turn off your main heat source and rely entirely on your backup system. Cook meals using your emergency methods. Sleep in your designated heat zone.
Take detailed notes during your practice run. What worked smoothly? What created frustration or confusion? Did you have all the supplies you needed, or did you find yourself improvising? Use these observations to refine your plan and update your supply lists.
The households that stay warm during winter emergencies aren't lucky—they're prepared. They calculated their needs, selected appropriate equipment, stored adequate fuel, and practiced their procedures. When the crisis arrives, they're not learning and improvising under stress; they're executing a tested plan with familiar equipment. That preparation transforms a potentially dangerous situation into a manageable inconvenience, keeping your family safe and reasonably comfortable while others struggle with the cold.
Your emergency heat plan represents an investment in your household's resilience and safety. The time you spend calculating requirements, selecting equipment, and practicing procedures pays dividends when winter storms knock out power or supply disruptions leave you without your primary heat source. Start with the calculations outlined in this guide, choose equipment that matches your actual needs rather than your fears, and commit to annual practice that keeps your skills sharp and your equipment ready. When the next polar vortex arrives, you'll face it with confidence rather than panic.