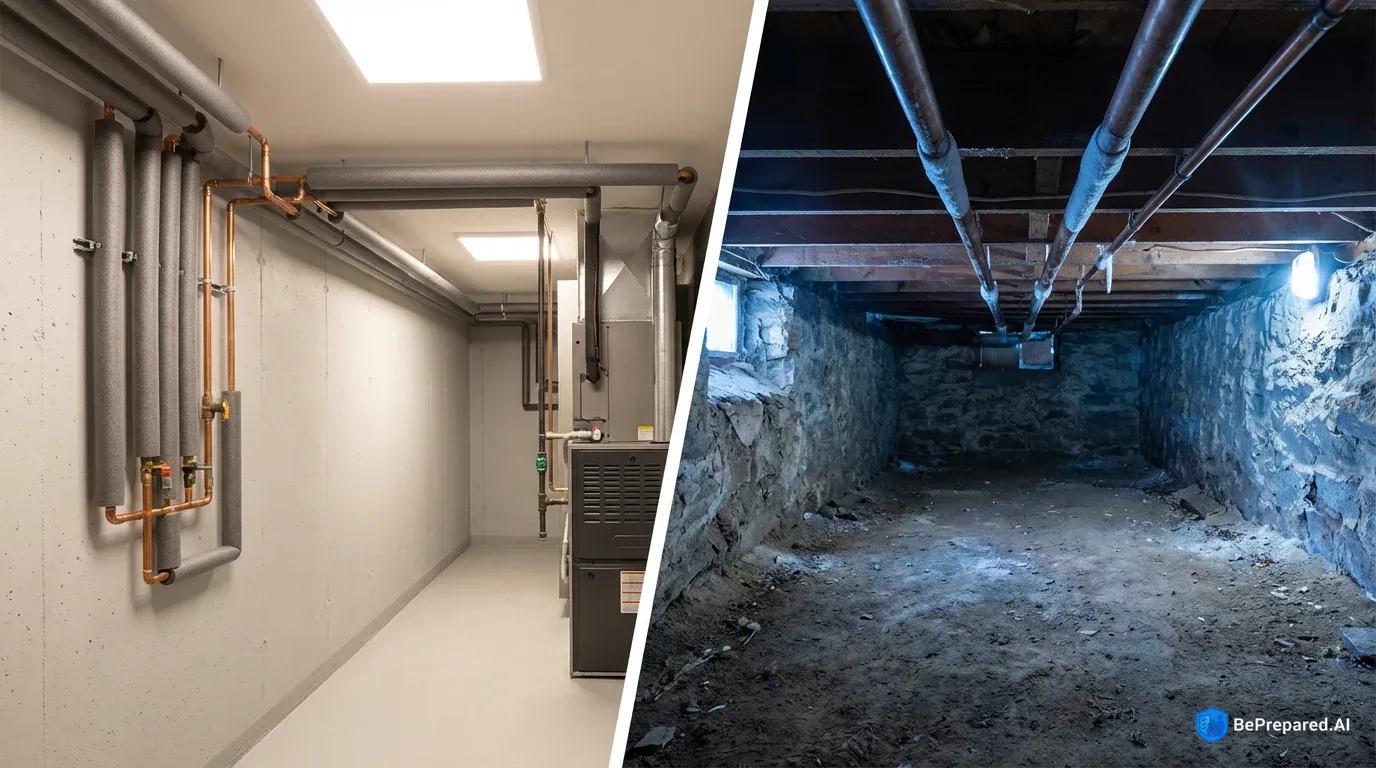
Understanding the Threat of Frozen Pipes
Picture this: You wake up on a February morning after temperatures plummeted overnight. You turn on the kitchen faucet for your morning coffee, and nothing happens. No water. Just an ominous silence from your pipes. Hours later, you discover water cascading through your ceiling as a frozen pipe finally bursts, turning your home into an indoor waterfall. This nightmare scenario plays out thousands of times each winter across America. Frozen pipes cause over $5 billion in property damage annually .
The science behind frozen pipes is straightforward, yet many homeowners don't understand the threat until it's too late. When temperatures drop to 20°F (-6°C) or below, the water inside your pipes begins to freeze . Think of it like leaving a can of soda in your freezer—as water freezes, it expands. Unlike that soda can which might just bulge a bit, water expanding inside a rigid pipe creates tremendous pressure. This pressure can sometimes exceed 2,000 pounds per square inch. Eventually, something has to give, and your pipe develops a crack.
Here's what makes burst pipes particularly devastating: a 1/8-inch crack can unleash 250 gallons of water per day . That's enough to fill three standard bathtubs every 24 hours, soaking insulation, drywall, flooring, and everything you own. The good news? You can prevent this disaster with some simple steps that don't require special skills or expensive equipment.
The areas most vulnerable to freezing are exactly where you'd expect—anywhere pipes are exposed to frigid air. Exterior walls, especially on the north side of your home, create a perfect storm for freezing. Unheated spaces like garages, attics, crawl spaces, and basements act like refrigerators for your plumbing. Even kitchen cabinets on outside walls can trap pipes in dangerously cold pockets of air.
Identifying Freeze-Risk Areas in Your Home
Before you can protect your pipes, you need to know where danger lurks. Think of this as creating a vulnerability map of your home's plumbing system. The process doesn't require special tools—just a flashlight, about thirty minutes, and a willingness to explore some dusty corners.
Start in your basement or crawl space. Grab that flashlight and trace the path of your water supply lines. Pay special attention to any pipes running along exterior walls. These walls separate your home's warmth from winter's bite by just a few inches of insulation and siding. On particularly cold days, that's not enough protection.
Look for pipes that seem to disappear into uninsulated areas. Check for spaces where you can feel cold air seeping in. If you notice cobwebs moving in a breeze, you've found an air leak that's also threatening your pipes. Mark these spots mentally or with tape so you can address them later.
Next, move upstairs to your kitchen and bathrooms. Open the cabinet doors under sinks, especially those positioned on outside walls. Reach your hand toward the back of the cabinet. Does it feel noticeably colder than the room? That temperature difference tells you those pipes are at risk. Many homes have kitchen sinks on exterior walls with large windows above them—a design that looks great but creates a plumbing vulnerability.
Don't forget about your garage. If you have a water supply line running through an attached garage to feed a utility sink, laundry area, or outdoor spigot, that pipe is living in what's essentially an outdoor space. Garages typically aren't heated. Every time you open the garage door, you're blasting those pipes with arctic air. The same concern applies to unheated mudrooms, enclosed porches, or any addition to your home that wasn't built with the same insulation standards as the main structure.
Walk around the outside of your home and locate your outdoor faucets and hose bibs. Trace backwards in your mind—or actually go inside and trace with your eyes—where those supply lines run. Many older homes have shut-off valves for outdoor faucets located in unheated basements or crawl spaces. This leaves several feet of pipe exposed to freezing temperatures even when the outdoor valve is closed.
Basic Prevention Measures
The good news about frozen pipes is that prevention doesn't require a massive investment or professional expertise. A few strategic improvements can protect your home for years to come. The costs are minimal compared to the thousands of dollars you'd spend recovering from even one burst pipe. Let's break this down into manageable steps that anyone can tackle.
Insulate Vulnerable Pipes
Pipe insulation represents your first and most cost-effective line of defense. Pipe insulation costs roughly 50 cents per linear foot , so you can wrap exposed pipes in foam sleeves that act like winter coats for your plumbing. These foam tubes come pre-slit so you can snap them around pipes without disconnecting anything. You don't need plumbing experience—if you can wrap a gift, you can insulate a pipe.
Focus on pipes in unheated spaces first. Your basement, crawl space, attic, and garage deserve priority attention. The insulation works by creating a barrier between the cold air and the water inside your pipes. It slows down heat loss enough to prevent freezing during typical cold snaps.
For pipes in especially vulnerable locations, consider upgrading to heat tape or heat cables. These electrical solutions wrap around your pipes and provide gentle warmth when temperatures drop. They offer active protection rather than just passive insulation. Just remember that heat cables require electricity, so they won't help during a power outage unless you have backup power.
Seal Air Leaks
Insulating pipes only solves half the problem. If frigid air is pouring into your basement through gaps around pipes, vents, or foundation cracks, you're fighting a losing battle. Grab a few cans of expanding foam insulation and walk through your basement or crawl space on a windy winter day. You'll be amazed at how many gaps you can feel cold air rushing through.
Seal around any place where pipes enter your home from outside. Check around dryer vents and anywhere you notice daylight peeking through. This project costs maybe $20 in materials but can make a dramatic difference in keeping cold air away from your pipes. The foam is easy to use—just point and spray. It expands to fill gaps and hardens within an hour.
Maintain Minimum Indoor Temperature
Your thermostat is a critical tool in pipe protection. Even if you're leaving for a winter vacation and want to save on heating costs, never let your indoor temperature drop below 55°F . This minimum temperature creates enough ambient warmth to protect pipes in interior walls and heated spaces.
Yes, heating an empty house feels wasteful. But compare that utility bill to the cost of repairing burst pipe damage—the heating costs win every time. If you have a programmable thermostat, set it to maintain that 55°F minimum rather than switching to vacation mode or turning the heat off entirely.
Disconnect and Drain Outdoor Hoses
Before the first hard freeze, disconnect every garden hose from outdoor faucets. Water trapped in a connected hose can freeze and expand back into the pipe feeding that faucet. This causes it to burst inside your wall. After disconnecting hoses, close the interior shut-off valves for outdoor faucets if you have them. Then open the outdoor faucet to drain any remaining water.
Some outdoor faucets are "frost-free" designs that drain automatically. But they only work properly if no hose is attached. Make this part of your fall routine, like raking leaves or cleaning gutters.
Ready to take your winter preparation to the next level? Download our complete winter home preparation checklist to ensure you haven't missed any critical protection steps. It's designed to de-overwhelm the process with simple, checkable tasks.
Emergency Actions During Extreme Cold
When the weather forecast shows temperatures plunging toward record lows, it's time to shift from prevention to active protection. These emergency measures aren't necessary for typical winter weather. But when extreme cold threatens, they can make the difference between safe pipes and a disaster. Don't panic—these steps are simple and effective.
Start by opening cabinet doors under sinks on exterior walls. This simple action allows warm air from your heated rooms to circulate around pipes that would otherwise be trapped in cold pockets. It seems almost too simple to matter, but it works. Focus especially on bathroom and kitchen sinks positioned on north-facing walls or above unheated crawl spaces.
Next, set faucets to a slow drip for any taps served by vulnerable pipes . Running water, even at a trickle, is much harder to freeze than standing water. The movement creates friction and prevents ice crystals from forming. You don't need a steady stream; that wastes water unnecessarily. Just a slow, steady drip keeps water molecules moving through the pipe.
If you pay for water and sewer service, the small increase in your utility bill is still cheaper than pipe repairs. Think of it as buying insurance for the night. When the cold snap passes, you can turn the faucets back to normal.
Monitor your home's temperature throughout the cold snap. If you have a smart thermostat or indoor temperature sensors, check them regularly. Pay attention to rooms that tend to run colder—often bedrooms over garages or additions built onto the original house. If any room drops below 50°F despite your heating efforts, you may need to add a space heater to maintain warmth near vulnerable pipes.
Just never leave space heaters unattended or running while you sleep. Place them on hard, flat surfaces away from curtains, bedding, or anything flammable. Modern space heaters have tip-over protection and automatic shut-offs, but caution is still essential.
Know where your main water shut-off valve is located and how to operate it. In an emergency—if you hear water running inside walls or see water staining your ceiling—you need to shut off your home's water supply immediately. Every second counts when a pipe bursts. Take a moment right now, before disaster strikes, to locate that valve. Make sure everyone in your household knows where it is and how to turn it.
This knowledge won't prevent frozen pipes, but it will minimize damage if prevention fails. Most shut-off valves are located near where the main water line enters your house. This might be in your basement, crawl space, or utility room. The valve usually has a round wheel or a lever handle. Turn it clockwise (righty-tighty) to close it.
Taking Your First Steps
Protecting your pipes doesn't have to happen all at once. Start with the easiest wins. Disconnect your outdoor hoses this weekend. Next week, spend an hour identifying vulnerable pipes in your basement. The following weekend, pick up some foam pipe insulation and wrap those exposed pipes.
Break the project into small chunks, and you'll have your home protected before the worst of winter arrives. Each step you take reduces your risk and gives you more confidence. You're not just protecting your property—you're building skills and knowledge that will serve you for years to come.
The key is to start now, before the emergency happens. Once temperatures plunge and pipes freeze, your options become limited. But with a little preparation during milder weather, you can face even the coldest winter nights with confidence. Your pipes will thank you, your wallet will thank you, and you'll sleep better knowing you've taken control of this common winter threat.