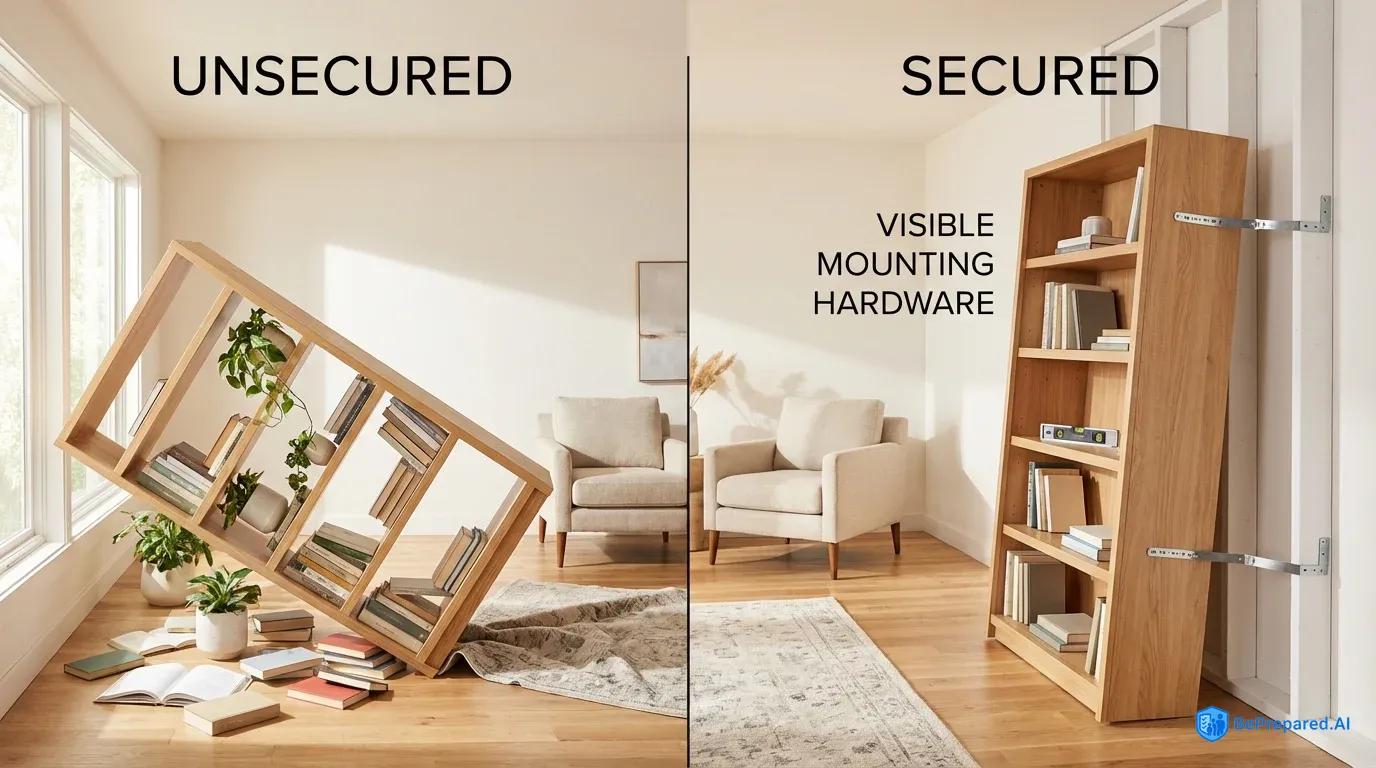
Understanding Earthquake Furniture Hazards
When the Northridge earthquake struck Southern California in 1994, emergency responders discovered something unexpected as they moved from house to house: while many structures remained standing, the interiors looked like war zones. Bookcases had toppled forward, crushing everything in their path. Heavy dressers had walked across rooms and pinned bedroom doors shut. China cabinets had launched their contents like projectiles. The aftermath revealed a sobering statistic: 55% of homes surveyed had significant content damage during the Northridge earthquake . The furniture we trust to stay put in our daily lives becomes a serious threat when the ground starts moving.
The physics of earthquakes transform ordinary furniture into dangerous hazards through a combination of lateral forces and vertical acceleration. During seismic activity, the ground doesn't just shake side to side—it moves in complex patterns that can lift objects and shift them unpredictably. Furniture taller than 4 feet poses particularly significant risks during earthquakes because the height creates a longer lever arm, amplifying the ground motion at the top of the piece . A six-foot bookcase experiences much more dramatic movement at its upper shelves than at its base, creating tremendous tipping forces. This explains why tall, narrow furniture consistently causes the most injuries and damage during seismic events.
The injury patterns tell a clear story about which furniture types present the greatest dangers. Heavy wooden bookcases and entertainment centers top the list, particularly when loaded with books, electronics, or decorative items that add weight and shift the center of gravity. Dressers and wardrobes, especially those with drawers that can slide open during shaking, create both tipping hazards and obstacles that block escape routes. China cabinets and display cases combine the tipping risk with the additional danger of breaking glass and flying objects. Water heaters, while technically not furniture, fall into this same category of tall, heavy items that become battering rams during earthquakes .
The consequences extend beyond immediate injury risks. When a heavy bookcase falls, it doesn't just create a hazard in that moment—it can block doorways, trap people in rooms, and prevent emergency responders from reaching injured individuals. Furniture that tips onto beds can trap sleeping occupants, while pieces that fall near exits can make evacuation impossible. Understanding these hazards isn't about creating fear; it's about recognizing that simple, proactive measures can prevent most furniture-related earthquake injuries entirely.
- QuakeHold! Putty
- Museum-grade adhesive putty, removable, 1oz secures items up to 40lbs, safe for delicate surfaces.
- Toggle Bolts
- 3/16" diameter spring-loaded anchors, 50lb shear strength per bolt, ideal for drywall installations without stud access.
- Cable Restraint Kit
- 1/16" steel cables with turnbuckles, 400lb working load limit, designed for securing large appliances and equipment.
Essential Hardware and Tools
Walking into a hardware store to buy furniture anchoring supplies can feel overwhelming when you're confronted with dozens of different brackets, straps, and mounting systems. The key to selecting the right hardware lies in understanding the fundamental principle: L-brackets must be mounted into wall studs or solid masonry to provide adequate holding strength . Drywall alone, even with anchors, cannot withstand the violent lateral forces generated during an earthquake. A bracket screwed only into drywall will simply tear through the material, taking chunks of wall with it while your furniture topples forward.
For most furniture applications, you'll encounter three primary hardware categories, each designed for specific situations. Flexible furniture straps, typically made from nylon webbing or braided steel cable, work well for items that need some movement tolerance or where rigid mounting isn't practical. These straps connect the top of furniture to wall studs using heavy-duty screws and mounting plates. Metal L-brackets provide rigid connections, ideal for bookcases and shelving units where you want zero movement. These right-angle brackets bolt to both the furniture back and the wall stud, creating a solid connection. Specialized earthquake-resistant furniture anchors combine elements of both systems, using flexible straps with anti-tip mechanisms that allow minor movement but lock during sudden acceleration .
Research shows that flexible nylon straps are better than rigid brackets for many applications because they accommodate the complex motion patterns during earthquakes while still preventing catastrophic tipping . The flexibility allows furniture to move slightly without concentrating stress at mounting points, which can cause rigid connections to fail. This makes strap systems particularly valuable for furniture that sits on uneven floors or pieces that experience regular use and minor shifting.
Weight capacity represents the most critical specification when selecting hardware. A common mistake involves choosing straps or brackets based on the furniture's empty weight, but earthquakes generate forces far exceeding normal gravity. Most safety experts recommend selecting hardware rated for significantly more than your furniture's loaded weight to account for the dynamic forces during seismic activity. A bookcase weighing 200 pounds when fully loaded benefits from straps rated for 400 pounds or more. This safety margin accounts for both the amplification of forces during shaking and the reality that most people underestimate how much their furniture actually weighs when loaded with books, dishes, or clothing.
The good news is that securing furniture doesn't require a major investment. The cost of securing typical furniture ranges from $10 to $50 per piece, depending on size and the hardware system you choose . A basic strap kit for a standard bookcase runs about $15, while heavy-duty bracket systems for large entertainment centers might reach $40. When you consider the potential cost of injuries, property damage, or replacing crushed belongings, this represents one of the most cost-effective safety measures you can take.
The tools required for proper installation aren't exotic, but using the right equipment makes the difference between secure mounting and false confidence. A quality stud finder—preferably an electronic model that detects both edges of the stud—eliminates guesswork about wall structure. A cordless drill with both drill bits and driver bits allows you to create pilot holes and drive screws with control. You'll need a level to ensure brackets align properly, preventing stress concentrations that could cause failure. A socket wrench or adjustable wrench becomes necessary for tightening bolts on L-brackets, and a tape measure helps you locate mounting points accurately. For masonry walls, add a hammer drill and appropriate masonry bits to your toolkit, as standard drills won't penetrate concrete or brick effectively.
Material selection matters as much as tool quality. Choose screws specifically designed for the application—wood screws for studs, masonry screws for concrete or brick, and heavy-duty lag bolts for the largest furniture pieces. The screws should penetrate well into solid wood studs to develop adequate pull-out resistance. Washers distribute load and prevent screw heads from pulling through mounting holes under stress. For furniture with finished backs, you may need spacers or standoffs to route straps properly without damaging the furniture's appearance. Keep a pencil handy for marking locations, and consider using painter's tape to mark stud locations before drilling—it prevents the drill bit from wandering and gives you a clear visual reference.
Step-by-Step Securing Process
The foundation of successful furniture anchoring begins well before you pick up a drill. Stand in front of the furniture piece you're securing and visualize what happens during an earthquake. The piece will try to tip forward, rotating around its bottom front edge. Your anchoring system needs to prevent this rotation by creating a connection point high on the furniture that resists the tipping moment. This mental model guides every decision you'll make during the installation process.
Locating wall studs accurately represents the single most important step in the entire process. Start by using your stud finder along the wall where you plan to position the furniture, moving it slowly and marking both edges of each stud you locate. Wall studs in most construction sit 16 or 24 inches apart on center, so once you find one, you can often predict where others will be. Verify each location by checking in multiple spots vertically along the suspected stud line—studs run continuously from floor to ceiling, so your finder should detect them consistently. If you're working with an older home or suspect unusual framing, try the knock test: tap along the wall and listen for the solid sound of wood behind drywall versus the hollow sound of empty cavity. Once you've located studs, mark them with painter's tape from floor to ceiling in the area where you'll be working.
Position your furniture in its final location before proceeding with mounting. Moving heavy furniture after installing hardware can stress connections or misalign mounting points. With the furniture in place, determine your strap placement points. The minimum requirement calls for two straps per furniture piece, positioned at the top third and bottom third of the furniture height . For a six-foot tall bookcase, this means one strap approximately 4.5 feet up and another around 2 feet up. This dual-point connection prevents both tipping and walking—the tendency of furniture to shuffle across the floor during shaking. Taller or heavier pieces benefit from three or even four connection points, particularly if they're top-heavy when loaded.
Mark your mounting locations on both the furniture and the wall. The furniture-side mounting point should be as far back as possible, ideally on the furniture's back panel or frame. The wall-side mounting point must align with a stud you've located. Measure carefully to ensure the strap will run at a slight downward angle from the furniture to the wall—this geometry provides better resistance to tipping forces than a horizontal strap. Use your level to verify that left and right mounting points sit at the same height, preventing the furniture from being pulled to one side.
Drill pilot holes before driving any screws. This step prevents wood splitting and allows screws to achieve their full holding strength. For the furniture side, use a drill bit slightly smaller than your screw's shaft diameter—typically 1/8 inch for a #10 screw. Drill to a depth about 75% of the screw length you'll be using. On the wall side, drill through the drywall and into the stud, again using a pilot hole smaller than your screw diameter. The pilot hole should penetrate at least as deep as your screw will go, ensuring you're actually in solid wood and not just hitting the stud edge.
Install the mounting hardware starting with the furniture side. Attach the strap bracket or L-bracket using appropriately sized screws, ensuring they bite into solid wood rather than particle board or backing material. Tighten firmly but don't overtighten—you want the screw snug against the bracket, but stripping the threads by excessive force weakens the connection. If working with particle board furniture, consider using toggle bolts or through-bolts that spread load across a larger area, as particle board has much lower holding strength than solid wood.
With the furniture-side bracket secure, extend the strap to the wall and mark the exact location where the wall bracket should mount. Double-check that this location aligns with your stud marking. Install the wall bracket using lag screws or heavy-duty wood screws that penetrate deep into the stud. For the strongest connection, use washers under screw heads to distribute force and prevent the bracket from deforming under load. Some installers prefer to use lag bolts with a socket wrench for maximum holding power, particularly on the heaviest furniture pieces.
Connect the strap between the two brackets, adjusting tension appropriately. The strap should be taut enough to prevent the furniture from tipping forward more than an inch or two, but not so tight that it pulls the furniture backward or lifts the front edge off the floor. Furniture needs to sit flat and stable in normal use. Test your installation by carefully attempting to tip the furniture forward—it should resist strongly after moving just slightly. If the furniture tips several inches before the strap engages, tighten it further. Repeat this entire process for each mounting point on the furniture piece.
Special Considerations for Different Furniture Types
Bookcases and shelving units present unique challenges that go beyond basic tipping prevention. The distributed weight of books creates enormous mass that generates tremendous force during seismic activity. A six-foot bookcase loaded with hardcover books can easily weigh 400-500 pounds, and during an earthquake, that mass wants to keep moving even after the ground stops. For bookcases taller than five feet, consider using three or four mounting points distributed vertically along the back. The top strap prevents tipping, while lower straps prevent the entire unit from walking away from the wall during sustained shaking.
The loading pattern in bookcases matters significantly for stability. Place heavier books on lower shelves, keeping lighter items and decorative objects up high. This lowers the center of gravity and reduces tipping forces. For built-in or custom shelving that spans an entire wall, secure each vertical section independently rather than assuming the interconnected structure will hold together. Earthquakes can twist and rack even well-built furniture, causing connections to fail. Metal L-brackets work particularly well for bookcases because they create a rigid connection that prevents the furniture from pulling away from the wall even slightly. Install brackets at both upper corners and, for taller units, add another set midway down.
China cabinets and display cases combine multiple hazards that demand special attention. Glass-front cabinets need special consideration for contents because the items inside become projectiles during shaking . Beyond securing the cabinet itself to the wall, address what's inside. Museum putty or earthquake gel applied to the bottom of dishes, vases, and decorative objects prevents them from sliding off shelves. For particularly valuable or dangerous items like crystal or heavy ceramics, consider installing a thin lip along shelf fronts—even a quarter-inch wooden strip or metal rod can prevent objects from launching forward. Glass doors themselves pose a hazard if they swing open during shaking, so install positive latches that require deliberate action to open rather than simple magnetic catches that can release during vibration.
The weight distribution in china cabinets typically concentrates at the top, where the display area sits above a lower storage cabinet. This creates a high center of gravity that amplifies tipping risk. Use both flexible straps at the very top and rigid L-brackets lower down to create a hybrid anchoring system. The straps prevent catastrophic tipping while the brackets resist the walking motion. Pay special attention to the cabinet's construction quality—cheaper cabinets with particle board backs may not provide adequate holding strength for mounting hardware. In these cases, locate the cabinet's internal frame members and mount to those, or use through-bolts that penetrate completely through the back panel with large washers on the furniture's interior to distribute load.
Wardrobes and armoires present challenges due to their size, weight, and the dynamic load of hanging clothes that can swing during earthquakes. A wardrobe filled with heavy winter coats or suits represents hundreds of pounds of mass suspended high off the ground. As the ground shakes, these hanging clothes swing like pendulums, creating additional forces that can destabilize the furniture beyond what you'd expect from the static weight alone. Secure wardrobes using the same multi-point approach as bookcases, with particular attention to mounting points at the very top where the tipping moment is greatest.
Many modern wardrobes and armoires feature doors that can swing open during shaking, shifting the center of gravity dramatically and increasing tipping risk. Install positive-latch door catches that won't release during vibration, or add simple barrel bolts that secure closed doors. The interior configuration matters too—if the wardrobe has drawers, ensure they have stops that prevent them from sliding completely out during shaking. A heavy drawer that ejects from the wardrobe mid-earthquake adds its weight to the tipping force and creates additional hazards in the room.
For particularly large or heavy wardrobes, consider the wall's load-bearing capacity beyond just finding studs. In older homes with plaster walls or in situations where you're mounting extremely heavy pieces, you might need to install a mounting board—a horizontal piece of lumber secured to multiple studs that provides a solid backing for your furniture anchors. This distributes the load across several studs rather than concentrating all force on one or two connection points. The mounting board approach also helps when stud locations don't conveniently align with your furniture's mounting points, giving you flexibility to attach hardware anywhere along the board.
Different furniture materials require adapted approaches. Solid wood furniture provides excellent holding strength for screws and brackets, but veneer-covered particle board—common in modern furniture—demands special attention. The thin veneer can chip or peel when drilling, and particle board has much lower screw-holding capacity than solid wood. Pre-drill carefully and consider using larger screws with coarse threads designed specifically for particle board. Through-bolts with backing plates provide the most secure connection for lightweight furniture construction. Metal furniture like filing cabinets or industrial shelving typically offers excellent mounting strength, but you'll need metal-specific screws or bolts and may need to drill mounting holes in the furniture itself.
The room's purpose influences furniture securing priorities. In bedrooms, prioritize furniture near beds—a dresser that tips onto a sleeping person creates life-threatening danger. In home offices, secure tall filing cabinets and heavy desk hutches that could trap someone at their workstation. Living room entertainment centers require special attention because they often combine height, weight, and valuable electronics in one unstable package. Kitchen cabinets typically mount to walls already, but freestanding pantry units or baker's racks need the same careful securing as any tall furniture. Children's rooms demand extra vigilance because kids may climb on furniture, and their smaller size makes them more vulnerable to tipping hazards even during normal use, let alone earthquakes.
Consider the furniture's relationship to other objects in the room. A bookcase positioned next to a window creates the risk of blocking an emergency exit if it tips. Furniture near doorways can trap people in rooms if it falls across the opening. Heavy pieces positioned above or near sleeping areas, workstations, or favorite sitting spots pose the greatest injury risk and should be your first securing priorities. Sometimes the best solution involves rearranging furniture to reduce hazards rather than just anchoring everything in place. Moving a heavy china cabinet away from the dining table means even if it fails, it won't crush someone during the earthquake.
Weighing Your Options: Pros and Cons of Different Securing Methods
Each furniture securing approach offers distinct advantages and limitations that affect your choice based on specific circumstances. Understanding these trade-offs helps you select the most appropriate method for each piece of furniture in your home.
Flexible nylon straps excel in versatility and ease of installation. They work with almost any furniture type, accommodate minor wall irregularities, and allow some natural movement that prevents stress concentration at mounting points. The flexibility means they won't crack plaster or damage delicate furniture finishes. However, straps require periodic inspection for wear, can stretch slightly over time, and may not provide the absolute rigidity some people prefer for their heaviest furniture. They also remain visible unless you route them carefully behind furniture.
Rigid L-brackets deliver maximum holding strength and create zero-tolerance connections that prevent any furniture movement. They're ideal for permanent installations where you don't plan to move furniture, and they work exceptionally well for built-in shelving or heavy bookcases. The downside is their inflexibility—they can't accommodate settling or minor wall movement, which may cause mounting points to loosen over time in older homes. Installation requires more precision since misalignment creates stress points, and they're more visible than straps unless you recess them into furniture backs.
Hybrid systems combining straps and brackets offer the best of both worlds but at higher cost and installation complexity. You get the movement tolerance of straps with the rigid support of brackets, creating redundant protection. This approach makes sense for your most critical furniture pieces—bedroom dressers near beds, heavy entertainment centers, or valuable china cabinets. The main drawback is the doubled installation time and expense, which may not be practical for every piece of furniture in your home.
The choice often comes down to your specific situation. Renters may prefer straps because they leave smaller holes when removed. Homeowners in newer construction might choose brackets for permanent protection. Those in earthquake-prone areas might invest in hybrid systems for critical pieces while using simple straps for less dangerous furniture.
Ready to secure every piece of furniture in your home? Download our complete furniture securing checklist that covers every room and furniture type, with specific hardware recommendations and installation tips you can reference during your project.
Making It Happen: Your Action Plan
The securing process isn't a one-time event but rather an ongoing commitment to safety. Check your furniture anchors periodically—at least annually—to ensure screws haven't loosened and straps haven't degraded. When you rearrange furniture or acquire new pieces, incorporate securing into your setup process immediately. Teaching family members, especially teenagers who might rearrange their own rooms, about furniture securing helps maintain safety as your household evolves.
Start with a room-by-room assessment of your home. Walk through each space and identify furniture taller than four feet or pieces that could block exits if they tipped. Make a list prioritizing items near beds, workstations, and frequently occupied areas. This systematic approach prevents you from feeling overwhelmed by the scope of the project.
Purchase hardware in bulk when possible to reduce costs. If you have six bookcases to secure, buying a multi-pack of straps costs less per unit than individual kits. Keep extra hardware on hand for future furniture additions. Store your tools together in a dedicated container so you're ready to secure new pieces as soon as they arrive rather than delaying because you can't find your stud finder.
Consider making furniture securing a family project. Older children can help locate studs, mark mounting points, and learn valuable skills while contributing to household safety. Explaining the physics of earthquakes and demonstrating how anchors work turns a chore into an educational opportunity. When everyone understands why securing matters, they're more likely to maintain the systems and speak up if they notice a loose strap or bracket.
Document your work with photos and notes about which hardware you used for each piece. This record helps when you need to inspect or replace components years later. Note the dates of installation and any adjustments you make during annual checks. If you move, this documentation helps you properly remove anchors and reinstall them in your new home.
The few hours invested in properly securing furniture provides protection that could save lives when the ground starts shaking, transforming your home from a collection of hazards into a safer shelter during one of nature's most violent events. The work isn't glamorous, but it's among the most practical safety measures you can take—right up there with smoke detectors and fire extinguishers. Unlike those devices that you hope never to need, furniture anchors work silently every day, holding your belongings in place and giving you peace of mind that your home won't turn into a danger zone the moment the earth moves.