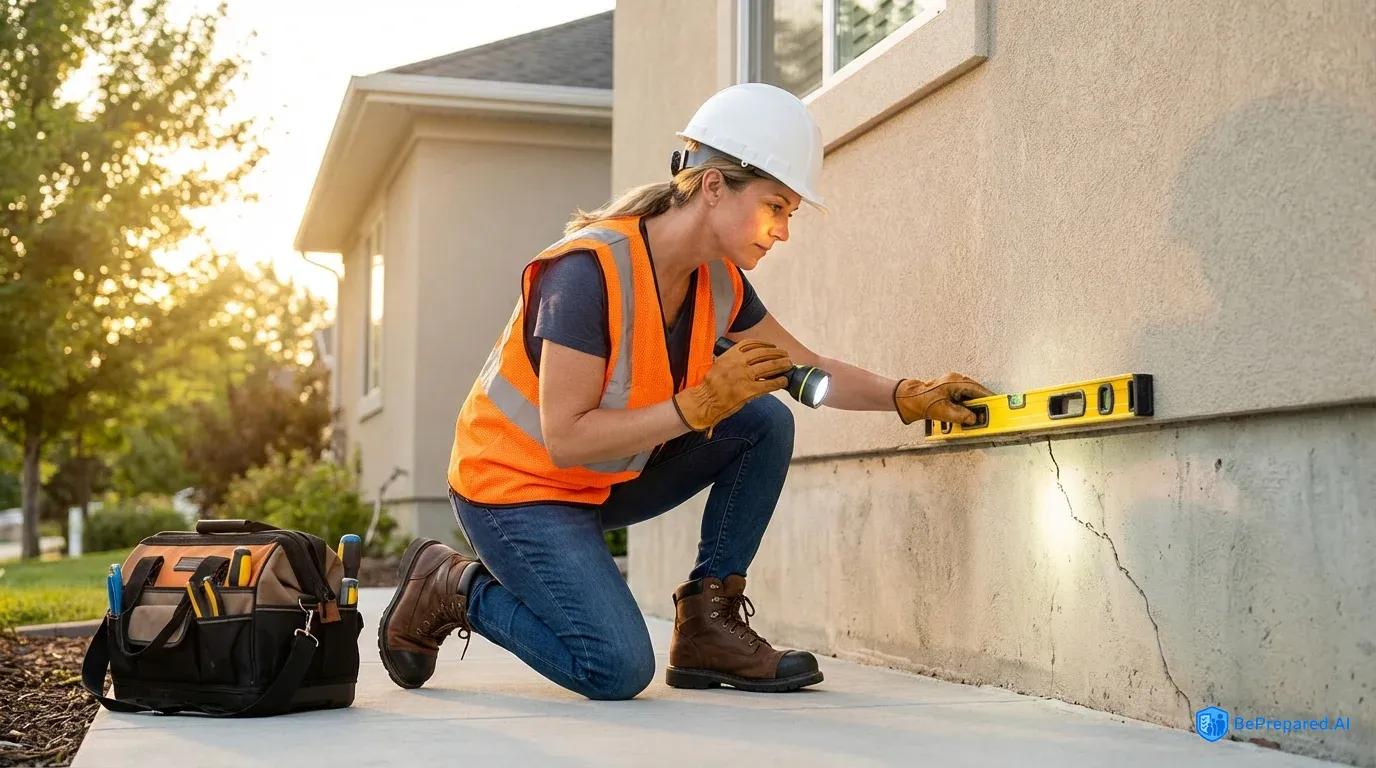
Safety First: Before You Begin Inspection
The ground has stopped shaking, and your first instinct might be to rush through your home cataloging every crack and broken window. Stop. Take a breath. The minutes immediately following an earthquake are often the most dangerous, and a hasty inspection can put you at greater risk than the quake itself.
Aftershocks can occur within hours or days after the main quake, sometimes measuring nearly as strong as the initial event . These secondary tremors have caught countless homeowners mid-inspection, causing injuries from falling debris, unstable structures, and compromised building elements that seemed stable moments before. Your safety assessment must account for this ongoing threat, not just the damage already done.
Start your safety protocol from outside the building if at all possible. Before you even consider entering, conduct a perimeter walk looking for obvious structural compromise. Are walls leaning outward? Do you see major cracks running through the foundation? Is the roofline sagging or visibly distorted? Any of these signs means you need to keep everyone out and call a structural engineer immediately.
The same applies if you smell gas—that distinctive sulfur odor added to natural gas for safety purposes. Gas leaks are the #1 immediate safety concern following an earthquake, responsible for the majority of post-quake fires and explosions . A single spark from a light switch or even static electricity can ignite accumulated gas, turning your home into a blast zone. If you detect even a faint gas odor, evacuate everyone immediately and call your gas company from a safe distance.
Your safety gear requirements aren't extensive, but they're essential. Heavy-soled shoes or boots protect against broken glass, nails, and debris that now litter floors. A hard hat or sturdy helmet guards against falling objects during aftershocks—ceiling tiles, light fixtures, and loosened building materials can drop without warning. Work gloves prevent cuts from sharp edges and broken materials.
A high-quality flashlight is mandatory since electrical systems often fail, and entering dark spaces without proper lighting multiplies every other risk. Keep a battery-powered radio nearby to monitor emergency broadcasts about aftershock warnings and community hazards like broken water mains or downed power lines. Some areas broadcast specific information about which neighborhoods have gas line breaks or water contamination.
Resist the urge to immediately restore utilities. If you've shut off gas, water, or electricity following the quake, leave them off until you've completed a thorough inspection. Many homeowners have turned gas back on only to trigger an explosion from a leak they hadn't yet discovered. Similarly, activating electrical systems with compromised wiring can start fires in wall cavities where you can't see them developing until it's too late.
Know when professional assessment isn't optional—it's mandatory. If you observe any structural shifting, major cracks in foundation or load-bearing walls, chimney damage, or if your home has shifted on its foundation, you need a structural engineer's evaluation before occupying the building. Insurance companies typically require professional assessment for significant claims, but your physical safety matters more than any policy requirement.
A building that appears stable can collapse during an aftershock if structural elements have been compromised in ways not visible to untrained eyes. Structural engineers have the training and tools to identify hidden damage—stressed connections, compromised load paths, and weakened members that look intact but have lost their strength. The few hundred dollars you spend on professional evaluation can prevent catastrophic failure that costs lives.
- Structural Wall Failure
- Analysis of diagonal cracking patterns and wall separation, including displacement measurements in millimeters
- Chimney Damage
- Evaluation of tilt angles and brick separation patterns with structural stability indicators
- Window/Door Frame Distortion
- Quantification of frame deformation and operational impairment using diagonal measurements
- Exterior Cladding Separation
- Documentation of veneer detachment and crack propagation with measurement guidelines (mm scale)
Exterior Inspection Checklist
Once you've confirmed it's safe to begin a detailed inspection, start with a systematic exterior assessment. Working from the outside in allows you to identify major structural issues before you're inside a potentially compromised building. This approach has saved lives when exterior damage revealed interior spaces too dangerous to enter.
Begin with the foundation assessment, which forms the literal base of your home's structural integrity. Walk the entire perimeter, examining where your home meets the ground. Fresh cracks in concrete foundations tell important stories about what happened during the shaking. Hairline cracks running vertically often result from normal settling and may have existed before the earthquake.
Diagonal cracks often indicate structural damage requiring professional evaluation . These angular fractures suggest the foundation experienced shearing forces, twisting the structure in ways that compromise its ability to support the building above. The diagonal pattern reveals that different parts of the foundation moved at different rates or in different directions during the shaking.
Pay particular attention to corners and areas where the foundation steps down to accommodate sloped lots. These transition points experience concentrated stress during seismic events. Look for cracks wider than a quarter-inch, any separation between the foundation and the structure above it, and areas where the foundation has visibly shifted or settled.
If you have a crawl space, check whether support posts remain plumb and properly seated on their footings. A post that's shifted even a few inches can allow floors to sag and walls to rack out of square. Bring a flashlight and inspect the entire crawl space if accessible, looking for shifted posts, cracked beams, and separated connections between floor framing and foundation.
Move your attention upward to the roof and chimney inspection. Chimneys are particularly vulnerable during earthquakes because they're essentially tall, heavy, rigid structures that want to whip back and forth while the building beneath them moves. From ground level, use binoculars to examine the entire chimney height. Leaning chimneys require immediate professional attention—they represent a collapse hazard that threatens anyone below .
Look for separation between the chimney and the house, missing bricks or mortar, and cracks running through the chimney structure itself. Even if a chimney appears intact, the internal flue may have separated or cracked, creating a fire hazard when you use the fireplace. Damaged flues can allow hot gases and sparks to escape into wall cavities, starting fires that smolder undetected for hours.
The roof itself deserves careful scrutiny. Earthquake shaking can shift roof structures, break connections between roof and walls, and dislodge roofing materials. Look for areas where the roofline appears wavy or sagging rather than straight. A roof that was straight before the quake but now shows dips or humps has experienced structural damage to rafters, trusses, or the ridge beam.
Check for missing or displaced shingles, tiles, or metal roofing panels. Examine the areas around chimneys, vents, and skylights where flashing provides waterproofing—these connections often fail during seismic events, creating leak points that will cause progressive damage during the next rain. Water intrusion after an earthquake can destroy insulation, promote mold growth, and damage ceilings before you even realize there's a problem.
Wall damage patterns reveal crucial information about structural performance. Exterior walls should be plumb and straight. Use a long straightedge or simply sight along the wall surface looking for bulges, leans, or waves in surfaces that should be flat. Stucco and plaster finishes often crack in distinctive patterns.
A few random cracks might be cosmetic, but systematic cracking—especially diagonal cracks at window and door corners—suggests the wall framing has racked and distorted. These corner cracks form because windows and doors create weak points in walls. When the wall racks, stress concentrates at these openings, cracking the finish materials in diagonal patterns that point toward the corners.
Wood-sided homes may show nail pops where siding has pulled away from framing, or boards may have split or separated. Brick and stone veneer can separate from the structural wall behind it, creating a dangerous condition where the heavy masonry facing could peel away and fall. Tap on suspect areas with your knuckles—a hollow sound where there should be solid backing indicates separation.
Masonry buildings require especially careful inspection. Look for stair-step cracking in mortar joints, which indicates the wall has shifted. Examine corners where perpendicular walls meet, as these connections often fail first. Masonry walls rely on the interlocking of units and the bond between bricks or blocks. When this bond breaks, the wall loses its strength even though individual units remain intact.
Don't overlook the connection between your home and its foundation. In older homes, this connection may rely on gravity and a few anchor bolts. Earthquake shaking can slide an entire structure off its foundation—sometimes just inches, sometimes several feet. Look for gaps between the mudsill (the horizontal wood member that sits on top of the foundation) and the foundation itself.
Check whether the house appears level or if one corner has dropped. Any evidence of sliding or lifting requires immediate professional structural evaluation. A house that has moved on its foundation has lost the connection that keeps it anchored during shaking. The next aftershock could move it further, potentially causing collapse.
Windows and doors in exterior walls provide additional diagnostic information. Walk around opening and closing accessible windows and doors. Those that previously operated smoothly but now stick or bind suggest the wall framing has distorted. Conversely, doors that now swing open on their own or won't stay latched indicate the building has shifted enough to change the level and plumb of door frames.
Look at the gaps around window and door frames where they meet the wall. Uniform gaps suggest the frame is still square. Gaps that vary significantly from one side to another reveal distortion. You can often see daylight through gaps that opened during the earthquake, particularly at the tops of door frames where headers may have sagged.
Interior Structural Assessment
Stepping inside a post-earthquake home feels different than entering a normal house. You're not just looking at your living space anymore—you're reading the building for clues about what it experienced during those violent seconds of shaking and what its current structural condition might be.
Load-bearing wall inspection forms the core of your interior structural assessment. Load-bearing walls carry the weight of the structure above them down to the foundation, making their integrity essential to the building's stability. In most homes, exterior walls are load-bearing, along with certain interior walls.
Single-story homes typically have load-bearing walls running perpendicular to floor and ceiling joists. Multi-story homes have load-bearing walls stacked on each floor, typically aligned with walls on floors above and below. Understanding which walls carry loads helps you prioritize your inspection and recognize which damage poses the greatest risk.
Examine these critical walls for new cracks, particularly those running diagonally from corners of doors and windows, or horizontal cracks at the junction between wall and ceiling. Small vertical cracks at corners where walls meet often result from minor settling and may not indicate serious problems. However, cracks you can insert a credit card into, cracks that run through drywall and continue into trim or framing, or cracks that appear on both sides of a wall suggest structural movement requiring professional evaluation.
Run your hands along walls feeling for bulges, soft spots, or areas where the wall surface feels detached from the framing behind it. Drywall that's pulled away from studs will feel spongy and may show fastener pops where nails or screws have pulled through the surface. In older homes with plaster walls, you might hear hollow sounds when tapping on areas where plaster has separated from lath.
These conditions don't necessarily mean structural failure, but they indicate the building experienced significant movement. The wall covering has broken its bond with the framing, which means the framing moved enough to overcome the fasteners holding everything together. This level of movement can stress connections and weaken the structure even if nothing has actually broken.
Floor level changes provide some of the most telling evidence of foundation or structural damage. Sloping floors suggest foundation damage or failed floor framing . Place a marble or ball bearing on the floor in various rooms. In an undamaged home, it should stay put or roll very slowly. If it rolls quickly toward one area, you're dealing with significant slope.
You can quantify this using a long carpenter's level or a smartphone with a level app, checking multiple locations and directions. Floors that have developed new slopes, dips, or humps since the earthquake indicate something has shifted in the support structure below. In single-story homes, this might mean foundation settlement, damaged support posts in a crawl space, or broken floor joists.
In multi-story buildings, the issue could be failed floor framing, compromised support walls, or damage to the structure below. Walk slowly through each room, feeling for changes in level. Your body is remarkably sensitive to slopes—you'll often feel a tilt before measurements confirm it. Pay attention to that subtle sense that something feels wrong. Trust your perception.
Door and window functionality serves as a sensitive indicator of structural distortion. Stuck doors and windows often indicate structural shift that's racked the building frame out of square . As a building distorts, door and window openings change from rectangular to parallelogram shapes. Since doors and windows are rectangular, they bind in the altered openings.
Test every door and window, noting which ones now stick, drag, or refuse to latch properly. Pay special attention to patterns. If all the doors on one side of the house stick while those on the other side operate normally, the building has likely shifted or racked in that direction. Doors that stick at the top suggest the building has compressed vertically or the header above the door has sagged.
Those sticking at the bottom might indicate floor heave or settlement. Interior doors that previously closed easily but now swing open or won't stay closed reveal changes in floor level—the floor has tilted enough that gravity pulls the door open. This seemingly minor issue actually indicates significant structural movement.
Examine the gaps around doors and windows. These should be relatively uniform on all sides. If the gap is wider at the top than bottom, or significantly different on left versus right sides, the opening has distorted. Look at the door or window itself within its frame. If it appears twisted or no longer aligns with the frame, structural movement has occurred.
Ceiling inspection reveals damage to upper floor structures or roof framing. Look for new cracks, sagging areas, or water stains that weren't present before. Popcorn or textured ceilings may show cracks more readily than smooth surfaces. Check where ceiling meets walls for separation gaps.
In two-story homes, examine ceilings below bathrooms and kitchens especially carefully, as broken water lines above can cause both immediate and delayed damage. A water stain that wasn't there before the quake indicates a leak somewhere above. Even if the leak has stopped, water has saturated insulation and framing, creating conditions for mold growth and wood rot.
Stairs deserve particular attention because they connect different levels and often show stress from differential movement between floors. Check for gaps between stairs and walls, new cracks in stair stringers (the diagonal supports), and any sense that stairs feel springier or less solid than before. Railings that have loosened or pulled away from walls indicate significant movement.
Test stairs by walking up and down, feeling for movement, squeaks, or flexing that wasn't present before. Stairs are complex assemblies with many connections. When a building shakes, these connections can loosen or break, compromising the stairway's strength and safety.
Utilities and Systems Check
Your home's utility systems—gas, electricity, water, and sewage—represent both immediate safety concerns and sources of ongoing damage if compromised. A systematic utilities check protects you from hazards while identifying problems before they worsen.
Gas line inspection takes absolute priority because of the fire and explosion risk. Natural gas fires following earthquakes have destroyed entire neighborhoods, particularly when broken gas lines fed flames that overwhelmed firefighting capacity. If you smell gas anywhere—that distinctive rotten egg odor—evacuate immediately, don't use any electronics or create any sparks, and call the gas company from outside the building.
Even turning on a flashlight can ignite gas in certain concentrations. Don't start your car if it's in an attached garage where gas might have accumulated. Once you're at a safe distance, call 911 and your gas company. Let professionals handle gas leaks—this isn't a DIY situation.
If you don't smell gas, conduct a careful inspection. Check the gas meter outside for any visible damage, leaning, or separation from pipes. Inside, examine visible gas lines for breaks, separations, or stressed connections. Flexible gas connectors to appliances can fail if the appliance moved during shaking.
Listen carefully near gas appliances and connections for the hissing sound of escaping gas. If you have any doubt about gas system integrity, leave it shut off and have the gas company inspect before restoration. Most gas companies will inspect and restore service for free after earthquakes, and this professional service is far safer than attempting restoration yourself.
Electrical system assessment prevents fire hazards and electrocution risks. Before restoring power, inspect your electrical panel for any visible damage, burning smells, or signs of overheating. Check visible wiring for damage, particularly where it passes through walls or ceilings that show structural damage. Outlets and switches that are cracked, blackened, or feel warm to the touch indicate problems.
If you have overhead light fixtures, ensure they're still securely mounted—fallen fixtures during aftershocks can cause injuries and electrical hazards. Look for ceiling boxes that have pulled loose or fixtures hanging by their wires. These need to be properly remounted before you restore power.
When you do restore power, do it systematically. Turn off all individual circuit breakers, then restore main power. Turn on circuits one at a time, checking for any sparking, burning smells, or unusual sounds. If any circuit trips immediately or shows problems, leave it off and have an electrician inspect before using.
Test GFCI outlets using their test buttons to ensure proper function—these safety devices protect against electrocution in wet areas. If a GFCI won't reset or trips immediately, there's likely a ground fault somewhere on that circuit. This could indicate damaged wiring or a compromised appliance.
Water and sewage evaluation prevents both immediate flooding and insidious long-term damage. Water line breaks can cause hidden structural damage as water saturates building materials, promotes mold growth, and undermines foundations . Start by locating your main water shutoff and ensuring it works—you may need to close it quickly if you discover a major leak.
Check visible water supply lines for breaks, leaks, or stressed connections. Look under sinks, behind toilets, at water heater connections, and anywhere pipes are visible. Turn on faucets one at a time, watching for leaks at fixtures and listening for water running in walls or ceilings. A toilet that runs continuously might have a broken fill valve, or it might indicate a broken supply line inside the wall.
Sewage system integrity is less obvious but equally important. Flush toilets and run water down drains, watching and listening for backups or unusual drainage. Water backing up into tubs when you flush toilets indicates a blocked or broken sewer line. Sewage odors suggest broken vent pipes or sewer line damage.
If you have a septic system, check the tank and drain field area for settling, cracking, or sewage surfacing. Septic tanks can crack or shift during earthquakes, and drain fields can be damaged by ground movement. Any sewage on the surface indicates a serious problem requiring immediate professional attention.
Water heaters deserve special attention. Check for leaks at connections, ensure the unit hasn't shifted or tipped, and verify that earthquake straps (if installed) are intact. Gas water heaters should be checked for proper venting—a damaged vent can allow carbon monoxide into your home. Look for water pooling around the base, which might indicate a cracked tank requiring replacement.
A water heater that has tipped or shifted significantly should not be used until it's been inspected and properly reinstalled. The connections may have stressed, and gas water heaters that have tipped may have damaged internal components. The relief valve, burner assembly, and vent connections all need to function properly for safe operation.
Don't forget HVAC systems. Check that furnaces, air conditioners, and ductwork remain properly connected and supported. Damaged ducts can spread gas leaks or fire through a building. Ensure exhaust vents for furnaces and water heaters haven't separated or become blocked.
A blocked or separated vent can cause carbon monoxide to accumulate in your home—an odorless, colorless killer. If you have any doubt about HVAC system integrity, have it professionally inspected before use. The cost of inspection is trivial compared to the risk of carbon monoxide poisoning or fire.
Documentation and Professional Assessment
The earthquake has passed, you've confirmed basic safety, and you've completed your inspection. Now comes the crucial phase that determines how effectively you'll recover: comprehensive documentation and knowing when to call in professional expertise.
Photo documentation serves multiple essential purposes—insurance claims, contractor estimates, repair verification, and your own records of what happened. Start by photographing the overall condition of each room and exterior elevation before you clean up anything. These "as-found" images establish the full scope of damage.
Then photograph specific damage in detail, capturing each crack, broken item, and structural issue from multiple angles. Include context in your photos. A close-up of a foundation crack has limited value; a photo showing the crack's full length and location on the building tells the complete story.
Place a ruler, coin, or other size reference next to cracks and damage to document scale. A crack that looks dramatic in a photo might be hairline or might be an inch wide—the size reference removes ambiguity. Take photos from the same locations in different directions to show spatial relationships. Photograph damaged items next to intact similar items for comparison when possible.
Create a systematic approach to avoid missing areas. Work room by room, photographing from each corner toward the center, then detail shots of specific damage. For exteriors, photograph each wall from multiple distances—wide shots showing the entire elevation, medium shots showing specific areas, and close-ups of individual damage points.
Don't forget less obvious areas like attics, crawl spaces, garages, and utility areas. These spaces often contain critical structural elements and systems that suffered damage. Attic photos can reveal roof structure damage not visible from below. Crawl space photos document foundation and floor framing issues.
Modern smartphones automatically embed date and location data in photos, which strengthens documentation. Take videos as well, narrating what you're showing. A video walk-through of your home describing damage provides context that still photos can't capture. You can explain what you're seeing, describe how things worked before versus now, and create a narrative that helps adjusters and contractors understand the full situation.
Back up all photos and videos immediately to cloud storage or external drives—losing documentation to a failed phone or computer compounds your earthquake losses. Upload to multiple locations if possible. Email yourself copies. The redundancy ensures you don't lose this critical evidence.
Damage reporting requirements vary by location and situation. Contact your insurance company as soon as safely possible to report the loss and ask about their specific documentation requirements. Many insurers have smartphone apps that streamline the claims process, allowing you to upload photos and descriptions directly.
Ask whether they'll send an adjuster or if they want you to obtain contractor estimates first. Some insurers prefer to have their adjusters assess damage before you get repair estimates. Others want you to gather estimates that they'll review. Understanding the process prevents delays and ensures you follow the steps your policy requires.
If your home is unsafe to occupy, contact local building authorities. Many jurisdictions post placards on earthquake-damaged buildings indicating their safety status—green for inspected and safe, yellow for limited entry, red for unsafe. Understanding your building's official status affects insurance, temporary housing coverage, and whether you can legally enter to retrieve belongings.
Document everything in writing as well as photos. Create a detailed inventory of damaged items including purchase dates and values when possible. Write descriptions of structural damage, noting which rooms are affected and the nature of problems. Keep a log of all communications with insurance, contractors, and officials, including names, dates, and what was discussed.
This written record becomes invaluable when you're dealing with multiple contractors, insurance adjusters, and repair timelines. You'll forget details without documentation. The written log ensures you can track what was promised, what was delivered, and what still needs attention.
Professional assessment becomes necessary at multiple thresholds. Any structural damage—foundation cracks, load-bearing wall issues, roof structure problems, or chimney damage—warrants a structural engineer's evaluation. These professionals can determine whether damage is cosmetic or structural, whether the building is safe to occupy, and what repairs are necessary.
Contractors can assess and repair specific systems, but structural engineers provide the overall evaluation of building safety and required repairs. Their reports carry weight with insurance companies and building departments. Many engineers offer initial consultations at reasonable rates, and this investment often pays for itself by ensuring you identify all damage and understand appropriate repairs.
For significant damage, consider hiring a public adjuster—a licensed professional who represents you in dealing with your insurance company. Public adjusters work for a percentage of your settlement, but they often increase settlement amounts enough to more than cover their fees. They know how to document damage, interpret policies, and negotiate with insurers.
Organize your digital documentation logically. Create folders by room or area, with subfolders for different types of damage. Name files descriptively—"kitchen_north_wall_crack.jpg" is far more useful than "IMG_2847.jpg." Create a master document or spreadsheet listing all damage with references to relevant photos and descriptions.
This organization helps you track what's been documented, claimed, and repaired. When a contractor asks about kitchen damage, you can immediately pull up all relevant photos and descriptions. When your adjuster needs foundation documentation, you have it organized and ready to send.
Pros and Cons of Professional Assessment
Pros:
- Identifies hidden damage that untrained eyes miss
- Provides documentation that insurance companies and building departments accept
- Determines whether your home is safe to occupy
- Creates a repair roadmap prioritizing critical issues
- May reveal damage that increases your insurance settlement
- Protects you from liability if you sell the property later
Cons:
- Costs several hundred to several thousand dollars depending on scope
- May delay your ability to begin repairs while waiting for appointments
- Could reveal problems you'd rather not know about
- Might require repairs you can't afford immediately
- Can complicate insurance claims if findings differ from adjuster assessments
The decision to hire professionals depends on damage severity, your technical knowledge, insurance requirements, and local regulations. For minor cosmetic damage, professional assessment may be unnecessary. For anything affecting structural integrity, utilities, or building safety, professional evaluation is worth the investment.
Taking Action: Your Recovery Roadmap
The days and weeks following an earthquake test your patience and organizational skills as much as the event itself tested your home's structural integrity. Thorough inspection, comprehensive documentation, and knowing when to call professionals transform an overwhelming disaster into a manageable recovery process.
Start by prioritizing safety over everything else. A few broken possessions matter far less than your physical safety and that of your family. If anything about your home feels unsafe, trust that instinct and stay out until professionals clear it.
Create a recovery timeline that addresses immediate safety issues first, then structural repairs, then cosmetic damage. This prioritization ensures you don't waste resources on cosmetic fixes while critical structural problems remain unaddressed. A fresh coat of paint over a cracked wall doesn't fix the underlying structural issue that caused the crack.
Work with your insurance company proactively. Respond to requests promptly, provide thorough documentation, and ask questions when you don't understand something. Insurance policies are contracts with specific requirements and limitations. Understanding your coverage prevents surprises and helps you maximize your recovery.
Consider temporary repairs to prevent further damage while you arrange permanent fixes. Tarping a damaged roof prevents water intrusion. Boarding broken windows keeps weather and intruders out. Shutting off damaged utilities prevents ongoing damage. Document these temporary repairs with photos and receipts—they're often reimbursable under insurance policies.
Your home protected you during the earthquake; now you protect your recovery by approaching assessment systematically, documenting thoroughly, and making informed decisions about when professional expertise is worth the investment. The time you spend on careful inspection and documentation now will save months of complications and thousands of dollars as you rebuild and recover.
Every earthquake teaches lessons about building performance, emergency preparedness, and recovery processes. Apply what you've learned to strengthen your home against future events. Retrofit weak connections, anchor heavy furniture, and update your emergency supplies. The next earthquake will come—preparation determines whether it's a disaster or merely an inconvenience.